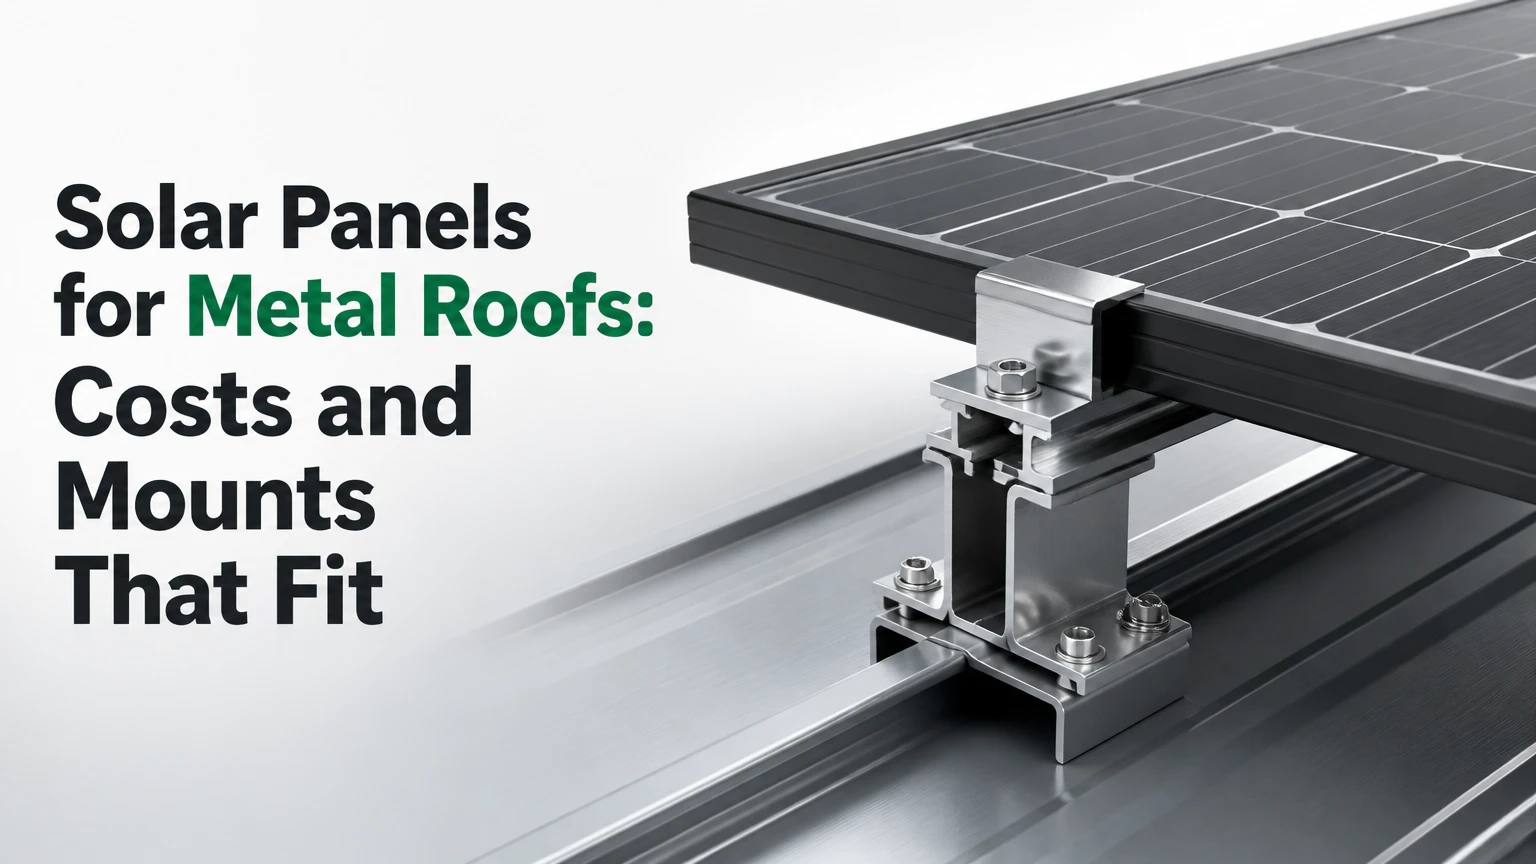
Solar panels for metal roofs are compatible with most residential, commercial, and agricultural metal roofing systems when the installer matches the attachment method to the roof profile and structural substrate. Standing seam roofs often accept non-penetrating clamps, while corrugated and exposed-fastener roofs usually require engineered brackets sealed to the roof and attached to framing.
Key Facts at a Glance
- A standing seam metal roof can often support solar panels without drilling through the roof panels.
- Corrugated and exposed-fastener roofs normally require penetrations into rafters, purlins, or structural decking.
- A typical residential solar installation costs about $2.20-$2.80 per watt before incentives, although local labor, electrical work, and roof repairs can change the total.
- Metal roofing does not automatically make photovoltaic modules more efficient; module temperature, orientation, shade, and ventilation control output.
- Solar modules commonly carry 25-30-year performance warranties, while a properly selected metal roof can last 40-70 years.
- The roof should be inspected before solar installation, because repairing or replacing roofing beneath an array is expensive.
What Solar Panels for Metal Roofs Are
Solar panels for metal roofs are photovoltaic modules installed with racking engineered for a particular metal roofing profile. The solar modules are not attached by generic screws alone. The complete system includes roof attachments, rails or mounting feet, module clamps, electrical conductors, an inverter, grounding or bonding equipment, and connection hardware.
Metal roofing can be a strong solar platform because the roof panels are lightweight, durable, and often supported by predictable framing. Standing seam profiles also provide a continuous structural feature that can accept clamps without puncturing the weather barrier. The roof still requires an engineering review, because panel weight, wind uplift, snow load, attachment spacing, and the condition of the substrate determine whether an installation is appropriate.
The National Renewable Energy Laboratory explains that photovoltaic module performance varies with operating temperature and system design, not simply with the roofing material beneath the modules. That distinction matters. A metal roof can support effective airflow, but it does not create a guaranteed efficiency increase.
How the System Generates Electricity
Photovoltaic cells convert sunlight into direct-current electricity. An inverter then converts that electricity into alternating current for household circuits, batteries, or the utility grid.
The roof attachment transfers wind and gravity loads into seams, purlins, rafters, or decking. Aluminum rails, module clamps, bonding jumpers, and equipment-grounding conductors create the mechanical and electrical framework. A code-compliant design also addresses rapid shutdown, overcurrent protection, roof access, and utility interconnection.
Which Metal Roof Types Work Best?
Standing seam metal roofing is usually the simplest roof type for solar because properly selected clamps can attach to the seams without roof penetrations. Corrugated, R-panel, and exposed-fastener roofs remain viable, but their attachment points must reach structural framing and use compatible seals.
| Roof profile | Typical attachment | Penetrations | Main design concern |
|---|---|---|---|
| Snap-lock standing seam | Seam clamp and rail | 0 | Seam width, fold geometry, clamp load |
| Mechanical-lock standing seam | Tested seam clamp | 0 | Clamp compatibility and wind testing |
| Corrugated metal | Crest bracket or rail foot | 4-16 per panel group | Rafter or purlin alignment |
| R-panel or exposed fastener | Stanchion with gasket | 4-16 per panel group | Washer condition and fastener embedment |
| Metal shingles | Hook, bracket, or replacement shingle mount | Profile-dependent | Shingle interlock and flashing |
| Insulated metal panel | Approved structural attachment | Profile-dependent | Avoiding compression of the panel core |
A roof manufacturer may limit drilling, clamping, or accessory installation under its warranty terms. The installer should document the roof profile, coating, fastener type, substrate, and attachment manufacturer before work begins.
Standing Seam Clamps
Standing seam clamps grip the vertical seam with a set screw or compression mechanism, allowing rails to sit above the roof surface. The best clamp is the one tested for the exact seam profile, material thickness, and design load, not necessarily the product with the highest advertised capacity.
S-5!, SnapNrack, and other manufacturers offer profile-specific hardware, but product compatibility must be verified from current engineering documentation. Clamp spacing depends on module dimensions, rail span, wind zone, snow load, and the roof manufacturer’s limits. Installers should use a calibrated torque tool and follow the attachment manufacturer’s instructions.
Zero penetrations do not mean zero roof risk. An incorrectly positioned clamp can deform a seam, damage a protective coating, or fail to develop the required uplift resistance.
Corrugated and Exposed-Fastener Mounts
Corrugated and exposed-fastener systems use brackets or standoffs fastened through the metal panel into a rafter, purlin, or structural deck. The fastener assembly normally includes an EPDM washer, butyl or compatible sealant, and corrosion-resistant hardware specified for the roof environment.
The critical question is not how many screws a bracket uses. The critical question is whether each screw develops adequate embedment in the supporting structure without crushing the panel or missing the framing. A bracket placed only in thin sheet metal is not equivalent to a bracket connected to a structural purlin.
Roof penetrations should be laid out away from panel laps where possible. The installer should replace failed washers rather than covering visibly damaged seals with extra sealant. Sealant is a secondary water-management measure, not a substitute for a correctly installed gasket and attachment.
Low-Profile and Laminated Options
Flexible or adhesive-backed solar laminates can reduce visual height and roof loading, but they are not automatically the best choice for a metal roof. Many laminates have lower power density, limited serviceability, and more difficult replacement than framed modules.
Adhesive performance depends on surface preparation, temperature, coating condition, roof movement, and the product’s approved substrate. Some products are designed for specific commercial roofs, vehicles, or low-load structures rather than every residential standing seam application.
| Solar format | Typical efficiency range | Weight profile | Serviceability | Best-fit use |
|---|---|---|---|---|
| Framed monocrystalline module | 19%-24% | 2.0-2.5 lb/ft² | High | Most homes and commercial roofs |
| High-efficiency monocrystalline module | 21%-24% | 2.0-2.5 lb/ft² | High | Small roof areas |
| Flexible thin-film laminate | 10%-18% | 0.5-1.5 lb/ft² | Low to moderate | Weight-sensitive structures |
| Building-integrated PV panel | 12%-20% | Product-specific | Moderate | New architectural construction |
Efficiency ranges are typical market ranges, not guarantees for a particular module. Shade, azimuth, tilt, soiling, inverter clipping, and temperature can outweigh a small nameplate-efficiency difference.
Does a Metal Roof Improve Solar Output?
A metal roof can help maintain ventilation beneath elevated modules, but metal roofing alone does not increase solar output. The array’s energy production primarily depends on solar resource, orientation, tilt, shading, module temperature, inverter design, and system losses.
The air gap beneath a framed module allows heat to escape through convection. Installers should follow the racking manufacturer’s required clearance rather than applying a universal four-inch rule. Low-profile laminates may have less rear ventilation and can operate hotter, while framed modules usually provide a more predictable cooling path.
| Design factor | Typical effect on output | What to verify |
|---|---|---|
| Unshaded south-facing roof | High production potential | Annual shade report |
| East-west roof layout | More balanced daily output | Utility load profile |
| Chimney or vent shade | Localized production loss | Hourly shade simulation |
| Hot module operation | Lower voltage and output | Module temperature coefficient |
| Inverter clipping | Lost peak production | DC-to-AC ratio |
| Long cable runs | Electrical loss | Conductor size and voltage drop |
The U.S. Department of Energy states that solar photovoltaic systems can be installed on many roof types, but the roof’s condition and structural capacity must be assessed before installation. A cool roof surface is useful, yet it cannot compensate for poor orientation or persistent shade.
How Is a Metal-Roof Solar Installation Completed?
A typical roof-mounted solar project takes one to two active construction days after engineering, permitting, material delivery, and utility approvals are complete. The full project commonly takes four to eight weeks, although local permitting and interconnection queues can extend that period.
Step 1: Inspect the Roof and Structure
The installer records the roof type, age, panel thickness, seam dimensions, coating condition, fastener condition, framing direction, and signs of corrosion or leakage. Structural review should account for dead load, wind uplift, snow load, seismic conditions where applicable, and the load path into the building.
You will know this step is complete when the proposal identifies the roof profile and attachment product by name. A proposal that says only “metal roof mounting” is incomplete.
A common mistake is accepting a solar design before identifying whether the roof uses structural purlins, nonstructural battens, or thin decking.
Step 2: Model the Array Layout
The designer maps modules around chimneys, vents, valleys, ridges, skylights, service pathways, and electrical equipment. The layout should include fire-access setbacks required by the local authority having jurisdiction and the applicable code edition.
The design should show module count, array voltage, inverter location, conductor routes, attachment spacing, and expected annual production. Shade modeling is especially important where dormers, trees, or neighboring buildings affect winter sun.
Step 3: Select and Position Attachments
Standing seam clamps are placed at engineered positions along the seams. Penetrating brackets are aligned with rafters or purlins, then installed with the specified gasket, sealant, fastener, and torque.
You will know the attachment step worked when every penetration has a documented structural connection and every clamp has been torqued according to the manufacturer’s instructions. Do not use a generic torque value such as 15-20 foot-pounds unless the specific hardware documentation permits it.
Step 4: Install Rails and Modules
Rails are leveled, spliced where permitted, and secured to the attachments. Modules are then fastened with compatible mid-clamps and end-clamps, with cable clips keeping conductors off the roof surface and away from sharp edges.
The common mistake is allowing cables to rest on the metal pan. Wind movement can abrade insulation and create noise, faults, or premature conductor damage.
Step 5: Complete Electrical and Code Work
Electricians install the inverter, disconnects, rapid-shutdown equipment, grounding or bonding conductors, labels, and service-panel connections. The system is tested before the inspection and utility interconnection request.
A complete commissioning record should include insulation resistance where required, polarity, operating voltage, inverter status, rapid-shutdown response, grounding continuity, and monitoring configuration.
How Much Do Solar Panels on a Metal Roof Cost?
A typical residential system on a metal roof costs about $2.20-$2.80 per watt installed before incentives, placing a 10-kilowatt system near $22,000-$28,000 in many U.S. markets. The final price changes with roof access, electrical upgrades, storage, engineering, regional labor, and the attachment method.
Standing seam projects may save labor because installers avoid flashing many individual penetrations, although specialized clamps can add several hundred dollars. Exposed-fastener roofs can require more layout time, sealant work, structural blocking, and future roof-maintenance planning.
| Cost component | Typical residential range | Main price driver |
|---|---|---|
| Solar modules | $0.35-$0.75 per watt | Module efficiency and supply channel |
| Inverter and electrical equipment | $0.25-$0.60 per watt | Microinverter, string, or hybrid design |
| Mounting hardware | $0.15-$0.45 per watt | Seam clamps or penetrating brackets |
| Labor and installation | $0.75-$1.25 per watt | Roof height, complexity, local wages |
| Permitting and engineering | $300-$1,500 | Jurisdiction and structural review |
| Battery storage add-on | $8,000-$18,000 | Capacity, backup loads, installation |
These are planning ranges, not quotations. Federal, state, provincial, utility, and local incentives vary by location and eligibility. A responsible proposal separates equipment, labor, roof work, electrical upgrades, storage, taxes, and incentives instead of presenting one unexplained total.
Should You Replace the Metal Roof Before Solar?
Replace or repair the metal roof before solar when corrosion, leaking fasteners, failed seams, or remaining service life could require roof work during the array’s 25-30-year operating period. A sound roof with decades of remaining service life usually does not need replacement solely because solar panels are being added.
Roof age is a screening factor, not a verdict. A 20-year-old standing seam roof in excellent condition may outlast a poorly maintained 10-year-old exposed-fastener roof.
| Roof condition | Solar decision | Required action |
|---|---|---|
| New roof, no corrosion | Install normally | Confirm warranty and attachment approval |
| 10-20 years, sound seams | Usually install | Obtain written roof inspection |
| Failed washers or active leaks | Repair first | Replace seals and damaged fasteners |
| Widespread coating failure | Evaluate replacement | Price reroofing before array design |
| Severe structural corrosion | Do not install yet | Repair or replace structural roof areas |
| Planned replacement within 5-10 years | Usually delay solar | Coordinate roof and solar contracts |
The expensive sequence is installing solar over a roof that needs replacement soon. Panel removal, storage, reinstallation, and possible new racking can add thousands of dollars and create warranty disputes.
What Are the Main Risks and Failure Modes?
The most common metal-roof solar failures involve incorrect attachment selection, water-management errors, corrosion, thermal movement, and poor cable routing. Most failures are preventable when the installer follows the roof and mounting manufacturers’ engineering requirements instead of adapting generic hardware on site.
Leaks at Penetrating Attachments
Leaks usually trace to failed washers, incorrect fastener placement, damaged coatings, inadequate flashing, or penetrations that do not reach structural support. A sealant bead applied over a loose or misaligned fastener can hide the problem temporarily without restoring the roof assembly.
Galvanic Corrosion
Galvanic corrosion can occur when dissimilar metals contact each other in the presence of moisture. The installer should verify compatibility among roof steel, aluminum rails, stainless fasteners, copper conductors, coatings, and isolation washers, particularly in coastal or industrial environments.
Thermal Movement
Metal roof panels expand and contract as temperature changes. Racking must follow the mounting manufacturer’s provisions for rail splices, attachment spacing, sliding interfaces, and movement across long roof runs. Overconstraining the roof can stress seams, fasteners, or panel coatings.
Wind Uplift and Snow Loading
Solar modules add wind-catching area above the roof. The engineering design must use site-specific wind speed, exposure category, roof zone, building height, module dimensions, and snow load rather than relying on a generic clamp count.
Fire Access and Electrical Errors
Arrays can fail inspection if they block required roof pathways, lack labels, use incorrect rapid-shutdown equipment, or connect to a service panel without capacity analysis. The National Electrical Code requirements vary by edition and jurisdiction, so the local inspector’s adopted rules control.
How Do You Maintain a Solar Array on a Metal Roof?
Inspect the array at least annually and after severe storms, with additional attention to exposed-fastener roofs and coastal locations. Maintenance includes checking roof penetrations, corrosion, cable clips, module clamps, inverter alerts, drainage paths, and visible coating damage.
Homeowners should not walk on modules or loosen racking. A qualified solar or roofing professional can investigate leaks, abnormal production, and attachment movement without damaging the roof.
| Symptom | Likely cause | Appropriate response |
|---|---|---|
| Water below array | Failed gasket or flashing | Isolate the attachment and replace the seal |
| Metallic rattle | Loose hardware or cable | Inspect torque and secure conductors |
| Production drop | Shade, inverter fault, soiling | Compare monitoring data and inspect safely |
| Rust at attachment | Dissimilar-metal contact | Replace incompatible hardware and isolate metals |
| Hot electrical smell | Wiring or inverter fault | Shut down according to instructions and call electrician |
| Module movement | Attachment or rail failure | Keep clear and arrange urgent inspection |
Monitoring data is useful for triage. A sudden sustained drop across one inverter suggests an electrical or equipment issue, while gradual seasonal variation may be normal. Leak investigation should begin at the roof attachment uphill from the interior stain, but water can travel beneath panels before appearing indoors.
Which Setup Fits Your Situation?
Standing seam clamps are usually the best choice for homeowners who want minimal roof disturbance and a serviceable framed-module system. Penetrating mounts are practical for corrugated or exposed-fastener roofs when the roof is sound and the brackets connect to structural framing.
| Situation | Preferred system | Why it fits | Main limitation |
|---|---|---|---|
| New standing seam home roof | Non-penetrating seam clamps | No panel punctures and fast installation | Requires exact seam compatibility |
| Existing R-panel agricultural building | Structural penetrating brackets | Works with purlin layouts | Seal and corrosion maintenance |
| Small roof with limited area | High-efficiency framed modules | More watts per square foot | Higher module cost |
| Low-load accessory structure | Approved lightweight laminate | Lower added weight | Lower serviceability and output density |
| Roof with near-term replacement | Delay or reroof first | Avoids array removal | Solar project starts later |
| Shaded or unsuitable roof | Ground mount or carport | Better orientation and access | Requires land, foundations, or permits |
A ground mount can outperform a roof array when the roof faces away from the sun, has persistent shade, or cannot meet structural requirements. Solar carports can provide covered parking, but their steel, foundations, drainage, and permitting often cost more than roof mounting.
The strongest practitioner rule is simple: choose the roof attachment before choosing the panel brand. A high-efficiency module cannot correct an unsuitable attachment, failed roof substrate, or poor array orientation.
Frequently Asked Questions
Can solar panels damage a standing seam metal roof?
Properly engineered clamps should not damage a standing seam roof because they grip the seam rather than puncture the panel. Damage can still occur through excessive torque, incorrect clamp geometry, coating abrasion, or unsupported rail loads. Confirm clamp approval for the exact seam profile and obtain written warranty guidance before installation.
Are solar panels more difficult to install on metal roofs?
Metal roofs are not inherently more difficult for solar, but each profile requires specialized attachment hardware. Standing seam roofs can be faster than shingle roofs because installers avoid numerous penetrations, while corrugated roofs require careful purlin alignment, sealing, and corrosion control.
Can I install solar panels over an insulated metal roof?
Solar panels can be installed over some insulated metal panels, but the attachment must be approved for the panel assembly and structural support. Compressing the insulation or fastening only to the thin outer skin can reduce capacity and damage the weather barrier. The roof manufacturer’s engineering guidance should control.
Do metal roofs need special grounding for solar panels?
Solar arrays require equipment grounding and bonding regardless of roof material. Metal roofing can become part of the bonding path only when the racking and electrical design explicitly permit it. Installers should use listed bonding hardware and follow the adopted electrical code rather than assuming metal-to-metal contact is sufficient.
Can I add a battery to a metal-roof solar system later?
A battery can often be added later, but the original inverter, service equipment, backup-load panel, and wiring layout may limit the options. A hybrid inverter or battery-ready architecture can reduce future replacement work, although it may increase the initial equipment cost.
How long do solar panels last on a metal roof?
Solar modules commonly have 25-30-year performance warranties, while inverters, batteries, seals, and monitoring equipment may need replacement sooner. A well-maintained metal roof can last longer than the array, but exposed-fastener washers and roof coatings may require service before the modules reach the end of their rated life.
The Bottom Line
Solar panels for metal roofs are a practical long-term investment when the roof profile, structural framing, attachment hardware, electrical design, and remaining roof life are evaluated together. Use non-penetrating clamps for compatible standing seam roofs, engineered penetrating brackets for sound corrugated roofs, and a roof replacement plan when leaks or aging materials could interrupt the array.