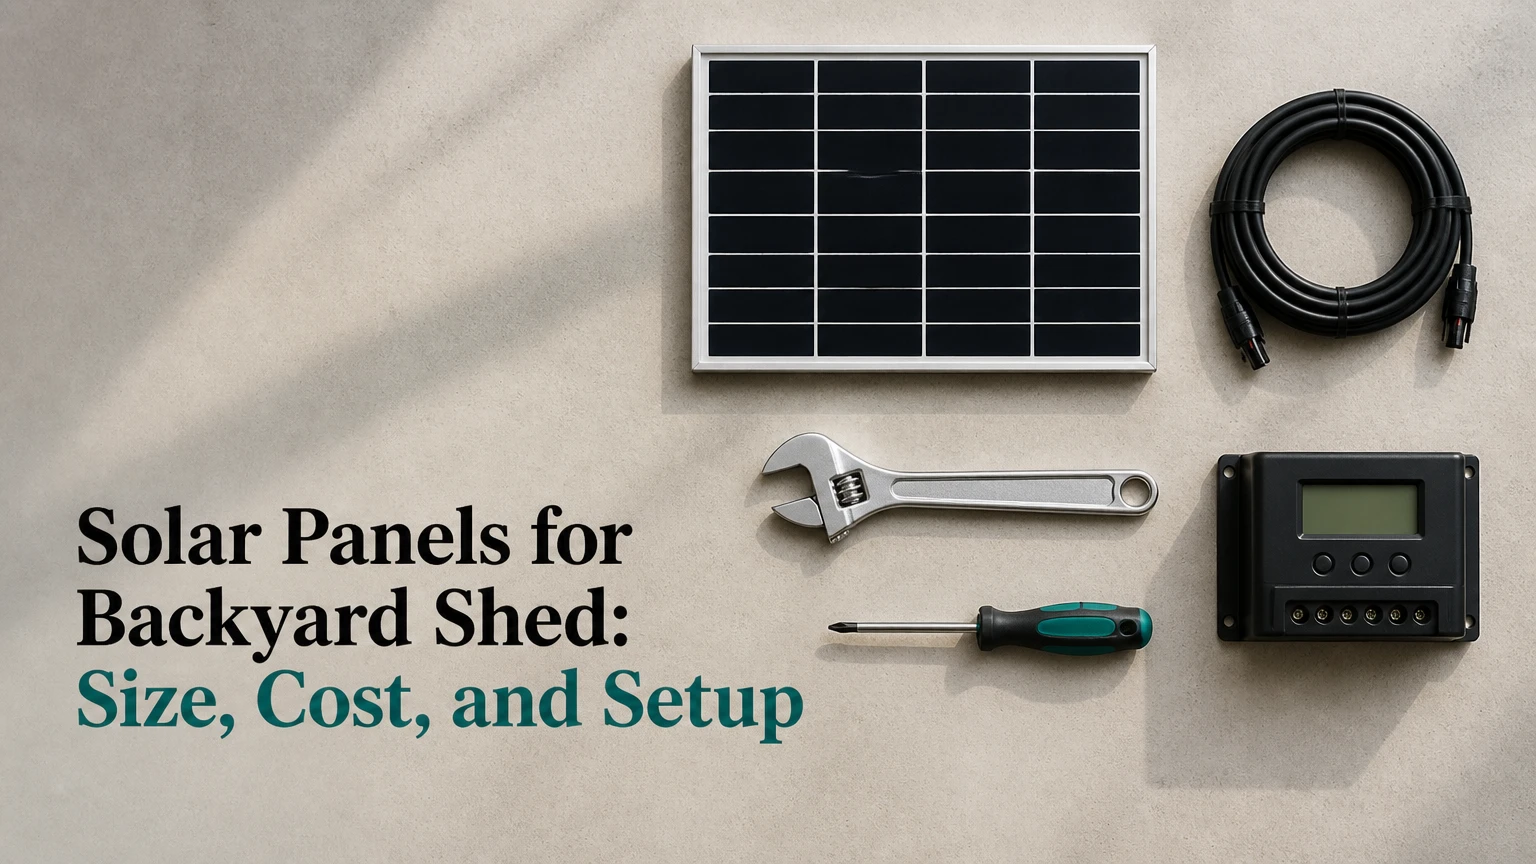
Solar panels for a backyard shed can provide independent electricity for lights, device charging, security equipment, and selected tools without trenching a utility cable. A practical system normally combines photovoltaic panels, a charge controller, a battery, an inverter, fuses, and weather-rated wiring, with the required size determined by daily watt-hours, motor startup surge, available sunlight, and winter conditions.
Key Facts at a Glance
- A 100W panel commonly produces about 250-500Wh per day in useful sun, depending on location, season, shade, and system losses.
- A 400W-600W array suits lights, electronics, battery charging, and intermittent workshop tools, but not continuous electric heating.
- LiFePO4 batteries provide more usable capacity and longer cycle life than AGM batteries, but most cannot charge below 32°F without a low-temperature protection system.
- A pure sine wave inverter is the appropriate choice for computers, chargers, refrigerators, fans, and tools with motors.
- Roof mounting is suitable only when rafters, waterproofing, wind exposure, and snow loads are acceptable.
- A small off-grid shed system typically costs $250-$1,500 for equipment, while office-capable systems often exceed $2,500.
What Are Solar Panels for a Backyard Shed?
Solar panels for a backyard shed are a small photovoltaic power system designed to generate and store electricity at a detached structure. Most installations are off-grid, meaning the shed has no utility connection, although a grid-tied extension or solar-plus-portable-power arrangement may be better when the shed needs continuous high-power appliances.
A panel produces direct current, or DC, when sunlight energizes semiconductor cells. The charge controller regulates that electricity for the battery, while the inverter changes battery DC into household alternating current, or AC, for standard outlets.
The shed location changes the design. A storage shed that needs two LED lights may use 100W of panels and a 12V battery. A workshop with a saw, compressor, and shop vacuum needs a larger array, a higher-voltage battery bank, and an inverter with adequate surge capacity.
The U.S. Department of Energy summarizes the resource clearly: “The amount of sunlight that strikes the earth’s surface in 90 minutes could power the world’s total energy usage for a full year.” That statement describes resource abundance, not guaranteed shed output. A shaded roof, snow cover, short winter days, and conversion losses can reduce practical generation substantially.
How Does a Shed Solar System Work?
A shed solar system moves energy through four main stages: panels generate DC electricity, a controller manages charging, a battery stores energy, and an inverter supplies AC power. The battery allows evening use and absorbs short-term differences between solar production and appliance demand.
The basic sequence is:
- Solar cells generate variable DC voltage.
- PV wiring carries current to a charge controller.
- The controller protects and charges the battery.
- The battery supplies DC loads or an inverter.
- The inverter creates AC for compatible outlets and appliances.
A maximum power point tracking controller generally extracts more energy than a basic PWM controller when panel voltage exceeds battery voltage, especially in cold weather or with longer cable runs. An inverter also consumes some energy, so a 100W appliance may draw approximately 110W-125W from the battery after conversion losses.
Keep the battery and inverter in a dry, ventilated, protected location. Do not place batteries where roof leaks, standing water, direct sun, or unrestrained tools can damage them.
What is the correct component order?
The practical power path is:
Solar panels → PV disconnect or fuse where required → charge controller → battery with fuse → inverter → AC outlets or lights
Connect the battery to the charge controller before connecting PV input when the controller manufacturer requires battery detection. Some modern controllers permit a different sequence, so the product manual controls the procedure.
Which System Size Fits Your Shed?
The correct shed solar system size depends on daily energy use rather than panel wattage alone. Calculate each load in watt-hours by multiplying its running watts by daily operating hours, then add approximately 20-30% for inverter, wiring, temperature, and battery losses.
| Shed use case | Typical daily load | Panel array | Battery recommendation | Inverter |
|---|---|---|---|---|
| Two LED lights and phone charging | 80-180Wh | 100W-200W | 12V 50Ah LiFePO4 | 300W pure sine |
| Lights, router, and tool chargers | 250-500Wh | 200W-400W | 12V 100Ah LiFePO4 | 600W-1,000W pure sine |
| Small workshop and computer | 600-1,200Wh | 400W-800W | 24V 100Ah LiFePO4 | 1,500W-2,000W pure sine |
| Refrigerator and intermittent tools | 1,000-2,000Wh | 800W-1,200W | 24V 200Ah or 48V 100Ah LiFePO4 | 2,000W-3,000W pure sine |
| Full-time office with cooling | 3,000Wh-plus | 1,200W-2,400W | 48V 100Ah-200Ah LiFePO4 | 3,000W-5,000W hybrid |
A 100W panel does not deliver 100W throughout the day. A typical 100W module may produce 250-500Wh on a clear day, but output can fall below 150Wh during short, cloudy winter days. Use local solar data from the National Renewable Energy Laboratory’s PVWatts calculator or an equivalent regional tool before final sizing.
What can a small system power?
A 100W-200W system can reliably power LED lighting, USB charging, a small DC fan, a security camera, and occasional cordless-tool charging when the battery has enough reserve. It is poorly suited to kettles, electric heaters, hair dryers, welders, large compressors, and continuous refrigeration.
| Appliance or tool | Running power | Typical startup or peak | Suitability |
|---|---|---|---|
| 8W LED lamp | 8W | 8W | Excellent for 100W systems |
| Wi-Fi router | 8W-15W | 15W | Suitable for 24-hour use with storage |
| Cordless tool charger | 50W-150W | 150W | Suitable with 200W-plus array |
| Small refrigerator | 60W-150W | 500W-1,200W | Requires surge-capable inverter |
| Miter saw | 1,200W-1,800W | 2,400W-4,000W | Requires 2,000W-plus inverter |
| Electric heater | 1,000W-1,500W | 1,500W | Poor off-grid choice |
How Should You Size a Workshop System?
A workshop system should be sized around the highest simultaneous load and the largest motor startup surge, not the average tool label. A 1,500W saw and 1,000W vacuum can require a 3,000W-plus inverter even when neither tool runs continuously.
For example, a 1,500W saw used for 20 minutes consumes about 500Wh before inverter losses. A 100W light used for five hours consumes 500Wh as well. The saw needs a larger inverter, but the light consumes comparable daily energy.
Use a 24V system above roughly 1,000W of inverter capacity to reduce battery current. A 2,000W load draws about 167A from a 12V battery before losses, compared with approximately 83A at 24V and 42A at 48V. Lower current reduces cable size, voltage drop, and connection heating.
Which Panel Type Should You Buy?
Monocrystalline panels are usually the best choice for a backyard shed because they produce more power in a limited roof area. Polycrystalline panels can reduce purchase cost, but their lower power density matters when the shed roof cannot fit enough modules.
| Panel characteristic | Monocrystalline | Polycrystalline | Practical shed effect |
|---|---|---|---|
| Typical module efficiency | 20%-23% | 15%-17% | Mono needs less roof area |
| Common residential module rating | 350W-450W | 250W-350W | Mono simplifies higher output |
| Typical panel footprint | 17-22 square feet | 17-22 square feet | Wattage differs more than area |
| Low-light performance | Generally stronger | Generally weaker | Mono helps during overcast periods |
| Best use | Small or shaded roof | Large unshaded roof | Choose by area and price per watt |
Panel technology cannot overcome shade. A chimney, tree, or neighboring building that shades one module can reduce output from a series string, depending on the panel’s bypass-diode design and controller arrangement.
Which Battery Is Best for a Backyard Shed?
LiFePO4 is usually the best battery chemistry for a frequently used shed because it offers more usable capacity, lower weight, and longer cycle life than AGM or gel lead-acid. AGM remains useful for low-cost, occasional-use systems and performs better than unprotected lithium in freezing conditions.
A nominal 12V 100Ah battery stores about 1,280Wh when rated at 12.8V. A LiFePO4 battery may provide approximately 1,000Wh of practical usable energy, while an AGM battery is commonly limited to roughly 640Wh if discharge is restricted to 50% for longer life.
| Battery type | Usable discharge target | Cycle-life range | Cold-weather limitation | Typical 12V 100Ah price |
|---|---|---|---|---|
| Flooded lead-acid | 50% | 300-700 cycles | Ventilation and maintenance | $120-$220 |
| AGM lead-acid | 50% | 500-1,000 cycles | Reduced capacity below freezing | $150-$300 |
| Gel lead-acid | 50% | 500-1,200 cycles | Charging limits below freezing | $180-$350 |
| LiFePO4 | 80%-90% | 2,000-5,000 cycles | Do not charge below 32°F without protection | $250-$500 |
Do not charge a standard LiFePO4 battery below freezing. Select a battery with a low-temperature cutoff and heater, place it in an insulated enclosure, or use a temperature-controlled battery compartment. Insulation alone delays freezing; it does not create heat.
How Much Does a Shed Solar System Cost?
A basic shed solar system costs approximately $250-$500, a workshop system costs $800-$1,800, and an office-capable system commonly costs $2,500-$6,000 before unusual trenching, structural reinforcement, or professional electrical work. Regional labor, permits, battery chemistry, and roof complexity create the largest price differences.
| System tier | Main equipment | Equipment cost | DIY time | Typical application |
|---|---|---|---|---|
| Basic lighting | 100W-200W panel, controller, battery, 300W inverter | $250-$500 | 3-6 hours | Lights and charging |
| Small electronics | 200W-400W array, MPPT, 100Ah lithium, 600W inverter | $500-$900 | 5-8 hours | Router and tool chargers |
| Workshop | 400W-800W array, 24V battery, 2,000W inverter | $900-$1,800 | 1-2 days | Intermittent tools |
| Office | 800W-1,200W array, 48V battery, 3,000W inverter | $2,000-$4,000 | 1-3 days | Computer and refrigerator |
| Office with cooling | 1,200W-2,400W array, hybrid inverter, 48V storage | $3,500-$6,000-plus | 2-4 days | Daily occupancy and cooling |
Professional electrical work may add $500-$2,000 or more. Local rules can require permits, listed equipment, disconnects, grounding, or inspection, particularly when the system has AC receptacles, a permanent structure, or a connection to the home electrical system.
How Should Panels Be Mounted?
Mount panels on structurally supported rafters or use a ground mount when the shed roof is thin, damaged, shaded, or difficult to waterproof. A roof-mounted array should have flashed penetrations, stainless or corrosion-resistant hardware, and a cable entry gland designed for outdoor PV wire.
Before drilling, inspect:
- Rafter spacing and timber condition
- Roof covering and remaining service life
- Local wind and snow loads
- Panel weight and racking weight
- Roof orientation and shade from trees
- Safe access for maintenance
A typical rigid panel weighs 35-55 pounds. Wet snow can add far more load than the panels themselves, so a lightweight plastic shed roof may require a freestanding rack rather than reinforcement. Flexible panels weigh less, but they often have shorter service lives, poorer ventilation, and more difficult replacement.
In the Northern Hemisphere, a south-facing orientation usually maximizes annual production. Southeast or southwest orientations can work well, while a shallow east-west roof may produce less peak energy but spread generation across more hours.
How Do You Install a Backyard Shed Solar System?
A small shed system usually takes 4-8 hours for a prepared DIY installation, excluding roof repairs and permitting. The most important success factor is a correct load calculation that includes winter sunlight, battery reserve, cable losses, and motor startup.
Step 1: Audit Every Electrical Load
Write down each appliance, its running watts, expected daily hours, and startup watts if it contains a motor. Multiply running watts by hours, add the results, and increase the total by 20-30%.
Checkpoint: Your load worksheet contains daily watt-hours and maximum simultaneous watts.
Common mistake: Using an appliance’s running wattage as the inverter’s only sizing value.
Step 2: Confirm the Site and Roof
Measure usable roof dimensions, locate rafters, inspect fasteners, and record shade at morning, midday, and afternoon. Check winter shading because a tree that misses the roof in July may shade it in December.
Checkpoint: The proposed array fits without blocking roof drainage or creating unsafe maintenance access.
Common mistake: Buying panels before measuring the actual usable roof area.
Step 3: Select Voltage, Battery, and Controller
Use 12V for small lighting systems, 24V for many 1,000W-2,000W workshop systems, and 48V for larger office or machinery systems. Choose an MPPT controller when the array is larger, the cable run is long, or panel voltage differs significantly from battery voltage.
Checkpoint: Controller PV voltage and current ratings exceed the array’s cold-weather voltage and maximum current.
Common mistake: Sizing the controller from average output instead of the array’s maximum electrical specifications.
Step 4: Install Racking and Panels
Fasten rails into structural members, maintain the manufacturer’s clamp zones, and use flashing or approved roof-sealing hardware at every penetration. Keep panels clear of roof edges where wind uplift is highest.
Checkpoint: Panels cannot shift by hand, and every penetration sheds water during a hose test.
Common mistake: Relying on roofing sealant alone without mechanical flashing.
Step 5: Install Protection and Battery Equipment
Place the charge controller close to the battery, keep the inverter near the battery, and install a correctly rated fuse or breaker in the positive battery conductor. Use a battery enclosure that protects terminals from accidental short circuits.
Checkpoint: The positive conductor is fused close to the battery, and cables are secured against abrasion.
Common mistake: Running long, thin battery cables that create voltage drop and heat.
Step 6: Connect the Battery, Controller, and Array
Follow the controller manual for connection order, verify polarity with a multimeter, and use outdoor-rated PV cable with compatible connectors. Install a PV disconnect where required by the equipment instructions or local electrical rules.
Checkpoint: The controller recognizes battery voltage and reports a plausible charging voltage in sunlight.
Common mistake: Connecting mismatched connector brands or forcing partially engaged connectors.
Step 7: Connect and Test the Inverter
Connect the inverter directly to the battery through its specified fuse and cable size. Test a small load first, then test the highest startup load while watching for low-voltage, over-current, or thermal alarms.
Checkpoint: The inverter runs the intended load without abnormal heating, buzzing, or voltage collapse.
Common mistake: Testing a large saw or compressor before confirming battery state and cable connections.
What Are the Alternatives to Roof-Mounted Solar?
A ground-mounted array, a utility extension, and a portable power station are the main alternatives to roof-mounted solar. Ground mounting improves access and angle adjustment, utility power supports unlimited continuous loads, and portable stations reduce wiring work but often cost more per stored watt-hour.
| Alternative | Initial cost | Installation effort | Best capacity range | Main limitation |
|---|---|---|---|---|
| Ground-mounted PV | $500-$2,500 | Medium | 200W-2,400W | Needs clear land and security |
| Utility cable to shed | $1,000-$5,000-plus | High | Unlimited by service size | Trenching and permits |
| Portable power station | $300-$3,000 | Low | 300Wh-3,000Wh | Battery replacement and recharge limits |
| Extension cord | $50-$300 | Low | Light intermittent loads | Voltage drop and weather exposure |
An extension cord is not a permanent substitute for a properly designed feeder. Outdoor cords require weather protection, suitable ampacity, ground-fault protection, and a route that avoids vehicles, water, and cutting tools.
Can Solar Run a Shed Office?
Solar can run a shed office when the daily energy budget includes the computer, monitor, router, lighting, ventilation, and seasonal heating or cooling. A computer-only office may work with 400W-800W of panels and 1,000-2,000Wh of battery storage, while electric heating or air conditioning can multiply the required array.
| Office load | Typical power | Daily use example | Daily energy |
|---|---|---|---|
| Laptop | 45W-90W | 8 hours | 360-720Wh |
| Monitor | 25W-60W | 8 hours | 200-480Wh |
| Router | 10W | 12 hours | 120Wh |
| LED lighting | 10W-30W | 6 hours | 60-180Wh |
| Mini refrigerator | 60W-150W running | Variable | 500-1,000Wh |
| Portable electric heater | 1,000W-1,500W | 4 hours | 4,000-6,000Wh |
A heat pump or high-efficiency mini-split may be more practical than resistance heating, but its compressor still requires startup capacity and substantial winter energy. For daily office use, a grid connection often becomes more economical once heating, cooling, and reliable overnight operation enter the design.
What Safety Problems Matter Most?
The main shed solar hazards are battery short circuits, overloaded conductors, poor roof waterproofing, inadequate ventilation, and unsupported panels. Follow equipment instructions, use overcurrent protection, keep combustible materials away from hot electrical equipment, and obtain local approval when required.
Practical safety rules include:
- Cover or disconnect panels before working on live PV conductors.
- Use cable sized for continuous current, length, insulation rating, and installation temperature.
- Fuse battery conductors close to the battery.
- Do not install lead-acid batteries in an unventilated sleeping or occupied area.
- Do not place an inverter directly above a battery.
- Provide clearance around inverter heat sinks and ventilation openings.
- Bond and ground equipment according to the applicable electrical code.
- Use listed outdoor connectors and never leave loose PV terminals exposed.
A shed battery should not share space with gasoline, solvents, sawdust piles, or damp soil. Lithium batteries have lower routine maintenance than lead-acid batteries, but a damaged lithium battery can still create a serious fire event.
How Do You Troubleshoot a Shed System?
Troubleshoot from the energy source toward the load: inspect sunlight and connections, measure battery voltage, verify controller status, then test the inverter and appliance separately. This sequence prevents replacing an inverter when the actual fault is a depleted battery or disconnected panel.
| Symptom | Likely cause | Diagnostic check | Corrective action |
|---|---|---|---|
| No charging in sunlight | Fuse, shade, polarity, loose connector | Measure PV voltage and battery voltage | Restore connection or replace fuse |
| Inverter shuts down at startup | Surge exceeds inverter rating | Compare tool surge with inverter peak watts | Use a larger inverter or smaller load |
| Battery empties overnight | Excess load or degraded battery | Record watt-hours and resting voltage | Reduce load or replace battery |
| Controller shows high voltage | Battery disconnected or wrong setting | Inspect battery terminals and profile | Reconnect and select chemistry |
| Battery will not charge in winter | Low-temperature cutoff | Check battery temperature and BMS status | Warm battery before charging |
| AC outlet has no power | Inverter mode or breaker fault | Check inverter display and AC breaker | Reset only after finding the cause |
A battery that falls sharply in voltage under a modest load may have high internal resistance or a loose connection. Disconnect power before tightening terminals, and do not bypass a fuse, breaker, or battery management system.
Which Setup Should You Choose?
The best configuration depends on whether the shed is used for occasional lighting, daily workshop work, or full-time occupancy. The following recommendations give a starting point rather than a substitute for a load calculation.
- Storage shed: 100W-200W of panels, 12V 50Ah-100Ah LiFePO4, and a 300W-600W pure sine inverter.
- Weekend workshop: 400W-800W of panels, 24V 100Ah LiFePO4, and a 2,000W inverter with documented surge output.
- Remote office: 800W-1,200W of panels, 48V 100Ah storage, and a 3,000W hybrid inverter.
- Tool-heavy workshop: 800W-1,500W of panels, 24V or 48V storage, and a 3,000W-5,000W inverter selected around motor starting current.
- Cold climate shed: insulated battery compartment, low-temperature lithium protection, or AGM storage if winter charging cannot be controlled.
The practitioner rule is simple: size panels for energy, batteries for operating time, and the inverter for simultaneous running loads plus startup surge. Increasing only one component creates an imbalanced system.
FAQ
Can I put solar panels on a plastic shed?
Plastic shed roofs are often unsuitable for direct panel mounting because they may not support concentrated rafter loads, wind uplift, or snow weight. Use a ground rack or an independent timber frame unless the shed manufacturer provides a tested mounting method and the roof has adequate structural reinforcement.
Do I need a battery for shed solar?
A battery is required for reliable power after sunset, during shade, and when appliance demand exceeds panel output. A direct solar panel can run a compatible daytime DC load, but it cannot provide stable electricity for ordinary AC outlets without regulation, storage, and an inverter.
Will a 200W solar panel run power tools?
A 200W panel cannot directly run most power tools because saws and compressors commonly require 1,000W-2,000W while operating and more during startup. A battery and surge-capable inverter can run short tool cycles, but the array must later replace the energy consumed.
Can I connect shed solar to my house?
A shed system can connect to the house only through equipment and wiring approved for that configuration. Never backfeed a house outlet with an inverter. A permanent feeder requires correct conductors, disconnects, grounding, overcurrent protection, and compliance with local electrical requirements.
How long will a shed solar battery last?
An AGM battery commonly lasts three to seven years in moderate use, while a properly managed LiFePO4 battery can last eight to fifteen years or several thousand cycles. High temperature, deep discharge, overcharging, freezing, and poor storage conditions shorten either battery’s service life.
Is a portable power station better than a custom solar system?
A portable power station is better for quick setup, occasional use, and renters. A custom system is usually better for fixed lighting, expandable panel capacity, repairability, and long-term daily use. Compare usable watt-hours, inverter surge rating, recharge speed, cold-weather behavior, and replacement cost rather than purchase price alone.
Conclusion
Solar panels for a backyard shed work well for lighting, charging, security devices, electronics, and carefully selected workshop loads. Start with a watt-hour audit, inspect the roof and shade, choose panel capacity for seasonal energy production, select battery storage for overnight use, and size the pure sine inverter for startup surge. For a typical storage shed, 100W-200W is a sensible beginning; daily workshops and offices usually need 400W-1,200W or more.