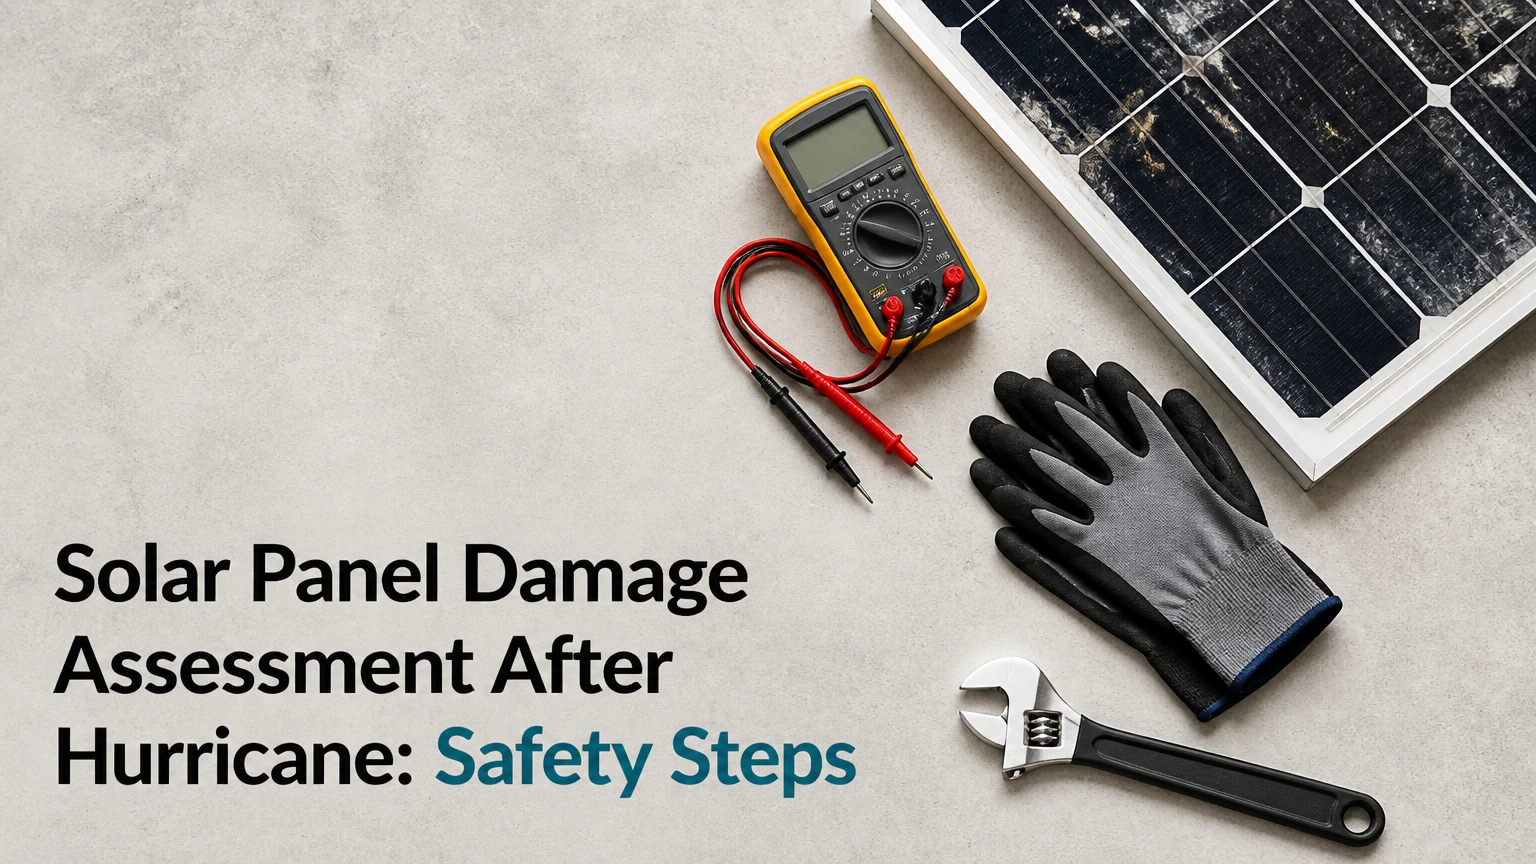
A solar panel damage assessment after hurricane conditions is a documented inspection of photovoltaic modules, racking, roof attachments, wiring, inverters, batteries, and electrical protection equipment. The process begins with hazard isolation, then checks structural damage, water intrusion, electrical faults, and production loss before a qualified professional authorizes repair or re-energization.
Key Facts
A PV array can produce DC voltage in daylight even when utility power is disconnected.
A cracked module, displaced clamp, cut conductor, or flooded inverter can create a shock, arc, or fire hazard.
Homeowners should photograph damage from ground level and avoid climbing, touching, or switching damaged equipment.
A typical residential inspection costs $350-$900 and takes 2-5 hours, excluding repairs and engineering design.
Infrared imaging identifies abnormal heat patterns under suitable load and weather conditions; it cannot prove that every micro-crack is present or dangerous.
Insurance-quality reports combine photographs, equipment identifiers, test results, site diagrams, storm timing, and repair estimates.
Solar Panel Damage Assessment After Hurricane: Scope and Safety
A post-hurricane assessment covers four connected failure domains: structure, module condition, electrical integrity, and thermal performance. Hurricane winds can uplift modules, twist frames, loosen clamps, deform rails, peel roof membranes, and stress cable connectors, while debris and rain can break glass, abrade insulation, and flood power electronics.
The assessment is not the same as a casual visual check. A visual sweep can find shattered glass or missing hardware, but it cannot establish insulation resistance, connector integrity, bypass-diode condition, or cell-level current concentration. A qualified solar electrician or electrical engineer chooses tests according to system voltage, equipment instructions, local rules, and observed hazards.
OSHA states, “Deenergized parts that have not been locked out and tagged in accordance with this section shall be treated as energized parts.” That rule is especially important for PV systems because daylight can energize modules independently of the utility grid.
What damage does a hurricane commonly cause?
| Component | Typical storm damage | Primary hazard | Verification method |
|---|---|---|---|
| Module glass | Cracks, impact holes, shattered sections | Shock, moisture entry | Close visual inspection, insulation test |
| Aluminum frame | Twisting, separation, corner deformation | Cell stress, mounting failure | Straightedge, photographs, manufacturer limits |
| Clamps and rails | Missing clamps, uplift, rail bowing | Module detachment | Fastener and torque inspection |
| DC wiring | Cuts, pinching, UV-exposed conductor | Arc fault, ground fault | Continuity and insulation testing |
| Inverter | Flooding, impact, blocked ventilation | Fire, electric shock | Manufacturer inspection, error history |
| Battery cabinet | Water entry, impact, displaced enclosure | Thermal event, toxic smoke | Visual inspection by trained battery technician |
Wind does not need to remove a panel to damage the array. A module may remain in place while its frame, connector, or cells absorb enough mechanical stress to produce delayed output loss. Saltwater exposure adds corrosion risk to coastal systems, particularly at connectors, grounding points, and dissimilar-metal interfaces.
What must happen before anyone inspects the array?
Before physical inspection, isolate the property hazards and keep people away from the array, inverter, battery, and damaged roof. The utility disconnect, PV system shutdown controls, battery disconnect, and inverter screen do not by themselves prove that every DC conductor is de-energized.
A homeowner should stay on the ground, avoid wet equipment, and contact the installer, utility, fire department, or emergency contractor when wires are down, equipment is smoking, a battery is hot or swollen, or floodwater reached electrical components. Emergency responders may establish a perimeter before a solar technician arrives.
Pre-inspection safety sequence
- Control the site. Keep children, occupants, and contractors away from damaged modules, hanging conductors, exposed terminals, and unstable roof sections.
- Notify the utility when conductors or service equipment are damaged. A utility crew may need to secure the service before solar work begins.
- Use the manufacturer shutdown procedure. Qualified personnel should open AC, battery, and DC isolation devices in the sequence specified for that system.
- Apply lockout-tagout. The worker must identify all energy sources, lock or tag disconnects, and verify absence of hazardous voltage with properly rated equipment.
- Treat daylight modules as energized. Covering modules is not a dependable substitute for electrical isolation, particularly when wind or water makes coverings unstable.
- Check for secondary hazards. Inspect roof stability, standing water, fire damage, fallen trees, exposed nails, and damaged communications or gas lines.
The first objective is life safety, not production recovery. Turning the inverter back on to see whether it works can energize a damaged conductor and destroy evidence needed for a claim.
How is structural and visual damage documented?
Structural documentation starts with wide photographs that establish the array’s position, followed by close images of each defect with a scale reference. The inspector records module rows, rail lines, clamp locations, roof penetrations, conduit routes, grounding conductors, inverter enclosures, and battery equipment.
Visual and structural checklist
| Inspection location | Record | Typical defect threshold or clue | Follow-up action |
|---|---|---|---|
| Module surface | Crack length, impact point, glass fragments | Any through-crack or shattered area | Isolate module and replace |
| Module frame | Corner gap, twist, laminate separation | Frame no longer square | Manufacturer review or replacement |
| Mid and end clamps | Count, position, fastener condition | Missing or shifted clamp | Secure only under approved procedure |
| Rails and attachments | Bow, uplift, loose flashing | Rail movement or roof-interface damage | Structural contractor review |
| DC connectors | Connector pair, seal, burn mark | Mismatched, wet, or loose connector | Replace matching connector set |
| Conduit and cable | Support spacing, abrasion, water path | Pinched or hanging cable | De-energized conductor repair |
| Inverter and battery | Waterline, impact, corrosion, alarms | Any floodwater entry | Do not energize; manufacturer review |
The inspector should label images with date, time, array section, module serial number when available, and direction of view. A site sketch or digital map links each photograph to a physical location, which prevents an insurer from receiving an unverified collection of close-ups.
Which findings require immediate isolation?
Immediate isolation is warranted for exposed copper, burned connectors, cracked backsheets, loose or hanging modules, submerged equipment, arcing marks, melted insulation, battery swelling, smoke, and any roof section that cannot safely support a worker. A missing cosmetic trim piece does not carry the same urgency, but it still belongs in the report because it may indicate wind movement.
A practical rule is to classify each finding as unsafe to energize, structurally unsafe, operable with monitoring, or cosmetic. The classification should come from the qualified inspector, not from a homeowner’s interpretation of photographs.
Which electrical tests reveal hidden faults?
Electrical testing identifies defects that visual inspection cannot confirm, including conductor insulation breakdown, connector resistance, string imbalance, bypass-diode problems, and inverter isolation faults. Qualified personnel isolate strings and follow the inverter and module manufacturer’s test limits before applying any meter or insulation tester.
| Test | What it measures | Useful storm finding | Important limitation |
|---|---|---|---|
| Open-circuit voltage, Voc | String voltage without load | Missing module, open connector, polarity error | Does not prove insulation safety |
| Short-circuit current, Isc | Current under controlled short test | Severe mismatch or open circuit | Requires rated equipment and safe procedure |
| Insulation resistance | Leakage from conductors to ground | Wet or abraded cable, ground fault | Test voltage must suit connected equipment |
| I-V curve tracing | Current and voltage across operating range | Shading, mismatch, diode or cell defects | Irradiance and temperature affect results |
| Continuity and polarity | Conductor path and orientation | Reversed or broken connection | Continuity alone cannot detect all insulation faults |
| Thermal imaging | Surface temperature differences | Hot connector, diode, cell region | Needs adequate irradiance, load, and image interpretation |
The AI Overview’s reference to a 1,000-volt DC insulation test is not a universal instruction. A 1,000 V test can damage connected electronics or exceed manufacturer limits on some residential equipment. The technician must isolate sensitive devices and use the test voltage required by applicable standards and product instructions.
Thermal imaging also needs precision. A drone scan does not directly “see” every internal micro-crack. It detects heat emitted at the module surface, and a crack becomes visible only when electrical loading, irradiance, cell isolation, angle, temperature, and resolution create a measurable temperature difference.
What conditions produce a useful infrared scan?
| Variable | Typical useful condition | Why it matters | Poor-condition consequence |
|---|---|---|---|
| Irradiance | About 600 W/m² or higher for many surveys | Produces stronger electrical heating | Weak anomalies or missed defects |
| Wind | Below approximately 20-25 mph | Reduces convective cooling variation | False temperature contrast |
| Module load | Operating string or controlled test load | Creates current through defective areas | No thermal signature at idle |
| Camera resolution | Radiometric thermal images | Supports temperature comparison | Visual-only images lack measurements |
| Viewing angle | Near perpendicular to module plane | Reduces reflected sky effects | False hot or cold regions |
| Timing | Stable sun, often late morning to afternoon | Limits transient heating | Inconsistent row comparison |
Infrared results should be compared with electrical data and module position. A hot connector may indicate resistance at the connector rather than a cracked cell, while a uniformly hot row may reflect shading, inverter behavior, or normal thermal differences.
Step 1: Build the storm record and equipment inventory
Create the evidence file before repair crews remove damaged parts. Record the storm name or date, wind and flood observations, system owner, address, installer, equipment serial numbers, system capacity, and production data from the monitoring portal.
Download pre-storm and post-storm energy graphs when the monitoring platform allows it. Utility bills, commissioning records, permitting documents, roof photographs, and prior maintenance reports establish the system’s condition before the event.
Success checkpoint: Every inverter, battery, module group, and roof section has an identifier that matches a photograph or map location.
Common mistake: Waiting until replacement begins to photograph serial numbers, broken clamps, and waterlines.
Step 2: Perform the ground-level visual sweep
Walk the property without entering an unsafe roof area. Photograph detached modules, broken glass, displaced rails, fallen trees, torn conduit, exposed wiring, inverter alarms, battery damage, and water intrusion from multiple distances.
Do not touch a module, connector, cable, or metal rail to determine whether it is loose. A loose component can conceal live conductors, sharp glass, or unstable roof attachments.
Success checkpoint: The report separates module damage, racking damage, roof damage, electrical damage, and unrelated pre-existing defects.
Common mistake: Photographing only the most dramatic broken panel and omitting intact-looking rows with displaced clamps or hanging cables.
Step 3: Have a qualified professional isolate and inspect structure
The technician verifies the system’s energy sources, applies lockout-tagout, and inspects the mounting system against the approved design and manufacturer requirements. The review includes clamp position, rail deflection, attachment pullout indicators, flashing, roof membrane damage, grounding paths, and tracker components where applicable.
Torque checks are not a substitute for engineering review. A bolt can meet a torque value while the substrate, insert, thread, rail, or attachment has already failed. Fasteners should be checked only when the inspector has a defined torque specification and a calibrated wrench.
Success checkpoint: Each structural defect has a location, photograph, measured condition, and disposition such as repair, engineering review, or replacement.
Common mistake: Tightening every loose-looking fastener without preserving evidence or checking whether the roof attachment has pulled out.
Step 4: Conduct electrical and thermal diagnostics
After safe isolation and visual triage, the technician tests strings, circuits, connectors, grounding, inverters, and batteries according to the system design. The test plan may include Voc, Isc, insulation resistance, I-V curves, connector inspection, and thermal imaging under stable operating conditions.
A string with normal Voc can still have poor current output, damaged bypass diodes, or a high-resistance connector. Conversely, a low current reading can result from shading or irradiance variation rather than storm damage, so measurements require consistent conditions and comparison with neighboring strings.
Success checkpoint: The technician can identify whether each abnormal reading originates in a module group, cable run, connector, inverter input, or external condition.
Common mistake: Performing a megohmmeter test through an inverter, rapid shutdown device, optimizer, or battery component that the manufacturer requires to be disconnected.
Step 5: Decide whether to repair, replace, or defer
Repair decisions depend on safety, code compliance, manufacturer instructions, structural condition, and documented performance loss. A cracked module generally requires replacement rather than glass patching, while a displaced clamp may be repairable if the rail, attachment, module frame, and roof remain within approved limits.
| Finding | Usual disposition | Evidence required | Typical decision time |
|---|---|---|---|
| Shattered module glass | Module replacement | Photos, serial number, electrical isolation | 1-3 days |
| Damaged MC4-type connector | Connector or cable replacement | Connector model, polarity, insulation result | 1-5 days |
| Bent rail with sound roof | Engineering or rail replacement | Deflection measurement, design review | 3-14 days |
| Flooded inverter | Manufacturer evaluation or replacement | Waterline photos, alarm log, serial number | 3-21 days |
| Wet battery enclosure | Immediate isolation and battery specialist | Flood depth, temperature, alarm history | Same day to 7 days |
| Roof attachment pullout | Roof and structural repair | Pullout evidence, roof report, plans | 7-30 days |
| Thermal anomaly without visible damage | Electrical confirmation first | Radiometric image, irradiance, I-V data | 1-7 days |
Do not mix damaged and undamaged replacement modules without checking electrical characteristics and warranty requirements. A different current rating, connector specification, frame size, or mounting method can create code, performance, or warranty problems.
How much does a post-hurricane inspection cost?
A typical residential assessment costs $350-$900, while large commercial and utility investigations commonly cost $2,500-$50,000 or more. Price depends on system size, roof access, travel, drone mapping, electrical testing, engineering review, report detail, and whether the inspection occurs during regional storm demand.
| System class | Typical capacity | Typical inspection cost | Typical duration |
|---|---|---|---|
| Residential basic | 3-8 kW | $250-$500 | 1-3 hours |
| Residential diagnostic | 8-20 kW | $350-$900 | 2-5 hours |
| Commercial | 100 kW-1 MW | $2,500-$7,500 | 1-3 days |
| Utility-scale | 5 MW or larger | $15,000-$50,000+ | 1-2 weeks |
These figures are typical practitioner ranges, not regulated prices. Repairs, roof work, engineering letters, replacement modules, crane access, laboratory analysis, permit fees, and expedited mobilization usually cost extra.
A basic visual report may be adequate for triage but insufficient for a disputed claim involving latent electrical damage. Ask the provider whether the price includes string testing, thermal imaging, a site map, serial-number inventory, signed findings, and an itemized bill of materials.
Which inspection technology should you use?
The best technology depends on the decision being made. Visual inspection is the fastest way to establish obvious damage, electrical testing verifies circuit safety and performance, and infrared imaging efficiently screens a large operating array for abnormal heat.
| Method | Best use | Typical scale | Main limitation |
|---|---|---|---|
| Ground visual inspection | Immediate hazard triage | 1 home to 20 kW | Misses latent cell and insulation defects |
| Handheld infrared camera | Targeted module or connector check | 1-100 kW | Requires safe access and stable load |
| Drone thermal survey | Large-area screening | 100 kW to multi-megawatt | Weather, irradiance, airspace, and resolution limits |
| I-V curve tracing | String performance diagnosis | Commercial and utility strings | Requires trained operator and stable conditions |
| Electroluminescence imaging | Cell and micro-crack investigation | Sampled modules or controlled batches | Usually requires module access and specialized equipment |
Drone thermal imaging is efficient, but it is not automatically superior. Aerial imagery may locate anomalies across thousands of modules, while a technician still must confirm the cause at ground level. Wet surfaces, gusty wind, low irradiance, reflective glass, and nonuniform loading can reduce interpretability.
Electroluminescence can reveal cell cracks more directly than thermal imaging, but field use is slower and may require dark conditions or specialized forward-bias equipment. It is most useful when warranty, manufacturing, transport, or severe mechanical damage questions justify the added cost.
What should the insurance report contain?
An insurance report should connect the hurricane event to specific physical and electrical consequences without claiming more certainty than the evidence supports. The report should preserve original conditions, identify affected equipment, distinguish storm damage from pre-existing wear, and price each repair or replacement line.
Include the following items:
- Property address, owner, system owner, inspection date, and storm date.
- System capacity, module model, inverter model, battery model, and serial numbers.
- Installer, engineer, maintenance provider, and inspection-company credentials.
- Pre-storm monitoring data, utility bills, commissioning records, and prior photographs.
- A roof and array map with module rows, string identifiers, and defect locations.
- Wide-angle and close-up photographs with timestamps and location references.
- Electrical readings with instrument model, calibration status, test conditions, and test voltage.
- Thermal files showing irradiance, ambient temperature, wind, loading state, and image scale.
- A defect classification separating unsafe, structural, electrical, performance, and cosmetic findings.
- An itemized bill of materials with quantities, part numbers, labor, access equipment, permits, tax, and disposal.
- Recommendations for temporary stabilization, repair, replacement, and retesting.
An inspector can document evidence, but an insurer or engineer may decide causation and coverage. Avoid statements such as “all modules must be replaced” unless test data, manufacturer criteria, or engineering analysis supports that conclusion.
What are the most common assessment mistakes?
The most expensive mistake is premature re-energization. An inverter that starts successfully has not proved that every connector, cable, module, and grounding path is safe.
Five failure modes and corrections
- Visual-only approval: The system looks intact, so the owner switches it on.
Correction: Obtain electrical isolation and string-level evaluation before energizing. - Testing connected electronics with excessive voltage: A technician applies a generic 1,000 V insulation test.
Correction: Follow the equipment manufacturer’s test procedure and disconnect sensitive devices. - Ignoring the roof interface: The modules appear secure, but attachments have loosened or flashing has torn.
Correction: Coordinate a solar and roofing inspection because water damage can continue after the array is stabilized. - Treating every infrared hot spot as a cracked cell: The report labels connector heating as module failure.
Correction: Correlate temperature patterns with electrical measurements, connector condition, and operating current. - Removing evidence too early: Damaged modules and clamps go to disposal before photographs and serial numbers are recorded.
Correction: Photograph, map, and obtain insurer or adjuster documentation requirements before disposal when safe.
A counterintuitive field rule is that a system producing partial power may present greater diagnostic risk than a completely offline system. Partial operation can leave selected damaged strings energized while the inverter’s overall output appears normal.
How do residential, commercial, and utility assessments differ?
Residential inspections prioritize occupant safety, roof access, battery hazards, and insurance documentation. Commercial and utility assessments add production ranking, drone logistics, string-level data, tracker or substation equipment, crew controls, and a larger evidence-management burden.
| Asset type | First priority | Common added equipment | Typical report output |
|---|---|---|---|
| Home rooftop | Occupant and roof safety | Clamp meter, rated voltage tester | Photo report and repair scope |
| Home with battery | Battery isolation and water entry | Manufacturer diagnostic interface | Battery condition and replacement decision |
| Commercial rooftop | Array access and string ranking | I-V tracer, radiometric drone | Defect map and production-loss schedule |
| Ground-mounted solar | Racking, fencing, buried conductors | Survey GPS, insulation tester | Block-level damage map |
| Utility tracker site | Tracker rows and central inverters | UAS, SCADA export, thermal camera | Orthomosaic, block ranking, BOM |
Ground-mounted and utility systems may have damaged fencing, buried cable exposure, substation faults, or tracker drive failures that a module-focused inspection misses. Commercial operators should preserve SCADA alarms, inverter logs, weather data, and pre-storm production baselines before systems are reset.
What changes for flooding, batteries, and coastal saltwater?
Flooded inverters, combiners, disconnects, batteries, and other electrical equipment should remain isolated until evaluated under manufacturer and electrical-safety procedures. Drying an enclosure or replacing a fuse does not prove that internal corrosion, contamination, or insulation damage has been removed.
Battery systems require a separate hazard assessment. Heat, hissing, swelling, smoke, unusual odor, damaged cooling systems, and water intrusion require evacuation or emergency response according to the battery manufacturer’s instructions. Do not open, move, charge, or submerge a damaged lithium-ion battery without trained personnel.
Saltwater exposure can accelerate corrosion even when equipment appears dry. Record the waterline, exposure duration, visible deposits, connector condition, grounding hardware, and enclosure seals; replacement decisions may require the equipment manufacturer because corrosion can progress inside sealed components.
Can damaged solar panels be repaired instead of replaced?
A damaged solar module is usually replaced when its glass, laminate, backsheet, junction box, frame, or electrical insulation has failed. Racking, conduit supports, and some cable routes may be repairable when an approved method restores mechanical strength, weather sealing, grounding, and code compliance.
Module-level glass patching is not a dependable restoration method for a cracked laminate. It may reduce immediate water entry while leaving cell, insulation, warranty, and shock hazards unresolved. A qualified technician should confirm module compatibility, connector type, electrical rating, and rapid-shutdown requirements before installation.
Replacement is more likely when damage involves multiple rows, unknown hidden movement, repeated hot spots, flooded electronics, or a roof that needs removal and reconstruction. A localized repair is more reasonable when the defect is isolated, the design remains compliant, and post-repair electrical tests pass.
How do you troubleshoot an inverter isolation fault?
An inverter isolation or ground-fault alarm after a hurricane means the inverter detects unacceptable leakage between a DC circuit and ground, although the exact cause depends on the inverter design. Common causes include wet connectors, damaged cable insulation, flooded junction boxes, module backsheet damage, and failed surge-protection components.
The homeowner should leave the system off and contact a qualified solar electrician. The technician isolates strings and equipment, reviews the alarm log, performs approved insulation and polarity tests, and narrows the fault by circuit rather than repeatedly resetting the inverter.
A fault that disappears after drying is not automatically resolved. Moisture may remain in a connector or conduit, and repeated thermal cycling can restore the leakage later. The final report should state the failed component, test conditions, corrective action, and retest result.
What happens after repairs are complete?
After repairs, the technician retests insulation, polarity, grounding, string voltage, operating current, inverter functions, rapid shutdown, communications, and battery controls where applicable. The roof contractor verifies penetrations and weather sealing, while the electrical professional confirms that replacement equipment matches the approved design.
The system should return to service only after failed tests are corrected and required inspections, utility permissions, permits, or authority-having-jurisdiction approvals are satisfied. Save commissioning readings and updated photographs with the insurance file.
Post-repair acceptance checks
| Check | Acceptance evidence | Responsible party | Record |
|---|---|---|---|
| Module mounting | Approved clamp and torque values | Solar installer | Torque log and photos |
| Roof sealing | Repaired flashing or membrane | Roofing contractor | Roof completion report |
| DC circuits | Polarity and insulation results | Qualified electrician | Test sheet |
| Inverter operation | No active fault and normal startup | Solar technician | Alarm log |
| Rapid shutdown | Device response at required locations | Qualified electrician | Functional test |
| Battery system | Normal temperature and status | Battery-certified technician | Manufacturer report |
Frequently Asked Questions
Can I inspect solar panels from the ground after a hurricane?
Yes, ground-level photographs and observations are appropriate for initial documentation, but they do not establish electrical safety. Photograph broken glass, displaced modules, hanging wires, inverter alarms, roof damage, and battery conditions from a safe distance, then keep the system isolated until qualified personnel complete testing.
Should I remove broken solar panels before filing an insurance claim?
Usually, preserve the damaged condition until it has been photographed, mapped, and documented according to the insurer’s instructions. Emergency stabilization may occur first when falling equipment, exposed conductors, fire, or public danger exists, but retain serial numbers, removed parts, invoices, and disposal records.
How soon after a hurricane should a PV system be inspected?
Safety triage should occur as soon as access is safe, often within 24-72 hours, while a full diagnostic inspection may follow after roof, utility, and site hazards are controlled. Commercial operators commonly prioritize critical inverters and high-loss blocks before completing the entire array survey.
Does a cracked solar panel always stop producing electricity?
No. A cracked module may continue producing reduced power while allowing moisture entry, creating hot spots, or presenting an insulation hazard. Electrical output alone cannot authorize continued use, because a module can generate power while its glass, backsheet, junction box, or internal conductors remain unsafe.
Can rain cause an inverter isolation fault without visible panel damage?
Yes. Water can enter a connector, conduit, junction box, combiner, or damaged enclosure without producing an obvious module defect. The technician should isolate strings and test the approved circuit sections rather than assume that drying or rebooting the inverter has corrected the fault.
Who should sign a hurricane solar damage report?
The appropriate signer depends on the report’s purpose and local requirements. A qualified solar electrician can document electrical findings, a structural engineer may need to assess racking or roof forces, and a roofing professional can evaluate penetrations and membrane damage; insurance may request all three.
Conclusion: Make the Solar Panel Damage Assessment After Hurricane Evidence-Based
A solar panel damage assessment after hurricane conditions should proceed from site safety to documented visual inspection, structural verification, electrical testing, thermal screening, and controlled re-energization. Do not rely on an intact appearance, a functioning inverter, or a single 1,000 V test as proof of safety. Preserve storm evidence, use manufacturer-approved diagnostics, and separate repairable hardware from modules, electronics, batteries, and roof attachments that require replacement or engineering review.