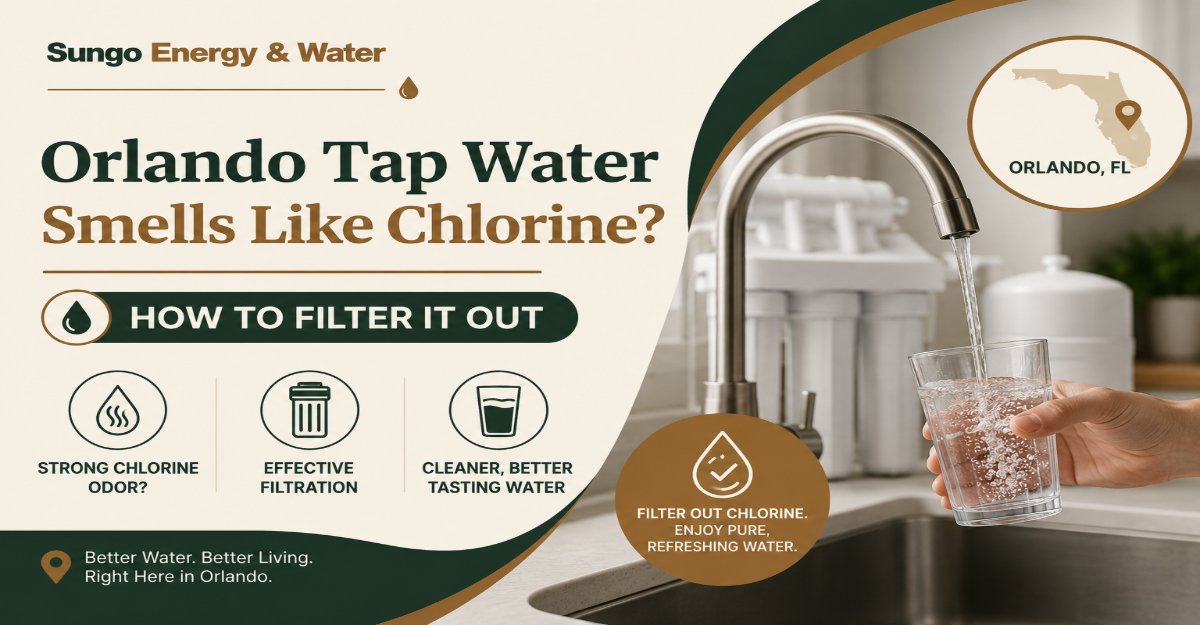
When Orlando tap water smells like chlorine, solve it in nine steps: verify your utility, isolate the odor source, test the water, define the treatment area, select and size a certified filter, install it, flush it, verify the result, and maintain it. Allow 15 minutes to one day. Correct filter selection matters most.
Before You Start
Time required:
15 to 30 minutes for diagnosis and testing; 10 minutes to 2 hours for a point-of-use filter; 12 to 24 hours for off-gassing; 2 to 6 hours for a typical professional whole-house installation.Difficulty:
Easy for a pitcher or faucet filter; moderate for an under-sink system; advanced for point-of-entry plumbing.Typical cost:
$0 for off-gassing; approximately $25 to $80 for a pitcher or faucet filter; $100 to $500 for under-sink carbon; $200 to $800 for many RO systems; $1,000 to $4,000 or more for professionally installed whole-house carbon.Tools and materials:
- Latest Consumer Confidence Report for your exact utility
- One clean, clear drinking glass
- Two clean food-safe containers
- Free-chlorine test strips covering roughly 0 to 4 ppm
- Optional total-chlorine test strips
- NSF-certified filter with the required reduction claim
- Manufacturer-approved replacement cartridge
- Clean towel and shallow pan for under-sink work
- Adjustable wrench or basin wrench, if required
- Flashlight
- Installation date label or permanent marker
Prerequisites:
- Identify who sends your water bill.
- Confirm whether you need drinking-water treatment or whole-home treatment.
- Obtain landlord approval before altering rental plumbing.
- Use only potable-water components rated for your pressure and pipe size.
Warning: A chlorine smell alone does not establish that the water is unsafe. OUC states that it uses chlorine at an average concentration of approximately 1.0 ppm and does not use chloramines. EPA’s maximum residual disinfectant level for chlorine is 4.0 mg/L. OUC’s information applies only to customers actually served by OUC.
Diagnose the Chlorine Odor
Step 1: Identify Your Water Utility
Check your water bill and confirm which utility supplies the property.
Read the provider name on the bill rather than relying on an Orlando mailing address. Properties in and around Orlando may receive water from OUC, another municipal system, a county utility, a community system, or a private well.
Download the provider’s latest Consumer Confidence Report, also called a water-quality report. Search within it for:
- “Disinfectant”
- “Chlorine”
- “Chloramine”
- “Total chlorine”
- “TTHM”
- “HAA5”
- “Distribution system”
For OUC customers, the utility currently reports an average chlorine concentration of about 1.0 ppm and says it does not use chloramines. It also identifies the Lower Floridan Aquifer as its water source.
You’ll know it worked when you can name the utility, disinfectant type, latest report year, and reported disinfectant level.
Common mistake: Assuming every property called “Orlando” receives identical water. Avoid this by verifying the account provider and service address.
Step 2: Locate the Source of the Smell
Compare cold water, hot water, the filled glass, and the empty drain.
Use this sequence:
- Do not use the selected faucet for at least 6 hours.
- Place a clean glass directly beneath the faucet.
- Run cold water for 5 seconds and fill the glass.
- Walk at least 6 feet away from the sink.
- Smell the water in the glass.
- Return and smell near the drain without running water.
- Run cold water for 2 minutes and repeat the glass test.
- Perform the same test with hot water after it reaches normal temperature.
- Repeat at a second faucet.
Interpret the pattern:
- Odor in cold water at multiple faucets: likely related to the incoming water or distribution residual.
- Odor only in the first draw: likely intensified by stagnant plumbing.
- Odor mainly in hot water: investigate the water heater rather than buying a drinking-water filter first.
- Odor present near the drain but not in the glass: clean the drain, overflow channel, disposal, or trap.
- Odor at one faucet only: inspect that faucet’s aerator, supply hose, or local plumbing.
You’ll know it worked when you can reproduce the odor in a glass away from the sink and identify whether it affects cold water, hot water, one fixture, or the entire property.
Common mistake: Smelling water while leaning over the drain. Drain biofilm and disposal odors can be mistaken for chlorine in the water.
Step 3: Measure the Chlorine Baseline
Test the unfiltered cold water before selecting or evaluating a filter.
Use free-chlorine strips that include the expected municipal range. Follow the strip manufacturer’s immersion and reading times exactly; many strips require only a brief dip followed by a reading within 10 to 30 seconds.
For a more dependable comparison:
- Flush the cold tap for 2 minutes.
- Fill a clean testing cup.
- Test immediately.
- Record the result, date, faucet, and time.
- Repeat the test twice.
- Use the middle result if the three readings are close.
- Test total chlorine separately when the utility uses chloramine or the disinfectant type is uncertain.
Do not leave the sample standing before testing. Free chlorine can decline as the water is exposed to air.
You’ll know it worked when you have a repeatable unfiltered reading rather than relying only on smell.
Common mistake: Using pool strips with an unsuitable range or interpreting them after the specified reading window. Use drinking-water-compatible strips and follow their timing instructions.
Choose the Treatment Method
Step 4: Define Which Water You Need to Treat
Decide whether to treat one glass, one faucet, or the entire home.
Choose the smallest treatment scope that solves the actual problem:
- Occasional drinking water: off-gassing or a pitcher
- Kitchen drinking and cooking water: faucet-mounted or under-sink carbon
- Drinking water plus broader contaminant reduction: certified RO system
- All showers, sinks, and appliances: point-of-entry carbon
- One shower only: shower filter certified for free-chlorine reduction
Estimate demand before purchasing:
- Drinking and cooking: commonly 1 to 3 gallons per person per day
- Kitchen faucet peak demand: often 0.5 to 1.5 gallons per minute
- Whole-home peak flow: commonly 6 to 12 gallons per minute, but larger homes can exceed this
A carbon filter removes chlorine through adsorption and chemical reduction at the media surface. It does not function mainly by mechanically straining chlorine particles. NSF identifies NSF/ANSI 42 as the standard commonly used for aesthetic claims such as chlorine taste and odor.
You’ll know it worked when every affected outlet is included without paying to filter outlets that do not need treatment.
Common mistake: Buying a small under-sink filter to solve chlorine odor in showers. A point-of-use system treats only the connected outlet.
Step 5: Select a Certified Filter
Choose a filter certified for the exact reduction claim you need.
For OUC water, begin with a product certified for free-chlorine taste-and-odor reduction under NSF/ANSI 42. Do not stop at the logo. Verify:
- Exact system model
- Exact replacement-cartridge number
- “Chlorine reduction” or “free available chlorine reduction”
- Rated capacity in gallons
- Rated service flow in gallons per minute
- Required inlet pressure
- Replacement interval
- Operating-temperature limits
Use the following hierarchy:
Activated-Carbon Pitcher or Faucet Filter
Choose this for low-cost drinking-water treatment, rentals, dorms, or temporary use.
It is easy to install but has limited flow and cartridge capacity.
Under-Sink Carbon Block
Choose this for higher capacity, faster kitchen use, and hidden installation.
A dedicated-faucet system treats only the smaller drinking-water line. A direct-connect system can treat all cold water at the kitchen faucet but must be rated for the faucet’s flow.
Reverse-Osmosis System
Choose RO only when you want certified reduction of specific dissolved contaminants in addition to chlorine odor.
Look for NSF/ANSI 58 and confirm every desired contaminant individually. RO performance depends on the membrane, carbon stages, pressure, recovery ratio, maintenance, and certification. NSF notes that most RO systems use additional filters before or after the membrane.
Whole-House Carbon System
Choose point-of-entry treatment when the odor affects showers and multiple faucets.
Use a properly sized backwashing carbon tank or high-capacity cartridge system. Whole-house systems are normally installed near the municipal water entry point.
Shower Filter
Choose a shower filter only for that shower. NSF/ANSI 177 applies to shower filtration claims for free available chlorine reduction.
You’ll know it worked when the certification listing or performance sheet names both your exact model and the exact contaminant claim.
Common mistake: Treating “tested to NSF standards” as equivalent to independent certification. Look for a verifiable listing from NSF, WQA, IAPMO, or another accredited certifier.
Step 6: Size the Filter for Flow and Capacity
Match the filter’s rated flow and gallon capacity to your actual use.
For a point-of-use system, calculate approximate cartridge life with:
Rated gallons ÷ average gallons used per day = estimated days
Example:
- Cartridge rating: 400 gallons
- Household filtered use: 4 gallons per day
- Theoretical capacity: 100 days
Replace it earlier if the manufacturer specifies a shorter calendar interval, pressure falls sharply, or chlorine returns.
For whole-house carbon, record:
- Incoming pipe diameter
- Static water pressure
- Number of bathrooms
- Highest simultaneous flow
- Required service flow
- Backwash flow, if applicable
- Drain availability
- Media volume
- Manufacturer-specified contact conditions
A whole-house filter rated at 5 gallons per minute may be inadequate when two showers and a washing machine operate together. Excessive flow shortens contact time and can allow chlorine breakthrough.
You’ll know it worked when the filter can supply peak demand without a major pressure drop and remains within its certified flow rating.
Common mistake: Selecting a system by tank height or advertising language rather than rated service flow and verified capacity.
Install and Verify the Filter
Step 7: Install or Prepare the System
Install the filter exactly as its manual specifies and use cold water for drinking-water carbon systems.
For a Pitcher
- Wash the pitcher and reservoir with mild dish soap.
- Rinse until no soap remains.
- Prepare the cartridge exactly as directed.
- Seat it firmly so water cannot bypass the seal.
- Fill only with cold potable water.
For a Faucet Filter
- Remove and clean the faucet aerator.
- Identify the faucet thread.
- Select the supplied adapter and gasket.
- Hand-tighten the fitting.
- Tighten only enough to stop leakage.
- Confirm the diverter changes between filtered and unfiltered modes.
Faucet-mounted filters commonly do not fit pull-down sprayers or irregular faucets.
For an Under-Sink System
- Close the cold-water shutoff valve.
- Open the cold faucet to relieve pressure.
- Place a towel and shallow pan below the connection.
- Disconnect the cold supply line.
- Install the approved tee or adapter.
- Mount the filter vertically with enough clearance for cartridge removal.
- Connect tubing with clean, square cuts.
- Insert tubing to the manufacturer’s full marked depth.
- Reopen the valve slowly.
- Inspect every joint with a dry tissue for 10 minutes.
For RO or Whole-House Equipment
Use a licensed plumber when the installation requires drilling a countertop, modifying a drain, cutting the main line, adding a bypass, installing a pressure regulator, providing backwash drainage, or meeting permit requirements.
You’ll know it worked when the cartridge is fully seated, the water flows in the indicated direction, and every connection remains dry under pressure.
Common mistake: Applying excessive thread tape or overtightening plastic fittings. Either can crack the housing or prevent a gasket from sealing correctly.
Step 8: Flush the New Filter
Flush the cartridge for the full manufacturer-specified volume or time before drinking.
Do not rely on a universal “two pitchers” rule. Flushing requirements vary considerably.
Typical procedures include:
- Pitcher: discard 2 to 3 full reservoirs
- Faucet filter: run cold water for approximately 5 minutes
- Under-sink carbon: flush approximately 5 to 15 minutes
- RO system: discard one or more complete storage tanks
- Whole-house carbon: backwash and rinse until the discharge runs clear
Follow the manual when its procedure differs.
Temporary gray or black particles are usually carbon fines. Cloudiness that clears from the bottom upward after standing is usually trapped air.
You’ll know it worked when the water runs clear, loose carbon particles disappear, the flow stabilizes, and the manual’s flushing requirement has been completed.
Common mistake: Drinking the first water because it looks clean. Fine carbon and manufacturing residues may not be obvious in a dark sink.
Step 9: Verify Reduction and Set Maintenance Dates
Compare filtered and unfiltered water under identical conditions.
After flushing:
- Run the unfiltered cold tap for 2 minutes.
- Collect and test an unfiltered sample.
- Collect a filtered sample immediately afterward.
- Use strips from the same package.
- Follow identical timing for both tests.
- Record odor, taste, free chlorine, flow, and date.
- Repeat the comparison after 7 days.
Do not expect a basic chlorine strip to prove removal of TTHMs, HAA5, lead, PFAS, or other contaminants. Those require suitable laboratory analysis or a system carrying a verified reduction claim.
Write these dates on the housing or maintenance log:
- Installation date
- Rated-gallon limit
- Manufacturer’s replacement deadline
- Monthly odor-check date
- Planned chlorine-retest date
NSF advises replacing cartridges as required and considering replacement-filter cost when budgeting for treatment.
You’ll know it worked when filtered water has a clearly lower chlorine reading or falls within the product’s expected result, the odor is reduced, and there are no leaks or unacceptable flow losses.
Common mistake: Judging the system only by taste. Taste adaptation can hide gradual cartridge exhaustion; periodic comparison testing gives an earlier warning.
Use Free Chlorine Removal Without a Filter
Off-Gas Water in an Open Container
Fill a clean, wide container with cold water and leave it uncovered for 12 to 24 hours in the refrigerator.
More exposed surface area generally improves gas exchange. Protect the container from food spills, insects, dust, and cleaning fumes. Use the water promptly and wash the container regularly.
This method is suitable for limited quantities of water containing free chlorine. It is unreliable for chloramine and does not remove hardness, metals, salts, or most nonvolatile contaminants.
Boil Water Only When Practical
Bring the water to a rolling boil and continue for approximately 15 minutes when you need to accelerate free-chlorine loss.
Allow it to cool in a clean, covered container. Boiling consumes energy, concentrates nonvolatile dissolved minerals as water evaporates, and is impractical for routine whole-house use.
Warning: Boiling is not a general purification method for every chemical contaminant and should not replace official boil-water-advisory instructions.
Common Mistakes and How to Fix Them
The Filtered Water Still Smells Like Chlorine
Likely causes:
- Cartridge is exhausted
- Flow exceeds the rated value
- Cartridge is not seated correctly
- Water bypasses a damaged gasket
- Filter is intended for sediment rather than chlorine
- Utility uses chloramine but the filter has only a free-chlorine claim
Recovery:
Reduce the flow, reseat the cartridge, inspect seals, verify the model’s certified claim, and compare chlorine before and after filtration. Replace the cartridge when performance does not recover.
The Odor Is Strongest Every Morning
Water has remained in the building plumbing overnight.
Run the cold tap for 1 to 2 minutes, or until its temperature becomes consistently cooler, before filling a drinking container. If the odor disappears after flushing, the first-draw plumbing conditions are contributing to the problem.
Persistent or extreme changes should be reported to the water utility.
A New Filter Produces Black Specks
Loose carbon fines were not fully flushed.
Complete the manufacturer’s full flush procedure. Remove and reseat the cartridge if particles continue beyond the specified volume. Replace it if the cartridge is cracked or leaking media.
Water Flow Drops Sharply
A clogged prefilter, undersized cartridge, kinked tube, low inlet pressure, or incorrectly opened valve may be restricting flow.
Check shutoff valves, straighten tubing, inspect the aerator, and replace blocked sediment or carbon cartridges. Never drill, cut, or modify a cartridge to restore flow.
The Filter Improves Odor but Not Scale
Carbon does not significantly remove the calcium and magnesium responsible for water hardness.
OUC reports average hardness of about 129 ppm, or 7 grains per gallon. Treat scale separately with an appropriately sized softener or another certified hardness-treatment method.
The Smell Comes Only From Hot Water
The water heater may contain stagnant water, sediment, an anode-related odor problem, or another maintenance issue.
Do not attempt to drain or service a hot-water tank unless you understand scalding, electrical, gas, and pressure hazards. Have a qualified plumber inspect the heater when the odor is isolated to hot water.
Variations for Different Orlando Households
Renters and Students
Use a certified pitcher, countertop unit, or compatible faucet-mounted carbon filter.
These options require little or no permanent plumbing modification. Keep the original faucet aerator and adapters so the property can be restored before moving. Obtain written permission before drilling a countertop or altering a shutoff connection.
Homeowners Treating Drinking Water Only
Use an under-sink carbon block when chlorine taste and odor are the main concerns.
Choose RO only when the household has identified additional contaminants and selected a system certified for them. A good carbon system is normally simpler, wastes no reject water, and retains the water’s dissolved minerals.
Homes Treating Showers and Every Faucet
Install a point-of-entry carbon system sized for peak household flow.
Include a sediment prefilter when the equipment manufacturer or water conditions require it. Install pressure gauges or sampling ports before and after the system when practical. A bypass valve makes future maintenance easier.
Homes Outside OUC Territory
Repeat the utility and disinfectant checks from Step 1.
Some neighboring systems may use different disinfectants or may temporarily change disinfection practices. If chloramine is listed, choose a system carrying a chloramine-reduction claim rather than assuming ordinary carbon will provide adequate cartridge life.
How Long Does It Take and What Does It Cost?
| Method | Setup Time | Result Time | Typical Initial Cost | Typical Maintenance |
|---|---|---|---|---|
| Off-gassing | 2 minutes | 12–24 hours | $0–$20 | Container cleaning |
| Boiling | 15–30 minutes | After cooling | Minimal | Energy cost |
| Filter pitcher | 5–15 minutes | After flushing | $25–$80 | $40–$150 yearly |
| Faucet filter | 10–30 minutes | After flushing | $30–$100 | $40–$150 yearly |
| Under-sink carbon | 30–120 minutes | After flushing | $100–$500 | $60–$200 yearly |
| Reverse osmosis | 2–5 hours | After tank flushing | $200–$800+ | $100–$300 yearly |
| Whole-house carbon | 2–6 hours | After backwash | $1,000–$4,000+ | $150–$600+ yearly |
Actual cost moves toward the upper end when the project requires permits, a plumber, a pressure regulator, drainage, electrical work, higher service flow, larger carbon volume, leak protection, or difficult access.
Do not compare systems only by purchase price. Divide the cartridge cost by its certified capacity and include installation, water use, replacement filters, membranes, electricity, and professional service.
Frequently Asked Questions
Is Orlando Tap Water Safe if It Smells Like Chlorine?
A chlorine odor does not by itself mean the water violates a safety limit. OUC reports an average chlorine level of approximately 1.0 ppm, while EPA’s maximum residual disinfectant level for chlorine is 4.0 mg/L. Check the current utility report and contact the provider when the odor changes suddenly or becomes unusually strong.
Does OUC Use Chlorine or Chloramine?
OUC states that it adds chlorine at an average concentration of about 1.0 ppm and does not use chloramines. That answer applies to OUC’s system, not every property in metropolitan Orlando. Confirm the provider printed on your water bill before selecting activated carbon or a chloramine-rated treatment system.
Does a Water Softener Remove Chlorine?
A conventional ion-exchange softener is designed to reduce hardness minerals, not chlorine. Use activated or catalytic carbon for chlorine reduction. A combined system may place carbon and softening stages in sequence, but each component must be sized and maintained for its specific function.
Does Reverse Osmosis Remove Chlorine?
The carbon prefilters in most residential RO systems are normally responsible for reducing chlorine before it reaches the membrane. Do not assume the membrane alone provides the claimed reduction. Verify that the complete system is certified under NSF/ANSI 58 and carries the specific contaminant claims you need.
Can I Test Chlorine With My Sense of Smell?
Smell can identify a change but cannot measure concentration accurately. Odor sensitivity varies between people and can be affected by temperature, plumbing stagnation, drains, and other compounds. Use free- and total-chlorine test methods for comparisons, and use an accredited laboratory when a regulatory or health-related measurement is needed.
When Should I Call the Water Utility?
Contact the utility when chlorine odor increases suddenly across multiple cold-water fixtures, water becomes discolored, neighbors report the same change, testing produces an unexpected result, or the odor persists after several minutes of flushing. Ask whether maintenance, flushing, repairs, or a temporary disinfection change is occurring nearby.
Conclusion
When Orlando tap water smells like chlorine, do not begin by buying the largest filter. Verify the utility, isolate the odor, measure free chlorine, and decide which outlets need treatment. Then select a certified carbon or RO system with enough flow and capacity, flush it completely, test the result, and replace its media before chlorine breakthrough returns.
For OUC customers whose main complaint is drinking-water odor, a certified NSF/ANSI 42 activated-carbon pitcher, faucet filter, or under-sink carbon block is usually the most direct solution. Whole-house carbon is appropriate only when treatment is also needed at showers and every other fixture.