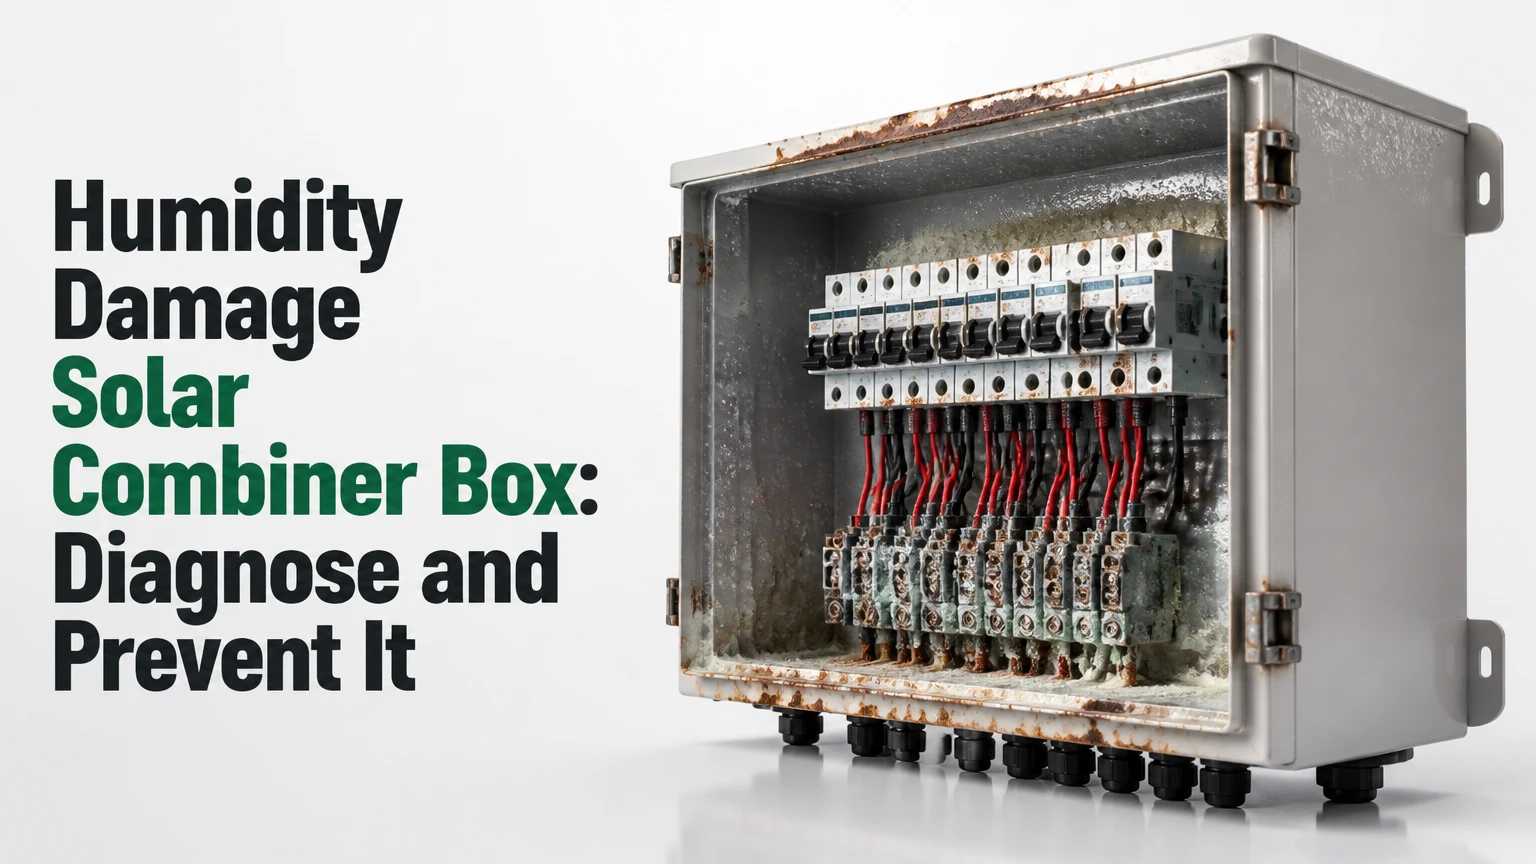
Humidity damage in a solar combiner box occurs when moisture enters or condenses inside the enclosure, reducing insulation resistance and corroding terminals, fuses, surge-protection devices, and monitoring electronics. The reliable remedy is to identify the moisture path, de-energize and test the box, replace compromised parts, and control future condensation with enclosure design and climate-specific measures.
Key Facts at a Glance
- A solar combiner box combines current from multiple photovoltaic strings before the inverter, so one corroded connection can affect several strings.
- Condensation forms when an internal surface falls below the surrounding air’s dew point; a box can condense internally even without visible rain leaks.
- NEMA 4X and IP66 describe enclosure protection against specified environmental hazards, but neither rating alone guarantees freedom from internal condensation.
- Green copper corrosion, white aluminum oxidation, rust, droplets, swollen gaskets, and heat-discolored terminals are practical warning signs.
- A wet DC combiner box must be isolated and tested by qualified personnel before covers are opened or components are touched.
- Typical corrective work ranges from $150 for sealing and cleaning to more than $1,200 when the enclosure, fuse holders, wiring, and monitoring board require replacement.
What Is Humidity Damage in a Solar Combiner Box?
Humidity damage is the deterioration of electrical and mechanical parts caused by moisture vapor, liquid water, or repeated condensation inside a photovoltaic combiner enclosure. The damage includes metal corrosion, conductive contamination, insulation breakdown, terminal heating, failed surge protection, and unreliable string monitoring.
A combiner box normally receives several DC string circuits, routes them through fuses or circuit protection, and combines them into a larger output circuit to the inverter. Depending on the design, the box may also contain a DC disconnect, surge protective device, terminal blocks, current sensors, and communication electronics.
Humidity becomes dangerous when it creates a conductive film across insulating surfaces or increases resistance at a termination. The result may be a ground-fault alarm, reduced insulation resistance, nuisance fuse operation, or a hot connection that progresses toward arcing. Moisture damage is therefore an electrical reliability problem, not merely a cosmetic enclosure issue.
Humidity, Condensation, and Water Ingress Are Different
Humidity is water vapor in the air. Condensation is liquid water formed when a surface temperature falls to or below the air’s dew point. Water ingress is direct entry through a damaged gasket, open conduit, cracked gland, drain, door, or enclosure penetration.
| Condition | Typical source | Observable evidence | Primary risk |
|---|---|---|---|
| High humidity | Tropical air, underground conduit, coastal fog | Hazy interior, damp sensor reading | Condensation during cooling |
| Condensation | Night cooling, shaded wall, cold terminal | Droplets on roof or components | Tracking and insulation loss |
| Direct ingress | Failed gland, top entry, damaged door seal | Standing water or wet cable | Short circuit and corrosion |
| Contaminated moisture | Salt, dust, fertilizer, industrial residue | Sticky film or crystalline deposits | Leakage current and tracking |
| Persistent dampness | Buried conduit breathing, blocked drain | Corrosion returns after drying | Repeated component failure |
How Does Condensation Damage a Combiner Box?
Condensation damages a solar combiner box through a sequence of air exchange, temperature cycling, surface cooling, and electrical contamination. Warm air enters during the day, cools after sunset, and deposits liquid water when the enclosure’s coldest component reaches the dew point.
The process is often strongest during clear nights. A box mounted under open sky can radiate heat away faster than the surrounding air, while metal terminals and cable glands become colder than the enclosure interior. A sealed box can therefore experience condensation even when its gasket prevents rain entry.
Moisture first lowers surface insulation resistance. Dissolved salts and corrosion products then create semi-conductive paths between energized conductors, grounded metal, or adjacent terminals. Copper and aluminum form galvanic cells when an electrolyte connects them, while steel hardware can rust and lose mechanical strength.
Electrical tracking is more severe when contamination concentrates along a surface. Tracking can carbonize plastic, extend a leakage path, and produce a permanent conductive route. Relative humidity below 60% can be a useful operating objective in some monitoring programs, but it is not a universal guarantee against tracking because temperature, contamination, voltage, creepage distance, and material condition also control failure.
Why Thermal Cycling Matters More Than Average Humidity
Average outdoor humidity does not predict combiner-box condensation by itself. The decisive variables are dew point, enclosure surface temperature, air exchange, solar shading, and the temperature of conductive parts.
For example, air at 30°C and 70% relative humidity has a dew point near 24°C. If the inside wall or terminal cools below that value overnight, water can form even though the enclosure remains closed. A morning inspection may find droplets that disappear after sunlight warms the box, leaving corrosion as the only lasting evidence.
Which Enclosure Rating Is Enough?
NEMA 4X or an enclosure tested to IP66 is usually a stronger outdoor choice than NEMA 3R or IP54, especially where rain, salt, dust, or washdown exposure is expected. The rating does not replace correct cable-gland installation, drainage, pressure management, or condensation control.
NEMA 250 and IEC 60529 use different classification systems. NEMA 4X includes protection expectations for water, dust, and corrosion resistance, while the “X” relates to corrosion protection under the applicable NEMA construction and testing requirements. IP66 indicates dust-tight construction and protection against powerful water jets. Neither designation means the enclosure is hermetically sealed or internally humidity-free.
| Rating or construction | Environmental meaning | Suitable use | Important limitation |
|---|---|---|---|
| NEMA 3R | Outdoor rain, sleet, snow, and ice protection | Sheltered residential outdoor locations | Does not provide the corrosion resistance of 4X |
| NEMA 4 | Windblown dust and hose-directed water protection | General exposed outdoor mounting | Condensation can still occur internally |
| NEMA 4X | NEMA 4 protection plus corrosion-resistant construction | Coastal, industrial, and wet climates | Material and penetrations still require inspection |
| IP54 | Limited dust ingress and splashing water protection | Protected equipment areas | Weaker against jets and fine dust |
| IP65 | Dust-tight and water jets from any direction | Exposed equipment with moderate washing | Not the same as immersion protection |
| IP66 | Dust-tight and powerful water jets | High-rain or washdown exposure | Does not describe internal dew-point control |
A fiberglass-reinforced polyester enclosure may resist coastal corrosion better than painted mild steel, but stainless steel can be preferable where impact, UV exposure, or mounting hardware demands higher mechanical strength. The best material depends on salt concentration, ultraviolet exposure, chemical contaminants, temperature range, and the manufacturer’s certification.
Where Should Conduits Enter the Enclosure?
Conduits should normally enter through the bottom or a manufacturer-approved side location, with listed glands or hubs tightened to the specified torque. Top entries create a direct gravity path into the box and also make failed seals more damaging.
Every unused knockout needs an approved closure. Open conduit ends should receive a suitable sealing method that does not trap water against conductors, and underground conduits may need drain or moisture-management treatment according to the installation design. Expanding foam is not a universal electrical sealant and can interfere with cable insulation, inspection, or future maintenance.
Which Moisture-Control Method Works Best?
An anti-condensation heater is generally the most effective active method when an external or auxiliary power source is available and temperature swings are severe. A breathable pressure-equalizing vent reduces pressure-driven moisture exchange, while desiccant provides low-cost temporary control and conformal coating protects selected circuit boards rather than the whole combiner.
| Strategy | Typical specification or cost | Best operating condition | Limitation |
|---|---|---|---|
| Breather vent | $15-$40 per vent; hydrophobic membrane | Sealed outdoor box with pressure cycling | Does not remove all water vapor |
| Desiccant pack | $5-$25 per pack; replacement every 1-6 months | Small enclosure with low leakage | Saturates and needs inspection |
| Anti-condensation heater | 15-50 W; $30-$120 for heater alone | Cold nights and high dew-point swings | Requires power, thermostat, and clearance |
| Conformal coating | $20-$80 in coating materials; board dependent | Monitoring PCB exposed to humid air | Does not protect fuses or raw terminals |
| Improved enclosure | $300-$1,200 or more, string-count dependent | Repeated leakage or unsuitable box | Installation labor and rewiring add cost |
| Drain or vented gland | $10-$60 per component | Low-point water accumulation | Incorrect placement can admit water |
A vent is not a dehumidifier. It equalizes pressure and blocks liquid water through a membrane, but humid air can still pass and later condense. A heater is not a repair for an open gland either, because it may warm a defective enclosure while corrosion continues at the entry point.
Desiccant works best as a temporary measure or inside a small, well-sealed box. Installers should record the pack’s mass, color indicator, or saturation status rather than assuming that a packet remains active for a fixed calendar period. Large boxes with continuous air exchange can exhaust desiccant quickly.
Conformal coating has a narrow purpose. It can protect a clean, compatible printed circuit board, but it should not cover terminals, fuse clips, grounding points, connectors, heat-producing components, or pressure-sensitive components unless the component manufacturer approves the process.
How Can You Diagnose Humidity Damage Safely?
Diagnosis begins with de-energization, lockout, verification of absence of voltage, and documentation of the string configuration. A qualified solar electrician should then inspect the enclosure, test insulation resistance according to equipment instructions, and compare electrical results with historical string performance.
DC photovoltaic circuits can remain energized in sunlight even when an inverter is off. A DC disconnect may not isolate every upstream conductor, and a combiner can contain multiple sources. Arc-flash, shock, and stored-energy hazards make casual inspection unsafe.
| Diagnostic action | Tool or instrument | Useful finding | Decision produced |
|---|---|---|---|
| Visual inspection | Flashlight, camera, inspection mirror | Droplets, green copper salts, white oxidation | Identify moisture path and damaged parts |
| Torque verification | Calibrated torque screwdriver | Loose or over-tightened termination | Correct connection or replace hardware |
| Thermal scan | Calibrated infrared camera | Localized hot connection under load | De-energize and investigate resistance |
| Insulation test | Approved megohmmeter | Low or declining conductor-to-ground resistance | Isolate affected string or circuit |
| Continuity and polarity | Rated multimeter and test leads | Open fuse, reversed polarity, broken conductor | Confirm circuit configuration |
| Humidity logging | Temperature/RH sensor | Dew-point crossings and recurrence | Select heater, vent, sealing, or redesign |
Thermal imaging cannot prove that moisture caused a hotspot. High temperature may result from loose torque, damaged conductor strands, undersized hardware, overload, or a failing fuse clip. An infrared scan is a prioritization tool, not a substitute for electrical testing.
Megohmmeter voltage and test duration must follow the combiner, module, inverter, and component instructions. Sensitive monitoring boards, surge protective devices, and electronics may require disconnection before insulation testing. The technician should record test voltage, duration, temperature, humidity, circuit identity, and result so that a trend can be recognized.
What Visual Signs Matter Most?
Green or blue-green deposits usually indicate copper corrosion, while white or chalky material commonly indicates aluminum oxidation or zinc corrosion. Rusted fasteners, blackened plastic, swollen gasket sections, water marks, cloudy fuse windows, and salt crystals each indicate a different combination of moisture and contamination.
| Sign | Likely location | Probable mechanism | Immediate response |
|---|---|---|---|
| Green crust | Copper conductor or busbar | Copper oxidation in electrolyte | Replace pitted part and remove moisture source |
| White powder | Aluminum lug or enclosure hardware | Aluminum oxide formation | Check compatibility, torque, and corrosion |
| Black carbon trail | Plastic terminal surface | Electrical tracking or arcing | Replace component, do not polish and reuse |
| Cloudy fuse body | Fuse or holder | Internal moisture or overheating | Replace with approved equivalent |
| Droplets on roof | Interior upper wall | Dew-point condensation | Log temperature and inspect ventilation |
| Rust at gland | Cable entry hardware | Water retention or dissimilar metal contact | Replace gland and repair penetration |
Can a Wet Combiner Box Be Dried and Reused?
A wet solar combiner box can sometimes be reused when moisture was minor, no tracking or pitting occurred, insulation tests pass, and every entry and gasket defect is corrected. Drying alone is insufficient when fuse clips, terminals, surge protectors, busbars, or circuit boards show corrosion or heat damage.
The safe remediation sequence is:
- Isolate all sources, apply lockout procedures, and verify the DC circuit is de-energized.
- Photograph wiring, fuse positions, labels, cable routing, and moisture evidence before disassembly.
- Remove standing water with approved methods, then dry the enclosure under controlled conditions.
- Replace corroded, pitted, cracked, heat-discolored, or tracked components rather than brushing them into service.
- Clean light surface contamination with a compatible electrical contact cleaner and a non-metallic brush.
- Inspect cable insulation, gland compression, door seal, drain, unused knockouts, and enclosure cracks.
- Correct conductor-to-lug compatibility and tighten terminals to the component manufacturer’s torque.
- Perform polarity, continuity, insulation resistance, and functional checks before reconnection.
- Photograph the completed repair and record test results, humidity conditions, parts, and torque values.
Industrial duct seal putty may be appropriate for specific conduit arrangements, but the product must be compatible with the enclosure and wiring method. Sealant should not obstruct a required drain, cover a pressure-equalizing vent, or conceal a failed gland.
When Should the Entire Box Be Replaced?
Replacement is usually the better decision when corrosion has reached busbars, fuse clips, grounding points, enclosure hinges, or the door sealing surface. It is also warranted when the box has repeated insulation alarms after sealing, lacks suitable spare parts, or cannot maintain its environmental rating after repair.
| Condition | Cleaning and resealing | Component replacement | Full box replacement |
|---|---|---|---|
| Dry surface dust only | Usually sufficient | $0-$100 | Not normally justified |
| Light removable oxidation | Sometimes sufficient | $50-$250 | Not normally justified |
| Pitted fuse holder | Not sufficient | $75-$300 | Consider if obsolete |
| Tracked terminal block | Not sufficient | $50-$250 | Consider if multiple parts affected |
| Corroded busbar or grounding point | Not sufficient | $150-$600 | Often preferred |
| Cracked enclosure or failed door | Not sufficient | Not practical | $300-$1,200+ |
| Repeated moisture after repair | Not sufficient | Temporary only | Preferred after root-cause review |
Typical costs vary by string count, labor access, local electrical requirements, and whether a crane or lift is needed. A small residential repair may take 1-3 labor hours, while a commercial box with many strings can require a planned outage, retesting, and replacement documentation.
Why Does Moisture Return After Sealing?
Moisture returns when the original cause is air exchange or dew-point crossing rather than a single leak. Common causes include wet underground conduits, a missing pressure-equalizing vent, a cold north-facing wall, trapped water below the cable entry, and a gasket compressed unevenly by overtightened screws.
A box can also be sealed too tightly for its climate. Daily heating expands internal air, and nighttime cooling contracts it, creating pressure changes that draw humid air through microscopic gaps. A properly selected breathable vent can reduce that pumping effect without allowing liquid water through.
Use a temperature and relative-humidity sensor to log conditions inside the upper and lower parts of the enclosure. A sensor near the coldest metal surface is more informative than one mounted beside a heater or in direct sunlight. Alarm logic should focus on repeated dew-point crossings, rapid humidity rise, and insulation-resistance decline rather than one isolated humidity value.
Which Installer Mistakes Cause the Most Damage?
The highest-risk mistakes combine water direction with electrical incompatibility. A top-entry conduit, an unsealed unused knockout, a damaged gasket, or copper connected to an incompatible aluminum termination can create failure even in an otherwise well-rated enclosure.
- Entering through the top without a listed, weatherproof hub creates a gravity-fed leak.
- Overtightening door screws can bow a polymer door and produce uneven gasket compression.
- Leaving underground conduit ends unsealed allows humid air and condensation to breathe into the box.
- Mixing bare copper and aluminum without an approved connector or interface accelerates galvanic corrosion.
- Applying grease or sealant to a terminal without manufacturer approval can change contact resistance.
- Installing a desiccant packet beside a hot component can shorten packet life and create misleading readings.
- Drilling a field vent without preserving the enclosure certification can invalidate the environmental rating.
One practitioner rule is simple: inspect the bottom of the enclosure before inspecting the roof. Water often enters above but accumulates below, where it attacks grounding hardware and the lowest terminal row first.
How Much Do Prevention and Repair Cost?
Typical prevention costs range from $15-$40 for a breather vent to $300-$1,200 or more for a replacement outdoor combiner enclosure before labor. A heater, thermostat, sensor, conduit correction, and commissioning can raise the installed cost beyond the component price.
| Work item | Typical material cost | Typical labor time | Main cost variable |
|---|---|---|---|
| Replace gasket | $20-$120 | 1-2 hours | Enclosure model and access |
| Seal gland or knockout | $10-$60 each | 0.5-1 hour | Conduit size and rework |
| Add breather vent | $15-$40 each | 1-2 hours | Certified drilling or replacement door |
| Add heater and thermostat | $30-$120 heater; $20-$100 control | 2-4 hours | Available auxiliary power |
| Replace fuse holder or terminal | $25-$300 per part | 1-3 hours | String count and rewiring |
| Replace monitoring board | $150-$700 | 2-5 hours | Compatibility and commissioning |
| Replace complete combiner | $300-$1,200+ | 3-8 hours | DC isolation and cable length |
These are typical field estimates, not fixed market prices. Utility sites can incur much higher outage, access, testing, and lost-generation costs. A low-cost packet of desiccant is not economically attractive if a failed box causes several days of inverter downtime.
Which Design Fits Each Solar Installation?
Residential systems usually benefit from a certified NEMA 4X or IP66-rated box, bottom-entry wiring, sealed conduits, and an annual pre-rainy-season inspection. Commercial systems with repeated ground faults need humidity logging, documented torque checks, and an approved heater or vent strategy based on measured dew point.
| Installation situation | Preferred design | Monitoring practice | Inspection interval |
|---|---|---|---|
| Residential, temperate climate | NEMA 4 or 4X; bottom entries | Visual inspection and inverter history | Annually |
| Coastal residential | NEMA 4X fiberglass or corrosion-resistant metal | Inspect salt deposits and glands | Every 6-12 months |
| Tropical commercial site | NEMA 4X or IP66; vent plus heater assessment | Temperature/RH logger and insulation trend | Quarterly |
| Cold nights, dry days | Sealed box with dew-point control | Nighttime humidity and surface temperature | Before winter |
| Utility-scale field | Certified box with replaceable parts and sensors | SCADA alarm, thermal route, insulation trend | Scheduled quarterly or condition-based |
| Dusty agricultural site | Dust-tight enclosure with protected vent | Inspect membrane and contamination | Monthly to quarterly |
Utility-scale operators should place humidity and temperature sensors where they can detect the coldest practical location, then connect alarms to SCADA when the equipment supports it. A useful alarm may require persistent high humidity or repeated dew-point crossings, which reduces nuisance alerts caused by a brief morning event.
What Standards and Documentation Should Be Checked?
The enclosure certification, component instructions, local electrical code, and installation method must agree. In the United States, National Electrical Code requirements for photovoltaic wiring, disconnecting means, grounding, and equipment suitability commonly interact with the combiner design, while IEC 60529 and NEMA 250 describe enclosure protection through different test frameworks.
The nameplate should identify the enclosure rating, voltage, current, short-circuit suitability, environmental limits, and replacement parts. Installation records should include cable-gland models, torque values, fuse ratings, surge-protection replacement status, insulation test results, and photographs of conduit entries.
A higher rating is not permission to ignore the manufacturer’s instructions. Field drilling, unlisted glands, incorrect gasket material, or incompatible replacement hardware can invalidate the tested construction. In warranty disputes, documented moisture ingress and unauthorized modifications often matter as much as the original enclosure specification.
What Is the Practical Maintenance Schedule?
Inspect outdoor combiner boxes at least annually in ordinary climates and every 3-6 months in coastal, tropical, dusty, or industrial environments. Replace desiccant according to its indicator or measured saturation, not merely a generic calendar interval, because leakage and climate change consumption rates.
| Maintenance task | Normal interval | Harsh-climate interval | Acceptance criterion |
|---|---|---|---|
| Exterior and gland inspection | 12 months | 3-6 months | No cracks, gaps, corrosion, or loose hardware |
| Interior visual inspection | 12 months | 3-6 months | No droplets, deposits, tracking, or odor |
| Gasket inspection | 12 months | 6 months | Continuous, elastic, evenly compressed seal |
| Thermal scan under load | 12-24 months | 6-12 months | No abnormal localized temperature rise |
| Insulation-resistance test | Per owner plan | After any moisture event | Stable result within manufacturer limits |
| Desiccant check | 3-6 months | 1-3 months | Indicator shows usable capacity |
| Heater and thermostat test | 12 months | 6-12 months | Correct switching and safe temperature |
Do not open a box solely to satisfy a schedule if live DC hazards have not been controlled. Maintenance planning must include the electrical isolation procedure, weather conditions, replacement fuses, labels, and a commissioning test after closure.
Frequently Asked Questions
Can high humidity trip a solar inverter?
High humidity can contribute to inverter ground-fault, isolation, or insulation-resistance alarms when moisture creates leakage paths in a combiner box, cable, connector, or module circuit. The inverter alarm identifies a system symptom, not the exact location. Test strings individually and inspect the combiner before replacing the inverter.
Does a NEMA 4X box prevent condensation?
A NEMA 4X box resists specified external water and corrosion conditions, but it does not prevent internal condensation caused by dew-point crossings. Correct cable entries, pressure equalization, drainage, temperature control, and maintenance remain necessary. A heater or suitable breathable vent may be required in locations with large day-to-night temperature swings.
Is silica gel enough for a wet combiner box?
Silica gel is enough only for limited, trapped moisture inside a relatively tight enclosure, and it cannot correct an open gland, standing water, or continuous humid-air exchange. Use an indicator-equipped pack, place it away from heat, and replace or regenerate it when saturated. Persistent condensation requires root-cause correction.
Can corrosion on a fuse holder be cleaned?
Light surface contamination may be cleaned when the fuse holder remains mechanically sound and electrically approved for reuse. Pitting, loss of spring tension, black tracking, heat discoloration, cracked insulation, or increased contact resistance requires replacement. Abrasive polishing can remove plating and make future corrosion faster.
Should a combiner-box heater run continuously?
A combiner-box heater should normally operate through a thermostat or humidity and dew-point control rather than continuously. A 15-50 W heater can keep internal surfaces above the condensation threshold, but it needs approved power, adequate clearance, overtemperature protection, and verification that the enclosure remains within component temperature limits.
How long can a damaged combiner box last?
A damaged combiner box has no dependable remaining-life estimate because corrosion rate depends on salt, temperature, voltage, contamination, and mechanical damage. Light contamination may remain stable after correction, while a pitted high-current connection can overheat during the next high-output period. Replace safety-critical parts instead of forecasting a lifespan from appearance alone.
The Bottom Line
Humidity damage in a solar combiner box usually results from condensation, direct water ingress, contaminated surfaces, or incompatible metal connections. The strongest solution combines bottom-entry sealed wiring, a correctly selected NEMA or IP enclosure, pressure management, measured dew-point control, and documented electrical testing.
Use vents when pressure cycling is the main issue, heaters when cold-surface condensation is recurring, and desiccant only as a limited passive measure. Replace tracked, pitted, heat-damaged, or structurally corroded parts. Treat the exact keyword, humidity damage solar combiner box, as a fault-investigation problem rather than a product-label problem: find where moisture enters, determine what it has electrically changed, and verify that the repaired system remains dry and electrically stable.