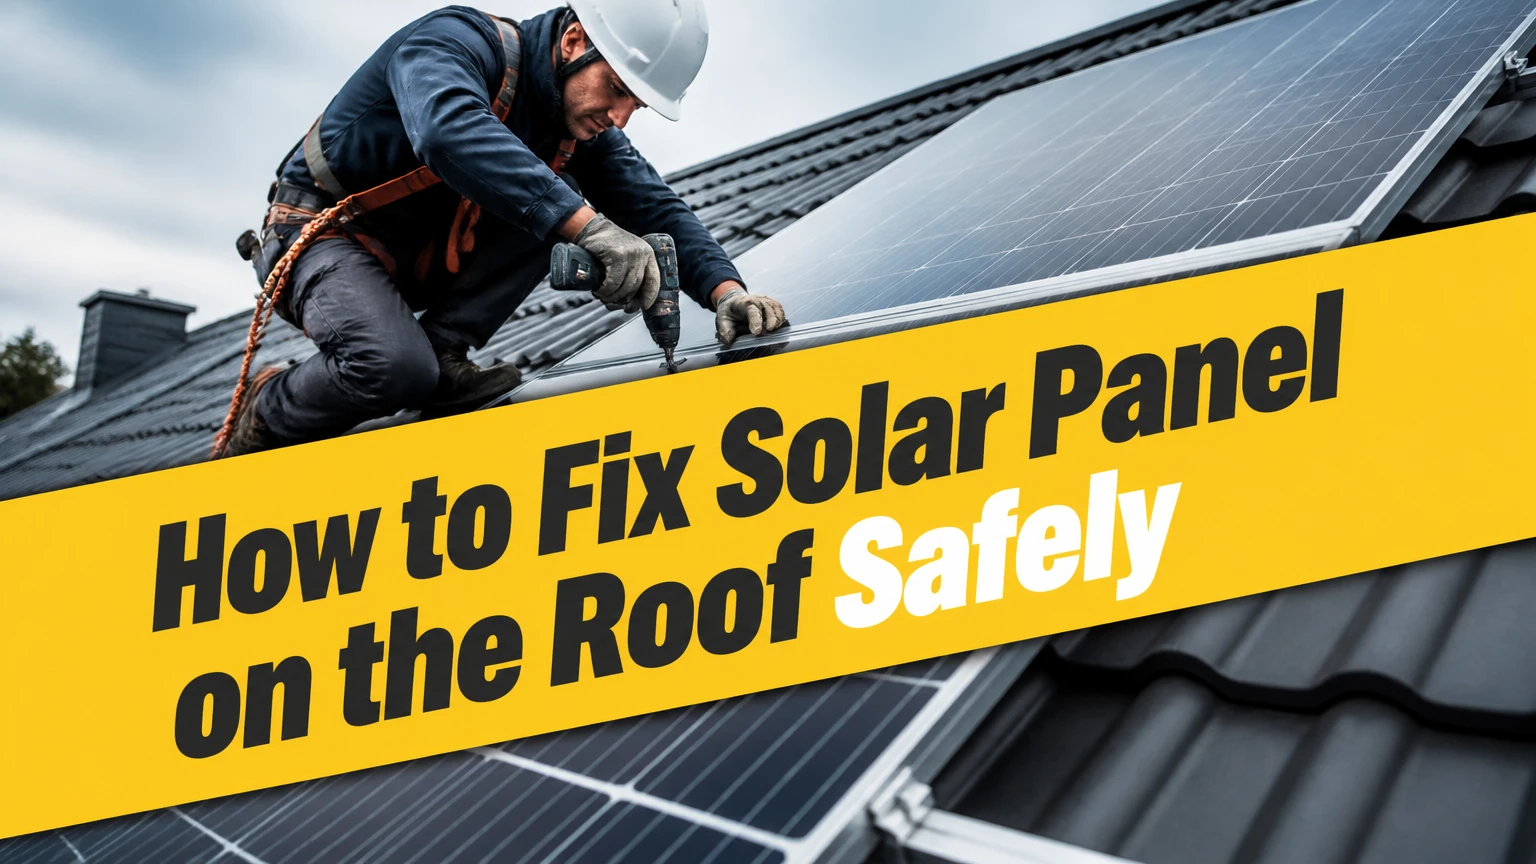
To fix a solar panel on the roof, first identify whether the problem is a loose module, failed attachment, damaged wiring, or roof leak, then isolate the electrical system and repair the roof-mounted hardware to its manufacturer specifications. Most homeowners should inspect from the ground or attic, while roof access, structural repairs, flashing replacement, and electrical work require trained professionals.
Key Facts
A solar panel must attach to structural framing or an engineered mounting system, not merely roof sheathing.
Flashing diverts water above the attachment; roof sealant alone is not a complete waterproofing method.
Typical residential modules weigh 40-50 pounds and add about 2.5-4 pounds per square foot with racking.
A rooftop solar repair commonly takes 1-4 hours for diagnosis and 1-2 days when modules must be removed.
Solar panels can still produce dangerous DC voltage after the utility supply is disconnected.
A grid-connected solar system normally shuts down during an outage unless it has approved backup equipment.
What Does Fixing a Solar Panel on a Roof Involve?
Fixing a roof-mounted solar panel means restoring four separate functions: structural attachment, waterproofing, electrical continuity, and panel alignment. A sound repair secures the module and racking against wind and snow, keeps water outside the roof assembly, protects cables from abrasion, and preserves the system’s grounding and production performance.
A panel itself is rarely the only failed component. The defect may be a cracked module, a loose mid-clamp, a corroded rail splice, a lag screw that missed a rafter, a damaged roof boot, or a connector exposed to moisture. Treating every problem with roofing cement can conceal the cause while allowing movement or electrical faults to continue.
The photovoltaic module converts sunlight into direct-current electricity. A microinverter converts power at each panel, whereas a string inverter receives DC from several modules and produces household alternating current. The utility interconnection, disconnects, grounding, rapid-shutdown equipment, and service-panel breaker form a regulated electrical system, not a simple appliance connection. The U.S. Department of Energy explains that grid-connected systems generally stop supplying household circuits during an outage to protect utility workers unless a properly configured storage or backup system is installed.
Is the Roof Ready for Solar Repair?
A roof is ready for solar repair only when its covering, framing, access conditions, and drainage can support the work. Do not reinstall panels on a roof that is near replacement, has active structural movement, or shows widespread brittle shingles, rot, ponding water, or failed underlayment.
Check these conditions before anyone climbs:
- Roof age: Asphalt shingles often have 15-30 years of expected service, depending on grade and climate. A roof with fewer than roughly 5-10 useful years remaining may justify reroofing before solar work.
- Framing: The installer must locate rafters or other approved structural members. A stud finder cannot reliably identify every roof framing condition through roofing layers.
- Roof slope: Low-slope roofs need a system designed for drainage, membrane compatibility, wind uplift, and ballast or attachment loads. A generic shingle mount is unsuitable.
- Obstructions: Chimneys, vents, skylights, valleys, parapets, and fire-access pathways determine the usable array area.
- Weather: Wet shingles, frost, high wind, heat-softened membranes, and lightning make roof work unsafe.
Typical roof loads and module dimensions
| Component or condition | Typical residential value | Design implication | Verification method |
|---|---|---|---|
| Solar module weight | 40-50 lb | Requires lifting plan and secure handling | Manufacturer datasheet |
| Module size | About 65-79 by 39 inches | Determines rail layout and clearances | Module datasheet |
| Module plus racking load | About 2.5-4 lb/ft² | Requires structural review | Engineer or permit plans |
| Rail attachment spacing | Commonly 48-72 inches, but variable | Must follow the racking manual | Stamped layout |
| Roof service life remaining | Preferably 10+ years | Avoids premature removal and reinstall | Roofing inspection |
| Flat-roof ballast | Project-specific | Dead load and wind calculations required | Structural engineer |
The 48-72-inch attachment range is a typical planning figure, not a universal rule. Snow, wind exposure, roof geometry, rail span, module orientation, and the specific racking listing can reduce that spacing.
How Do You Fix a Solar Panel on the Roof?
A safe repair follows eight stages: document the fault, isolate the system, inspect the roof, expose the attachment, correct the mount, reinstall the module, verify electrical work, and monitor for leaks or abnormal production. The most important success factor is using the exact racking and module instructions, because clamp zones, torque values, attachment spacing, and grounding methods differ between products.
Before you start
| Requirement | Typical value | Why it matters | Homeowner boundary |
|---|---|---|---|
| Diagnosis time | 30-90 minutes | Confirms the failure before disassembly | Ground and attic checks are reasonable |
| Minor clamp repair | 1-4 hours | May require panel removal and torque verification | Roof access needs training |
| Full attachment repair | 1-2 days | Includes flashing, rails, and inspection | Use a solar roofer |
| Typical repair cost | $300-$1,500 | Depends on access and parts | Obtain a written scope |
| Replacement module | $150-$500 equipment-only | Matching electrical characteristics matters | Installer should confirm compatibility |
| Required tools | Torque wrench, socket set, multimeter, fall protection | Prevents guesswork and overtightening | Electrical testing is qualified work |
Do not improvise with automotive hose clamps, household silicone, roofing nails, unlisted fasteners, or a replacement connector from a different manufacturer. Turn off the utility AC disconnect and follow the system shutdown procedure, but assume the modules and DC conductors remain energized in daylight.
Step 1: Document the fault from the ground
Photograph the array, suspected panel, roof penetrations, conduit, inverter display, and any ceiling or attic staining. Record the inverter fault code, date, weather, recent storms, production reduction, and whether the defect appears on one module or the whole system.
You will know this step worked when the installer can identify the suspected circuit and hardware without relying on memory. The common mistake is climbing immediately and moving the panel before recording its position, cable routing, or visible damage.
Step 2: Isolate the electrical system
Use the shutdown sequence printed on the equipment labels, which commonly includes the inverter, AC disconnect, DC disconnect, and main service equipment. Only a qualified person should open energized enclosures, test conductors, disconnect MC4-style connectors, or alter grounding and rapid-shutdown wiring.
You will know this step worked when the inverter displays the expected shutdown state and the work area has been controlled against accidental re-energization. The common mistake is assuming a dark inverter means the roof conductors are dead. Solar modules generate DC whenever sufficient light reaches them.
Step 3: Inspect the roof and framing
Inspect the attic below the suspected attachment for wet wood, rusted fasteners, daylight, mold, crushed insulation, or water tracks. From the roof, a professional checks shingle condition, flashing overlap, attachment position, rafter engagement, rail deformation, and evidence of uplift.
You will know the inspection is complete when the repair scope identifies the failed layer, such as a cracked tile, failed boot, loose clamp, or misplaced lag. The common mistake is repairing an interior stain without tracing water uphill, because roof leaks often travel along rafters before appearing indoors.
Step 4: Remove or lift the module safely
Remove the relevant end clamps and mid-clamps using the manufacturer’s procedure, then support the module with two people and protect its glass and frame. Never step on a module, drag its frame across rails, or let connectors hang against shingles.
You will know the panel is ready for repair when its frame, junction box, cables, connectors, and labels are intact and the module rests on padded supports. The common mistake is pulling on a cable to move the panel, which can damage the connector seal or junction-box strain relief.
Step 5: Repair the roof attachment and flashing
Replace a failed flashing plate, roof boot, tile hook, or attachment with a listed component that matches the roofing system and racking. For a penetrating mount, the fastener must pass through the approved flashing and roof layers into the structural member, with the hole size, embedment, sealant, and torque specified by the mount manufacturer.
Flashing must overlap in the direction of water flow. On asphalt shingles, the upper edge normally slides beneath the shingle course above the attachment, while the lower portion remains over the course below. Metal, tile, slate, and membrane roofs use different details.
You will know the repair is sound when the attachment is centered in the approved framing member, the flashing lies flat, the fastener has documented embedment, and no water path is blocked. The common mistake is filling a missed rafter hole with sealant and calling the roof waterproof. Sealant can deteriorate, and it cannot restore structural capacity.
Step 6: Reinstall and clamp the module
Reposition the panel within the manufacturer’s clamp zones, maintain the specified inter-module gap, and tighten end clamps and mid-clamps with a calibrated torque wrench. Secure cables beneath the module with compatible clips so they cannot rest on roofing, sharp rail edges, or standing water.
You will know the module is correctly mounted when the frame sits evenly, clamps do not overlap prohibited areas, cables have strain relief, and the array alignment matches adjacent panels. The common mistake is overtightening clamps, which can distort the frame or stress the glass, or under-tightening them, which permits wind movement.
Step 7: Restore electrical connections and test
A qualified solar electrician reconnects module connectors, equipment grounding, bonding jumpers, conduit, disconnects, rapid-shutdown devices, and inverter communications as required. Testing may include polarity, insulation resistance, open-circuit voltage, operating current, grounding continuity, and inverter error review.
You will know commissioning is complete when the system passes required tests, the inverter reports normal operation, and the repaired module produces output consistent with neighboring modules under comparable sunlight. The common mistake is swapping connectors from different product families because they appear to fit. Similar-looking connectors may have incompatible contact geometry or sealing performance.
Step 8: Test the roof after rain
Inspect the attic during or after the next substantial rainfall, then check the repaired attachment and ceiling area for moisture. Monitor production for several sunny days and compare the repaired module with nearby modules after accounting for shade, orientation, and inverter architecture.
You will know the repair worked when the roof remains dry, the array is mechanically stable, and production returns to the expected range. The common mistake is closing the job after a dry-weather visual inspection.
Which Solar Mounting and Inverter Options Fit Each Roof?
The appropriate solar equipment depends on roof covering, shading, structural capacity, service-panel limits, and whether the system must provide backup power. Monocrystalline modules are usually the space-efficient choice, but the mounting attachment and electrical architecture matter more than module color or cell branding.
| Option | Typical specification | Best-fit roof or condition | Main limitation |
|---|---|---|---|
| Monocrystalline module | About 20-23% efficiency | Small roof with high energy demand | Higher equipment price |
| Polycrystalline module | About 15-18% efficiency | Large roof with cost-sensitive design | More area for equal output |
| Thin-film module | About 10-13% efficiency | Large low-load surfaces or specialty roofs | Lower power density |
| Railed penetrating mount | Aluminum rails with roof attachments | Asphalt shingles and many tile layouts | Roof penetrations require flashing |
| Standing-seam clamp | Metal-seam attachment | Standing-seam metal roof | Must match seam profile and load rating |
| Ballasted rack | Concrete or engineered ballast | Flat commercial or membrane roof | Adds substantial dead load |
| String inverter | One central conversion unit | Unshaded, consistent array | Shade can reduce string output |
| Microinverters | One inverter per module | Multiple roof orientations or shade | More rooftop electronics |
| DC optimizers | Module-level control plus string inverter | Partial shade and long strings | Adds components and service points |
A microinverter does not make rooftop work safe. It can reduce some DC wiring complexity, but a roof still contains fall hazards, module voltage, sharp edges, and weather exposure. A ballasted flat-roof system does not automatically eliminate leaks either, because installers may still use penetrations for conduit, equipment, or restraint.
Roof-specific attachment choices
| Roof covering | Common attachment | Typical repair concern | Specialist needed |
|---|---|---|---|
| Asphalt shingle | Flashed lag attachment | Incorrect flashing overlap or crushed shingles | Solar roofer |
| Clay or concrete tile | Tile hook or replacement tile detail | Broken tiles and poor hook positioning | Tile-experienced installer |
| Standing-seam metal | Seam clamp | Clamp mismatch or seam deformation | Metal-roof installer |
| Corrugated metal | Manufacturer-approved screw and gasket detail | Gasket aging and unsupported sheet | Solar and metal-roof specialist |
| EPDM or TPO membrane | Curbs, bonded details, or ballast | Membrane compatibility and puncture risk | Commercial roofing specialist |
| Slate | Specialty hooks and careful cutting | Brittle slate and hidden damage | Slate roofer |
How Much Does Solar Panel Roof Repair Cost?
A typical minor solar panel roof repair costs $300-$1,500, while a repair requiring module removal, new flashing, damaged roofing, or electrical troubleshooting can cost $1,500-$5,000 or more. Local labor rates, roof height, access, replacement parts, permitting, and whether an electrician and roofer must coordinate drive the final price.
| Work scope | Typical cost range | Typical duration | Main cost driver |
|---|---|---|---|
| Ground diagnosis and monitoring | $0-$250 | 30-90 minutes | Service-call policy |
| Replace clamp or cable clip | $300-$800 | 1-4 hours | Roof access and shutdown |
| Replace one flashed attachment | $600-$1,500 | 4-8 hours | Roofing layers and tile work |
| Repair roof under one module | $800-$2,500 | 1 day | Roofing damage and removal |
| Replace one module | $500-$1,200 installed | 2-6 hours | Matching module and labor |
| Multi-panel leak repair | $1,500-$5,000+ | 1-3 days | Array removal and reroofing |
| Reroof with solar removal and reinstall | Project-specific | Several days to weeks | Roof area and system size |
A full new residential solar system is a separate project. Typical U.S. installed pricing often falls around $2.80-$3.65 per watt before incentives, so a 6-kilowatt array may cost approximately $16,800-$21,900 before local rebates or tax treatment. The Database of State Incentives for Renewables and Efficiency, maintained by the North Carolina Clean Energy Technology Center, tracks incentives by U.S. state and territory.
What Are the Common Failure Modes?
The most common rooftop solar failures are missed structural members, inadequate flashing, loose clamps, cable abrasion, incompatible connectors, and roof deterioration hidden beneath the array. Each failure needs a different remedy, so visual symptoms alone should not determine the repair.
| Symptom | Probable cause | Safe first check | Corrective action |
|---|---|---|---|
| Water stain below array | Failed flashing or roof covering | Attic water trail | Remove module and rebuild roof detail |
| Panel visibly shifted | Loose clamp or rail attachment | Ground photograph | Torque or replace listed hardware |
| One panel produces little power | Shade, connector, module fault | Inverter monitoring | Electrical diagnostic and module test |
| Ground-fault alarm | Wet cable or insulation damage | Record fault and shut down | Qualified insulation and wiring test |
| Corroded rail or fastener | Dissimilar metals or moisture | Visual inspection | Replace compatible bonded hardware |
| Cracked glass | Impact, thermal stress, or handling | Ground-level photograph | Replace module, do not repair glass |
| Repeated roof leaks | Wrong attachment detail | Roofing inspection | Rebuild flashing and repair substrate |
Loose cables are more than an appearance problem. Wind movement can abrade insulation against asphalt granules or metal edges, eventually causing an insulation fault. The U.S. Department of Energy identifies galvanic corrosion as a photovoltaic-system concern when dissimilar metals and moisture interact, making compatible hardware and drainage part of long-term reliability.
Can You Fix a Solar Panel Yourself?
A homeowner can safely document damage, check inverter notifications, inspect the attic, clear nearby vegetation, and contact the installer. A homeowner should not climb onto a roof without fall protection, disconnect energized PV connectors, replace roof attachments, open an inverter, or modify a grid connection without the training and approvals required locally.
The Occupational Safety and Health Administration identifies falls as a leading cause of death in construction, and its residential fall-protection guidance addresses work near roof edges. A low roof does not remove the hazard, because brittle coverings, wet surfaces, ladders, and unexpected movement create separate risks.
Use a licensed solar contractor or qualified electrician when the job involves:
- Roof penetrations, flashing, tiles, slate, or membrane repairs.
- Module removal, DC connectors, grounding, rapid shutdown, or inverter wiring.
- Structural framing, storm damage, fire damage, or insurance claims.
- Utility interconnection, service-panel changes, or permit revisions.
- Any roof edge without compliant access and fall protection.
A practical exception is a ground-mounted or low-voltage portable panel system that never connects to a building or utility. That equipment follows different instructions and should not be treated as equivalent to a permanently roof-mounted array.
What Should You Check After a Repair?
After a solar roof repair, verify mechanical stability, roof drainage, electrical performance, documentation, and warranty status. Request photographs of concealed flashing, the manufacturer’s torque values, replacement-part numbers, electrical test results, permit updates, and the revised array map.
Check these items over the following week:
- Compare the repaired module’s output with neighboring modules under similar sunlight.
- Inspect the attic after rain rather than relying only on exterior sealant.
- Confirm inverter and monitoring portals show no recurring fault.
- Look for cable loops touching the roof or sharp hardware.
- Keep invoices and serial numbers for the module, inverter, racking, and roof work.
- Ask whether the repair affects the roof warranty, module warranty, or installer workmanship warranty.
A repair can restore electricity while leaving a warranty problem unresolved. Roofing and solar warranties often assign responsibility differently, so written documentation protects the homeowner if moisture or production issues return.
FAQ
Will solar panels cause my roof to leak?
Properly designed solar attachments should not cause leaks, but incorrect flashing, missed rafters, cracked tiles, deteriorated roofing, and poorly sealed conduit penetrations can. A leak under an array needs both a roofing inspection and an attachment inspection. Reapplying surface sealant without exposing the failed detail is usually a temporary response.
Can solar panels be installed without drilling holes?
Yes, some flat-roof systems use engineered ballast, and standing-seam metal roofs can use seam clamps without roof penetrations. Ballasted systems still impose wind and dead-load requirements, while seam clamps must match the exact roof profile. Asphalt shingle and many pitched tile roofs normally require approved mechanical attachments.
How far apart should solar roof mounts be?
Solar mount spacing is commonly about 48-72 inches, but the correct distance comes from the racking manufacturer’s span tables and the site’s wind, snow, roof, and module conditions. A wider spacing can overload rails or framing; a closer spacing can add cost without improving the approved design.
Can I replace one broken solar panel?
A single module can usually be replaced if the replacement has compatible electrical characteristics, dimensions, connector requirements, clamp zones, and monitoring compatibility. A different wattage module may alter string voltage or current. A qualified installer should update the array record and test the circuit after replacement.
Will solar panels work during a power outage?
A standard grid-tied solar system usually shuts down during an outage to prevent electricity from flowing into utility lines. Solar can power selected circuits during an outage only when the installation includes compatible batteries, an approved backup inverter, transfer equipment, and the required controls.
Should I remove solar panels before reroofing?
Usually, yes. Reroofing beneath an array without removing the modules can leave hidden damaged shingles, prevent proper underlayment installation, and complicate flashing. Coordinate the roofer, solar installer, permits, and utility requirements before scheduling removal, because panels must be stored and reinstalled without frame or connector damage.
The Bottom Line
To fix a solar panel on the roof, identify the exact failure before touching the array, isolate the system without assuming the DC side is de-energized, and restore the structural, waterproof, and electrical details with listed components. Homeowners can document symptoms and inspect safely from the ground or attic, but roof attachments, flashing, module removal, and wiring belong to qualified solar and roofing professionals. Correct flashing, verified framing, manufacturer torque, protected cables, and post-repair rain and production checks determine whether the repair lasts.