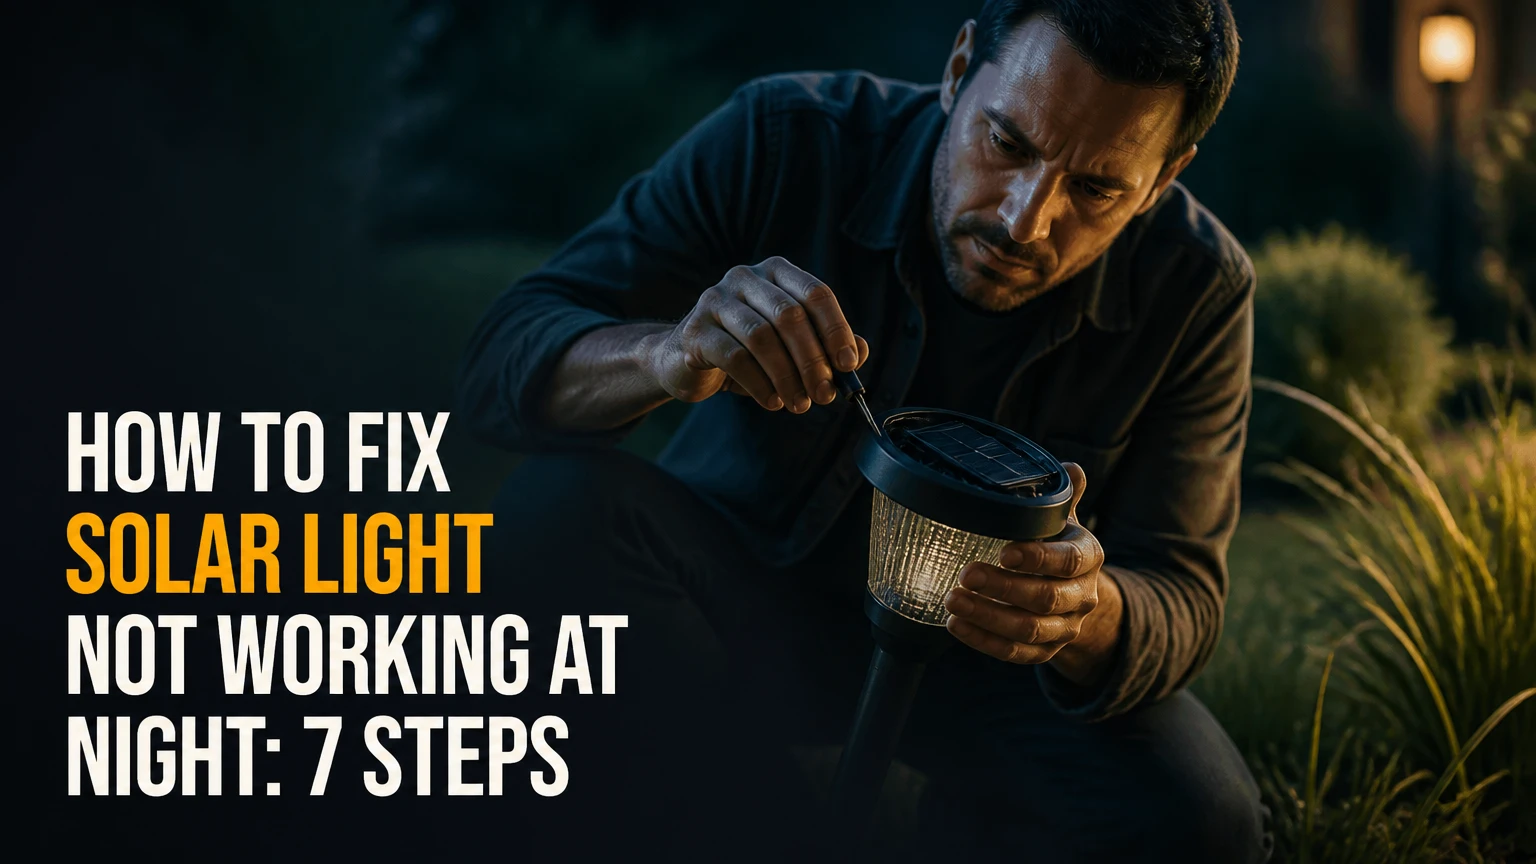
To fix a solar light not working at night, trace the energy path from sunlight to the LED: switch, panel, battery, controller, sensor, wiring, and lamp. Start by covering the panel in darkness, then clean and reposition the unit, test or replace the rechargeable battery, and inspect corrosion or water damage.
Key Facts at a Glance
- A solar light needs a functioning panel, rechargeable battery, controller, darkness sensor, LED, and electrical connections.
- A single NiMH rechargeable cell is usually rated at 1.2 volts nominal, but resting voltage alone does not prove battery capacity.
- Most small solar garden lights need several hours of unobstructed direct sunlight, while winter shade and cloudy weather reduce runtime.
- Standard alkaline batteries must not replace rechargeable NiMH or lithium batteries in a solar charging circuit.
- Covering the panel for 30-60 seconds is a useful sensor test, but it does not prove that the battery can hold a charge.
- A swollen, leaking, burned, or badly corroded battery should be removed and recycled rather than recharged.
How Does a Solar Light Work?
A solar light converts daylight into stored electrical energy, then releases that energy through an LED after the controller detects darkness. The U.S. Department of Energy describes the basic principle this way: “Solar technologies convert sunlight into electrical energy.”
A typical garden light has a small photovoltaic panel, one rechargeable cell, a charging and protection circuit, an LED, and either a separate photocell or a sensor that uses panel voltage. During daylight, panel voltage tells the controller that charging is possible and that the lamp should remain off. At dusk, panel voltage falls, the controller changes state, and battery current reaches the LED.
The energy path creates a useful diagnostic order:
| Component | Daytime function | Nighttime failure symptom | Practical test |
|---|---|---|---|
| Photovoltaic panel | Produces charging voltage | Short runtime or no light | Clean panel, measure output in sun |
| Rechargeable battery | Stores daytime energy | Dim light or no light | Check chemistry, voltage, leakage |
| Controller | Regulates charge and switching | Stays on, stays off, erratic behavior | Switch test, board inspection |
| Photocell or panel sensor | Detects darkness | Light works only when covered | Cover panel for 30-60 seconds |
| LED and wiring | Emits light and carries current | No illumination despite charge | Inspect connectors and LED board |
The system can fail at one point while every other component appears normal. A clean panel cannot compensate for an open battery connection, and a new battery cannot overcome a controller damaged by water.
Before You Start
A basic solar-light diagnosis takes 10-20 minutes and costs $0-$15 if cleaning and inspection solve the problem. Battery replacement typically costs $3-$12 for a small light, while a complete decorative unit commonly costs $10-$40.
| Requirement | Typical amount or range | Why it matters |
|---|---|---|
| Diagnostic time | 10-20 minutes | Covers visual checks and darkness testing |
| Recharge time | 1-3 sunny days | Separates low charge from hardware failure |
| Replacement battery | $3-$12 | Common cost for AA, AAA, or 18650 cells |
| Tools | Multimeter, cloth, small screwdriver | Tests voltage and exposes connections |
| Cleaning solution | Water plus mild soap | Removes dust without scratching panel |
| Safety equipment | Eye protection, gloves | Useful for leaking cells and corrosion |
Before opening the housing, move the light to a dry work area and switch it off. Do not probe a large solar street-light battery cabinet or controller unless you understand its DC voltage, isolation procedure, and manufacturer instructions.
How to Fix Solar Light Not Working at Night
Step 1: Test the Light in Complete Darkness
Cover the solar panel completely with opaque material for 30-60 seconds, or test the unit in a dark room with the switch set to On or Auto. If the LED illuminates, the battery, controller, LED, and sensor are probably functional enough to operate, so inspect daylight placement and nearby light sources next.
A hand is usually insufficient because light can leak around the panel. A folded dark cloth or cardboard placed directly over the panel gives a more reliable result, but do not leave fabric on a hot lamp for extended periods.
You’ll know it worked when: the LED turns on within several seconds of full panel coverage.
Common mistake: testing beneath a porch lamp, streetlight, or bright window. A photocell can interpret that illumination as daytime and keep the lamp off.
Step 2: Confirm the Switch, Shipping Tab, and Mode
Set the switch to On or Auto, then look for a plastic battery tab or transport insulator that was not removed during installation. Some products use a recessed slider, while others have a push button that cycles through brightness or motion modes.
A new solar light can appear defective because its battery compartment still contains a pull tab. An older unit may have a switch whose contacts are oxidized or mechanically loose. Operate the switch several times while observing whether the LED flickers during the covered-panel test.
You’ll know it worked when: the light responds consistently to the same switch position and darkness test.
Common mistake: assuming “On” means continuous daytime illumination. Many solar lights still require darkness before the controller permits the LED to run.
Step 3: Clean the Solar Panel Correctly
Wipe the panel with a damp microfiber cloth, using mild dish soap only when greasy residue or bird droppings remain. Rinse residue away and dry the surface, because dust films and salt deposits reduce the light reaching the photovoltaic cells.
Do not use abrasive pads, powdered cleaner, razor blades, or solvent-based products. Scratches and cloudy plastic permanently reduce transmission. The U.S. Department of Energy identifies shading and soiling as factors that reduce photovoltaic output, although the effect varies with panel design and contamination thickness.
You’ll know it worked when: the panel is transparent or uniformly glossy, with no droppings, mineral film, or leaf shadow.
Common mistake: cleaning at night and declaring success immediately. Cleaning improves charging during the next daylight period; it does not instantly refill a depleted battery.
Step 4: Correct Sunlight and Nearby-Light Problems
Place the panel where direct sunlight reaches it for at least 6 hours when possible, with the clearest exposure around midday. Direct sun is much more useful than bright shade, and seasonal shadows from trees, fences, buildings, or roof overhangs can change after installation.
Keep the panel away from porch lights, landscape lighting, and illuminated signs. A nearby lamp can prevent the photocell from entering night mode even when the battery is fully charged.
| Placement condition | Likely result | Corrective action | Typical effect |
|---|---|---|---|
| Full midday sun, 6-8 hours | Normal charging | Keep position | Best runtime |
| Bright shade, 2-4 hours | Dim or short operation | Move into direct sun | Longer runtime |
| Seasonal tree shadow | Works in one month, fails later | Map shadows at noon | Restore exposure |
| Porch or streetlight nearby | No night activation | Relocate or shield sensor | Restore dusk detection |
| North-facing wall in winter | Weak charging | Change orientation | Reduce winter failure |
Measure sunlight over a full day rather than judging brightness at one moment. A panel can look bright at 10 a.m. but lose most charging time under a building shadow from noon onward.
You’ll know it worked when: the light remains on longer after one or two sunny days in its new position.
Common mistake: counting daylight hours instead of direct-sun hours. Sixteen hours of gray winter daylight may produce less usable energy than six hours of clear direct sun.
Step 5: Give the Battery a Controlled Recharge
Switch the light off, if the design permits, and leave the panel in unobstructed sunlight for 2-3 full days. This “bank charging” reset helps when several cloudy days or repeated short nighttime cycles have left a healthy battery undercharged.
The reset cannot restore lost battery capacity. Nickel-metal hydride batteries gradually lose usable capacity, and lithium cells can enter protection states after over-discharge or abnormal temperature. Panasonic’s nickel-metal hydride technical guidance warns that charging conditions must match the cell and charger design; a solar product’s controller is therefore part of the battery specification, not an interchangeable accessory.
You’ll know it worked when: the light produces a stable nighttime glow after the second or third sunny day.
Common mistake: leaving the lamp switched on during the reset. The LED may consume the same energy the panel is trying to store.
Step 6: Test and Replace the Rechargeable Battery
Open the battery compartment only after switching the light off. Photograph the original cell, record its chemistry, size, voltage, connector, polarity, and capacity, then replace it with a rechargeable cell that matches those specifications.
A single NiMH cell is commonly marked 1.2 V nominal. A full cell may measure around 1.4 V immediately after charging and then settle lower, so a reading of 1.2 V is not a universal pass threshold. Voltage under load or runtime after a full charge provides better evidence of capacity.
| Battery marking | Common use | Replacement rule | Do not substitute |
|---|---|---|---|
| AA NiMH, 1.2 V | Small garden lamp | Match AA size and polarity | AA alkaline, 1.5 V |
| AAA NiMH, 1.2 V | Compact pathway lamp | Match capacity and contacts | Disposable AAA |
| 18650 Li-ion, 3.6-3.7 V | Larger floodlight | Match protected-cell requirement | NiMH AA |
| LiFePO4, 3.2 V | Dedicated solar fixture | Match controller chemistry | Standard Li-ion |
| Sealed 12 V pack | Street or commercial system | Use specified pack | Individual random cells |
Replace the battery when it leaks, swells, overheats, shows severe corrosion, or loses its charge within minutes. Energizer’s rechargeable battery guidance recommends using the correct charger system and avoiding damaged cells, principles that also apply to integrated solar products.
You’ll know it worked when: the replacement battery charges during the day and powers the LED for a measurable period after darkness.
Common mistake: installing a disposable alkaline battery. An alkaline cell is not designed for repeated solar charging and may leak or damage the circuit.
Step 7: Inspect Wiring, Contacts, and Water Damage
Examine the battery contacts, switch terminals, panel wires, LED connector, and circuit board for green corrosion, white deposits, loose crimp connections, chewed insulation, or cracked solder joints. Gently tug each wire; a wire that moves independently of its terminal needs repair.
Use a multimeter on the correct DC voltage range. Measure the battery first, then check whether the panel produces voltage in bright sunlight, but avoid shorting adjacent board contacts with a probe tip. Small garden-light circuits often operate at low voltage, while security and street systems can contain higher-energy battery packs.
| Finding | Probable fault | Repair approach | Replace instead when |
|---|---|---|---|
| Green contact corrosion | Moisture at battery terminal | Clean or replace contact | Metal is deeply eaten away |
| Broken panel wire | Open charging path | Resolder or replace wire | Panel glass is cracked |
| White crust near cell | Battery leakage | Remove cell, clean housing | Board traces are damaged |
| Water inside housing | Failed seal or condensation | Dry, inspect gasket | Controller is burned |
| LED board dark with charge | LED or driver fault | Replace matching module | Parts are unavailable |
Water ingress is often the real cause behind recurring corrosion. Drying the housing may restore operation briefly, but a missing gasket, cracked lens, or open cable entry must also be corrected.
You’ll know it worked when: the battery charges, the covered-panel test activates the lamp, and no connection interrupts when the housing is gently moved.
Common mistake: applying contact cleaner without disconnecting the battery. Some products attack plastics, and liquid residue can create new leakage paths.
What Do the Multimeter Readings Mean?
A multimeter helps separate a depleted battery from a failed charging circuit, but a single open-circuit voltage reading cannot measure stored capacity. Test a small light with the battery disconnected from the circuit when the manufacturer allows it, and keep the meter leads from touching both battery terminals accidentally.
| Test point | Typical observation | Interpretation | Next action |
|---|---|---|---|
| NiMH cell at rest | About 1.1-1.4 V | Voltage is plausible | Perform runtime test |
| Li-ion cell at rest | About 3.0-4.2 V | Depends on charge state | Match protection design |
| Panel in bright sun | Variable DC output | Shows panel and light exposure | Compare with product rating |
| Battery during LED load | Voltage falls sharply | Weak cell or poor contact | Replace cell or clean contact |
| No panel output in sun | Near 0 V | Broken panel, wire, or probe setup | Inspect wiring and panel |
Readings vary with temperature, illumination angle, battery state, and circuit connection. A NiMH cell that reads 1.3 V can still have very low capacity, while a cell at 1.15 V may recover after charging. Runtime remains the practical test for inexpensive garden lights.
Why Does a Solar Light Work During the Day but Fail at Night?
A solar light that works during the day but fails at night usually has a sensor or controller problem, because the LED should be disabled during charging and enabled only when panel voltage falls. If the light illuminates when the panel is covered, the night-switching circuit is probably functioning.
Some products appear to work in daylight because the LED is being tested manually, not because the solar system is charging. If the light turns on under a covered panel but goes dark after a few minutes, suspect low battery capacity. If it never responds to darkness, inspect the switch, sensor, controller, and artificial light around the panel.
A dusk delay of several seconds is normal. A delay of 30 minutes is not typical for a simple garden light and suggests sensor obstruction, control programming, or a failing controller.
Why Does a Solar Light Stay on All Day?
A solar light that stays on during daylight usually has a covered or failed light sensor, a disconnected panel, a controller fault, or a switch mode that forces continuous operation. Clean the panel, verify its wire connection, and move the light away from artificial shade or nearby bright fixtures.
A disconnected panel can falsely resemble darkness because the controller no longer receives the voltage signal used for daytime detection. On some models, a separate photocell sits beside the panel and may be blocked by dirt, tape, insects, or a decorative cover.
Do not leave an always-on light operating while diagnosing it. Continuous daytime operation drains the battery and can make a sensor problem look like a battery problem.
Which Battery Should Replace a Solar Light Battery?
The correct replacement battery matches the original chemistry, nominal voltage, physical size, polarity, connector, and charging requirements. NiMH AA and AAA cells are common in low-cost garden lights, while lithium-ion and LiFePO4 packs appear in larger lights that use a chemistry-specific controller.
Capacity in milliamp-hours is a secondary match. A higher-capacity cell may charge too slowly in the available sunlight, physically fail to fit, or exceed the controller’s intended charging conditions.
| Original specification | Suitable replacement | Runtime expectation | Important limitation |
|---|---|---|---|
| 600 mAh NiMH AA | 600-1000 mAh NiMH AA | 4-8 hours typical | Higher capacity needs longer sun |
| 300 mAh NiMH AAA | 300-600 mAh NiMH AAA | 3-6 hours typical | Small panel limits charge rate |
| 2200 mAh 18650 Li-ion | Protected 18650, same voltage | 6-12 hours typical | Protection and polarity matter |
| 3.2 V LiFePO4 pack | Matching LiFePO4 pack | 8-14 hours typical | Li-ion replacement is unsafe |
| 12 V sealed pack | Manufacturer-specified 12 V pack | System-dependent | Professional service may be required |
Capacity estimates are typical field ranges, not guarantees. LED brightness, controller current, panel wattage, temperature, and programmed runtime can change results substantially.
Can Cloudy Weather Stop Solar Lights?
Cloudy weather can prevent a solar light from reaching full charge, especially when the panel is small and the lamp runs at high brightness. Diffuse daylight still produces some power, but several overcast days can reduce nighttime runtime to a few hours or eliminate illumination entirely.
Wait for two clear days before replacing a battery after prolonged bad weather. Winter also reduces performance through shorter days, lower sun angles, snow cover, and colder battery temperatures. Brush snow away carefully and never scrape a panel with a metal tool.
A security floodlight with a large panel may tolerate cloudy conditions better than a decorative pathway lamp. Comparing the two without considering panel area and LED power leads to incorrect diagnosis.
How Do You Fix a Solar Motion Sensor Floodlight?
Fix a solar motion sensor floodlight by separating charging, dusk detection, motion detection, and LED output tests. First cover the panel to confirm night mode, then walk across the sensor’s field at its rated distance, commonly 3-10 meters, while adjusting sensitivity and duration controls.
| Floodlight symptom | Most likely area | Test | Correction |
|---|---|---|---|
| No light at night | Battery or power path | Cover panel, inspect battery | Charge or replace battery |
| Light works only nearby | Motion sensor range | Walk at 3, 6, 10 m | Adjust angle or sensitivity |
| Light triggers constantly | Sensor interference | Observe branches, traffic, animals | Reduce sensitivity |
| Light stays on too long | Timer setting | Check duration dial | Set 30-120 seconds |
| Brightness fades quickly | Battery capacity | Compare first and last minute | Replace matched cell |
Motion sensors can react to heat movement from vehicles, HVAC exhaust, or sun-warmed surfaces. Mounting height and sensor angle matter as much as the sensitivity dial, so repositioning may solve a problem that a battery replacement would not.
How Do You Fix a Solar Street Light?
A solar street light requires system-level diagnosis because its panel, charge controller, battery bank, LED driver, and lighting schedule may operate at 12 V, 24 V, or a higher nominal system voltage. Check the manufacturer’s wiring diagram, controller display, fuses, and fault codes before measuring terminals.
Do not treat “above 12 V” as a universal battery test. A 12 V lead-acid battery, a 12 V lithium pack, and a 24 V solar system have different normal voltage ranges, and some systems expose hazardous stored energy even when the lamp is switched off.
For municipal, commercial, or pole-mounted equipment, the sensible repair boundary is external inspection, panel cleaning, fuse review, and controller diagnostics by an authorized technician. The International Electrotechnical Commission publishes photovoltaic installation and safety standards that emphasize system-specific electrical protection rather than improvised component substitution.
Common Mistakes and How to Fix Them
| Mistake | Why it fails | Recovery | Prevention |
|---|---|---|---|
| Using alkaline batteries | Charging can cause leakage | Install correct rechargeable cell | Photograph original marking |
| Testing under porch light | Sensor detects false daytime | Test in a dark room | Relocate or shield light |
| Replacing battery immediately | Shade may be the real fault | Check sun path first | Inspect seasonal shadows |
| Scrubbing panel with abrasive pad | Scratches reduce light transmission | Replace badly clouded cover | Use microfiber cloth |
| Trusting voltage alone | Voltage does not equal capacity | Perform nighttime load test | Compare runtime |
| Sealing every vent with silicone | Traps condensation and heat | Restore intended drainage | Replace gasket correctly |
One counterintuitive rule matters most: a panel can be electrically healthy and still fail to charge the battery because its actual daily sunlight is inadequate. Panel output is governed by exposure over time, not by whether the surface looks intact.
Another practitioner rule is to diagnose the cheapest reversible fault first. Cleaning, darkness testing, switch inspection, and placement changes cost nothing; opening a sealed controller or soldering a board should come later.
Repair or Replace: Which Option Makes Sense?
Repair is usually worthwhile when the housing, panel, and LED remain sound and the fault is a battery, contact, switch, or wire. Replacement is more sensible when water has damaged the circuit board, the panel glass is cracked, or the required battery costs more than a comparable new fixture.
| Repair option | Typical cost | Time | Expected benefit | Best use |
|---|---|---|---|---|
| Clean panel and contacts | $0-$5 | 10-15 minutes | Restores lost charging or contact | Dirty garden light |
| Replace NiMH cell | $3-$12 | 15-30 minutes | Restores stored capacity | Two-year-old lamp |
| Repair wire or terminal | $2-$10 | 20-45 minutes | Restores open circuit | Chewed or corroded cable |
| Replace controller | $10-$35 | 30-90 minutes | Restores switching or charging | Modular floodlight |
| Replace complete fixture | $10-$150 | 15-60 minutes | Avoids uncertain board repair | Sealed or water-damaged unit |
Battery replacement every 1-3 years is a typical expectation for inexpensive outdoor solar lights, but climate, charge cycles, and battery quality change the interval. A light that operates through many winter nights may wear its battery sooner than a decorative unit used for a short summer display.
When Should You Stop Repairing the Light?
Stop DIY repair when the battery is swollen, hot, leaking, punctured, or producing an unusual smell, or when the unit contains a high-voltage battery pack that lacks clear labeling. Place damaged rechargeable batteries in a nonconductive container and use a local battery-recycling program rather than household trash.
Stop electrical probing when the housing is connected to mains power, the panel system is pole-mounted, or the controller exposes more voltage than the product instructions identify. A small garden light is a reasonable low-voltage repair project; a commercial solar lighting system is an electrical installation.
Outdoor lighting also has an honest limitation: low-cost sealed units often lack replacement parts and corrosion-resistant construction. A successful battery change may extend service life, but it cannot make a poorly sealed fixture suitable for repeated flooding.
FAQ
How long should a solar light stay on at night?
A small garden solar light commonly runs 4-8 hours after a full sunny-day charge, while a larger floodlight may run for a programmed 30 seconds to several hours. Brightness, battery capacity, panel exposure, temperature, and controller settings determine the actual duration.
How do I reset a solar light without a reset button?
Turn the solar light off, cover the panel to confirm the LED can activate, then leave the unit switched off in direct sun for 2-3 days. This resets operation by allowing the battery to recharge, but it cannot repair a failed cell, damaged controller, or broken wire.
Why is my solar light dim instead of completely off?
A dim solar light usually has a weak battery, insufficient charging, high LED-current demand, corroded contacts, or a brightness setting designed to conserve energy. Compare brightness immediately after darkness with brightness several hours later to distinguish a low-charge problem from an LED-driver fault.
Can I use a higher-capacity rechargeable battery?
A higher-capacity battery can work only when its chemistry, nominal voltage, physical size, polarity, and charging requirements match the original design. Higher capacity may extend runtime, but the small panel may require more sunny days to recharge it fully.
Why do solar lights fail more often in winter?
Winter reduces solar-light performance through shorter daylight, lower sun angle, cloud cover, snow, shade from bare structures, and reduced battery efficiency in cold conditions. Reposition the panel for maximum midday exposure, remove snow safely, and judge battery health after several clear days.
Are solar lights waterproof?
Many solar lights are water-resistant, but water resistance is not proof of complete waterproofing or permanent submersion protection. Cracked lenses, damaged gaskets, open cable entries, and condensation can still corrode contacts and controllers, so inspect seals when the same fault returns after rain.
The Bottom Line
Fixing a solar light not working at night starts with a darkness test, not immediate battery replacement. Confirm the switch, clean and reposition the panel, allow 2-3 sunny days of controlled charging, then install the correct rechargeable battery and inspect wiring or water damage. If the panel, battery, and connections test normally but the LED remains off, the controller or lamp module is usually the failed part.