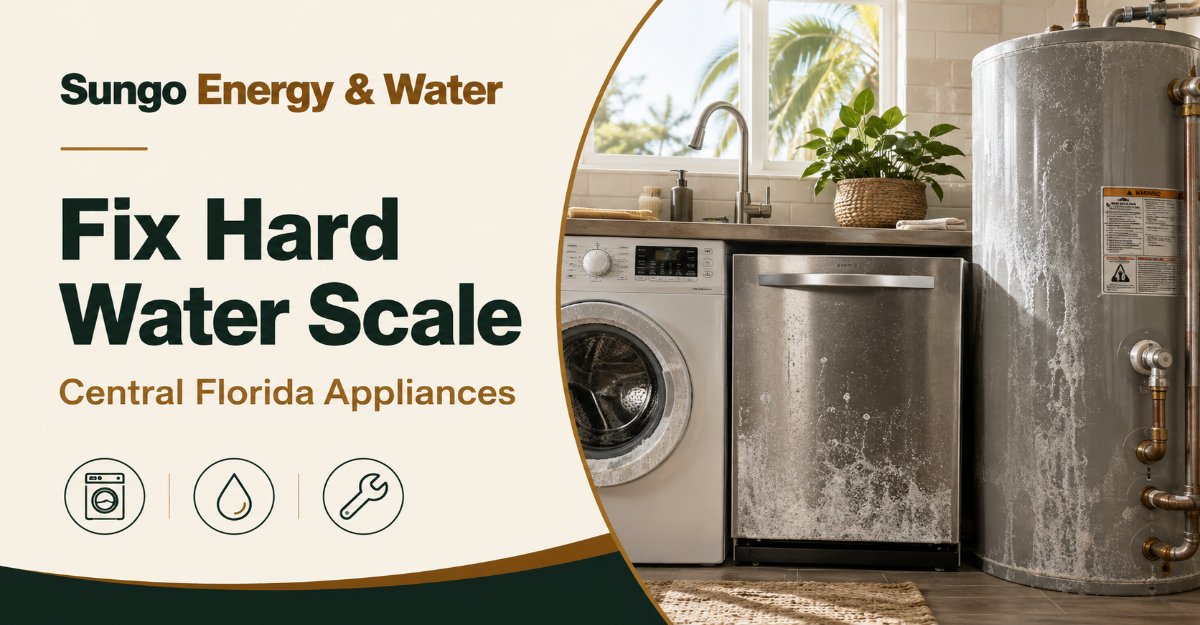
To fix hard water scale on Central Florida appliances, complete 10 steps: identify the deposit, test hardness, check appliance restrictions, prepare safely, descale each affected appliance, clean restricted components, test performance, and control future scale. Most jobs take 1 to 3 hours per appliance. Correct isolation and chemical compatibility determine whether the process succeeds safely.
Before You Start
Time required: 30 minutes for diagnosis, plus 1 to 3 hours per appliance
Difficulty: Beginner for dishwashers and washers; intermediate for water heaters
Typical DIY cost: $10 to $60 for household appliances; $40 to $150 for a tankless flushing setup if you do not own the pump and hoses
Professional service: Commonly higher and dependent on appliance access, condition, and local laborTools and materials
- Appliance owner’s manual
- Water-hardness test strips or drop-count titration kit
- Safety glasses
- Chemical-resistant gloves
- Distilled white vinegar, with 3 to 4 gallons available for a compatible tankless heater
- Food-grade citric acid or manufacturer-approved descaler
- 5-gallon bucket
- Small submersible utility pump
- Two suitable flushing hoses
- Microfiber cloths
- Nylon brush or old toothbrush
- Towels and shallow catch pan
- Flashlight
- Screwdriver or adjustable wrench only when the manual permits its use
- Rinse aid and hard-water dishwasher detergent
Prerequisites
- You must be able to identify the correct breaker, gas control, water shutoff, and appliance service valves.
- A tankless heater must have accessible isolation and purge valves for the circulation method.
- The appliance must not be leaking, electrically damaged, severely corroded, or under an unresolved warranty claim.
- Use only a descaling product and concentration permitted by the manufacturer.
Safety warning: Never mix bleach with vinegar, citric acid, toilet cleaner, rust remover, or another acid. The reaction can release toxic chlorine gas. If bleach has recently been used, rinse the appliance thoroughly and postpone acid treatment.
Central Florida’s public water supplies commonly draw from the Floridan Aquifer. Orange County describes this underground aquifer as its water source, with rainwater naturally filtering through layers of sand and rock before treatment and distribution. Hardness varies by utility, well, season, and treatment plant, so test the water at your property instead of relying only on a regional average.
Phase 1: Diagnose the Scale Problem
Step 1: Confirm That the Deposit Is Hard Water Scale
Identify the deposit before applying an acidic cleaner.
Inspect the affected surface under bright light. Hard water scale usually appears as a chalky white, gray, or tan crust around heating elements, spray holes, valves, fill ports, stainless-steel surfaces, and places where water repeatedly dries.
Place a few drops of distilled white vinegar on a hidden, acid-safe part of the deposit. Wait 5 to 10 minutes. Mineral scale may soften, turn powdery, or become easier to wipe. Do not perform this test on marble, limestone, natural stone, damaged enamel, galvanized surfaces, or a manufacturer-prohibited finish.
Use these distinctions:
- Mineral scale: Chalky, crusty, and concentrated where water heats or evaporates.
- Detergent film: Often greasy, cloudy, or slippery before drying.
- Rust: Orange, brown, or reddish and associated with corroding metal or iron-bearing well water.
- Glass etching: A permanent cloudy change that does not wipe away after descaling.
- Mold or biofilm: Soft, dark, pink, green, or slimy rather than rock-like.
You’ll know it worked when the test area softens or becomes visibly cleaner without damaging the underlying finish.
Common mistake: Treating every white mark as calcium scale. If the test spot does not change, stop adding acid and investigate detergent residue, silica, corrosion, salt deposits, or etched glass.
Step 2: Measure the Water Hardness
Test the untreated cold water and record the result in gpg or ppm.
Collect cold water from a faucet that does not pass through a softener, reverse-osmosis unit, or refrigerator filter. Let it run for 30 seconds, fill a clean cup, and test it according to the kit instructions.
For a test strip:
- Dip the strip for the manufacturer’s specified number of seconds.
- Remove it without shaking off the water unless instructed.
- Wait for the stated development time.
- Match the strip to the supplied color chart.
For a titration kit:
- Fill the test vial to the marked line.
- Add the indicator.
- Add titrant one drop at a time.
- Count the drops required for the permanent color change.
- Convert the count using the kit’s instructions.
Use this conversion when needed:
1 grain per gallon equals approximately 17.1 mg/L or ppm as calcium carbonate.
The uploaded source characterizes much of Central Florida’s water as approximately 12 to 25 gpg, or about 200 to 430 ppm, while noting that values above 10.5 gpg are generally considered very hard. Verify the number for the individual property because utility zones and private wells differ.
Record:
- Hardness in gpg and ppm
- City water or private well
- Appliance model
- Symptoms
- Date of the last cleaning
- Hot-water temperature
- Flow or cycle problems
You’ll know it worked when you have a repeatable hardness result and a written baseline for comparing future treatment.
Common mistake: Testing water after a functioning softener and assuming that result represents the incoming supply. Test before treatment when diagnosing the scale load entering the home.
Step 3: Check Restrictions and Stop Conditions
Read the appliance’s maintenance instructions before selecting a chemical or opening a valve.
Find the model number and download or open the exact manual. Search within it for:
- Descaling
- Flushing
- Mineral buildup
- Hard water
- Vinegar
- Citric acid
- Cleaning cycle
- Isolation valve
- Drain valve
- Water inlet screen
- Warranty exclusions
Follow the manufacturer’s chemical instruction over a generic household recipe. For example, Rinnai’s published tankless flushing procedure specifies 4 gallons of undiluted white vinegar and warns against unapproved chemical solutions. Other manufacturers may permit a named commercial descaler or a different concentration.
Stop and arrange professional service when:
- There is water near wiring, controls, a receptacle, or a breaker panel.
- A gas valve, vent, burner area, or combustion seal requires disassembly.
- The tank is leaking from its body.
- A drain or service valve is seized, broken, or heavily corroded.
- The tankless unit lacks usable isolation valves.
- The water is hot enough to create a scalding risk.
- The appliance displays a persistent safety or combustion code.
- The manual prohibits the planned chemical.
- The equipment remains under a warranty that requires authorized service.
You’ll know it worked when you can name the approved cleaner, isolation procedure, flushing path, and restart procedure for the exact model.
Common mistake: Assuming vinegar is harmless in every appliance. Prolonged acid exposure can damage incompatible metals, coatings, seals, grout, stone, and certain rubber components.
Phase 2: Prepare the Work Area
Step 4: Isolate Utilities and Protect Nearby Surfaces
Shut down the appliance, relieve hazards, and contain spills before opening the system.
For any appliance:
- Empty it completely.
- Turn it off at its control panel.
- Unplug it when the plug is accessible and dry.
- Shut off its water supply where the procedure requires it.
- Place towels and a shallow pan beneath hoses, filters, and valves.
- Keep children and pets away from the work area.
- Ventilate the room.
- Put on gloves and safety glasses.
For an electric water heater, turn off the correct double-pole breaker and verify that the controls are off. Do not restore power until the tank is completely full and air has stopped sputtering from an open hot-water faucet.
For a gas-fired heater, use only the normal appliance control and manual gas shutoff described by the manufacturer. Do not loosen gas fittings or dismantle combustion equipment.
For a traditional tank, allow the water to cool before draining. One practical method is to turn off the heat source several hours in advance and use hot water normally until the discharge is no longer dangerously hot.
For a tankless unit, close the hot and cold isolation valves only after confirming their positions in the manual. Service or purge valves are separate from the main isolation handles.
You’ll know it worked when the appliance cannot start, no unsafe hot water is present, the correct valves are identified, and any released liquid will enter a bucket, pan, or suitable drain.
Common mistake: Turning off the appliance at its front panel but leaving electrical power or gas available. Complete the manual’s full shutdown sequence.
Phase 3: Descale Water-Heating Appliances
Step 5: Descale the Tankless Water Heater
Circulate the approved descaling liquid through the isolated heat exchanger.
Use this procedure only when the heater has functioning hot and cold isolation valves plus purge ports.
Connect the flushing loop
- Turn off electrical power to the heater.
- Shut off the gas supply when required by the manufacturer.
- Close the cold-water inlet isolation valve.
- Close the hot-water outlet isolation valve.
- Remove the purge-port caps slowly.
- Connect one hose from the submersible pump to the cold-water purge port.
- Connect the second hose to the hot-water purge port.
- Place the pump and free end of the hot-side hose in a clean 5-gallon bucket.
- Confirm that both hoses are secure and will remain below the bucket rim.
Add and circulate the cleaner
Pour in the manufacturer-approved quantity. A common manufacturer procedure uses 4 gallons of undiluted white vinegar. The uploaded process allows 3 to 4 gallons of vinegar, food-grade citric-acid solution, or an approved commercial descaler, but the appliance manual controls the final choice.
Open both purge valves. Plug in or switch on the pump. Watch the first minute for hose movement, leaks, foaming, or an overflowing bucket.
Circulate for the approved period. The source process uses 60 to 90 minutes for heavy Central Florida scale. Do not extend the soak casually. Longer exposure is not automatically safer or more effective.
Hard-earned tip: keep the return hose submerged but visible. This allows you to confirm circulation while reducing splashing.
Rinse the heat exchanger
- Turn off and unplug the pump.
- Close both purge valves.
- Disconnect the pump-side hose according to the manual.
- Dispose of the spent solution in a manner permitted by the product label and local rules.
- Use the cold-water supply to flush fresh water through the heater and out through the hot-side service hose.
- Continue for 3 to 5 minutes, or until the discharge is clear and has no obvious cleaner odor.
- Close the purge port.
- Remove both hoses.
- Reinstall the purge caps and gaskets correctly.
- Clean the cold-water inlet screen if the manual permits.
- Open the cold and hot isolation valves gradually.
- Check every disturbed connection for leakage.
- Restore gas and power in the manufacturer’s order.
- Run a hot-water fixture and check for normal ignition, temperature, and flow.
Fresh-water flushing for approximately 3 to 5 minutes is also reflected in published tankless descaling guidance.
You’ll know it worked when the rinse water runs clear, the unit has no leaks or error codes, hot-water pressure improves or remains normal, and the heater produces steady hot water.
Common mistake: Opening the home’s main water path before closing the correct purge valves. This can send cleaner into household piping or produce an uncontrolled spill. Follow the valve diagram for the exact model.
Step 6: Flush the Traditional Tank Water Heater
Drain loosened sediment from the tank without applying power to an empty unit.
A traditional storage heater is not descaled with the same pump loop used for a tankless heat exchanger. In many tanks, routine homeowner maintenance consists primarily of controlled sediment flushing. Heavy bonded scale may require professional access through a cleanout or heating-element opening.
Cool and isolate the tank
- Turn off the electrical breaker or set the gas control as directed.
- Close the cold-water supply valve.
- Open a hot-water faucet to relieve pressure.
- Confirm that the water has cooled to a safe handling temperature.
- Attach a full-flow garden hose to the tank’s drain valve.
- Route the hose to a safe drain location that can accept hot, mineral-laden water.
- Keep the hose away from plants, painted surfaces, children, pets, and electrical equipment.
Drain and pulse-flush sediment
- Open the drain valve gradually.
- If flow is weak, verify that the hot faucet is open.
- Allow several gallons to discharge into a bucket for visual inspection when safe.
- After the tank partially drains, briefly open the cold-water inlet for 10 to 20 seconds to stir loose sediment.
- Close the inlet and continue draining.
- Repeat short pulses until the discharge is substantially clearer.
Do not insert wire into a drain valve or hammer the tank. A heavily blocked plastic valve can break and create an uncontrolled leak.
A. O. Smith advises regular draining and flushing to address sediment and recognizes different maintenance procedures for tank and tankless equipment.
Refill before restoring heat
- Close the drain valve fully.
- Remove the hose.
- Open the cold-water supply.
- Keep a hot-water faucet open while the tank fills.
- Wait until water runs in a full, steady stream without air sputtering.
- Inspect the drain valve and nearby fittings for leaks.
- Only then restore electrical power or return the gas control to operation.
Warning: Energizing an empty electric tank can destroy the heating elements within seconds.
You’ll know it worked when the tank refills without leakage, discharge water contains much less sediment, hot-water recovery is normal, and rumbling is reduced.
Common mistake: Expecting a brief drain to remove a thick, rock-like layer from an old tank. If flushing produces almost no flow, large chips, persistent rumbling, leakage, or no improvement, the tank may require professional cleaning or replacement.
Check the anode and safety components
Have the sacrificial anode inspected according to the manufacturer’s schedule. The source brief recommends checking it approximately every 2 years in severe Central Florida conditions. Actual replacement timing depends on water chemistry, heater design, anode material, and prior maintenance.
Do not casually operate or replace a temperature-and-pressure relief valve without following the manual. A leaking, seized, capped, or incorrectly discharged T&P valve is a safety issue, not a cosmetic maintenance problem.
Phase 4: Descale Cleaning Appliances
Step 7: Descale the Dishwasher
Run an empty cleaning cycle using a manufacturer-compatible descaler.
Start with a completely empty dishwasher.
Clean the filter and spray system
- Switch off the dishwasher.
- Remove the lower rack.
- Unlock and lift out the filter according to the manual.
- Rinse the filter with warm water.
- Brush its mesh gently with a soft nylon brush.
- Remove visible debris from the sump without pushing it deeper.
- Check accessible spray-arm holes for mineral blockage.
- Reinstall the filter and lock it fully.
A loose filter can allow debris to reach the circulation pump.
Run the descaling cycle
When the manufacturer permits vinegar:
- Measure 2 cups of distilled white vinegar.
- Place it as instructed by the manufacturer, commonly in an open dishwasher-safe container on the upper rack or in the empty tub when specifically allowed.
- Select a heavy-duty or cleaning cycle with hot water.
- After the machine has filled and circulated, pause it approximately halfway through.
- Allow a 30-minute soak.
- Resume and complete the cycle.
When using citric acid or a commercial dishwasher descaler, follow the label rather than combining it with the vinegar dose. Some citric-acid procedures use lower temperatures because excessive heat and concentration can contribute to difficult calcium-citrate deposits. One published cleaning method therefore calls for a cold citric-acid mixture and the dishwasher’s lowest-temperature program.
Whirlpool also advises cleaning the dishwasher filter first and keeping vinegar and baking soda in separate cleaning cycles rather than combining them.
Wipe and rinse
At the end of the cycle:
- Allow steam to escape before leaning into the machine.
- Wipe softened residue from the door edges, stainless-steel tub, detergent area, and accessible heating-element area.
- Use a nylon brush on acid-safe crevices.
- Run a separate rinse cycle with no acid, bleach, detergent, or dishes.
- Refill the rinse-aid reservoir.
You’ll know it worked when the tub feels smoother, spray holes are open, loose white residue is gone, the filter is clean, and a test load shows less spotting.
Common mistake: Pouring vinegar directly onto rubber seals and leaving it for hours. Use the approved placement and cycle duration to limit concentrated acid exposure.
Step 8: Descale the Washing Machine
Run the empty washer’s maintenance cycle with an approved mineral remover.
Remove all clothing, detergent pods, bleach, softener, and laundry additives.
Clean a top-loading washer
When the manufacturer allows citric acid:
- Add up to 1 cup of citric acid crystals directly to the empty drum.
- Select the self-clean, tub-clean, or longest heavy-duty cycle.
- Use the hottest permitted water setting.
- Allow the cycle to finish.
- Run one additional rinse cycle.
When using vinegar instead, the uploaded process specifies 1 quart of distilled white vinegar in the empty drum. Confirm compatibility first because some manufacturers discourage repeated vinegar use on seals and hoses.
Clean a front-loading washer
- Pull back the rubber door gasket carefully.
- Remove coins, hair, lint, and debris.
- Wipe the gasket with a cloth dampened in the approved cleaning solution.
- Do not flood the folds or leave concentrated acid sitting on the rubber.
- Clean the detergent drawer separately.
- Reinstall the drawer.
- Run the self-clean or hottest permitted empty cycle.
- Run an extra rinse.
- Dry the gasket and leave the door ajar after use when safe.
Do not mix the acid treatment with chlorine bleach. Do not combine citric acid with washing soda or baking soda in the same cleaning stage because neutralization reduces the acid’s ability to dissolve carbonate scale.
You’ll know it worked when the drum and dispenser have less chalky residue, water enters and drains normally, the gasket is clean, and no acidic odor remains after the extra rinse.
Common mistake: Assuming all washer residue is scale. Gray grease, black rubber particles, mold, undissolved detergent, and bearing-seal damage require different corrective actions.
Phase 5: Clear Restricted Components
Step 9: Clean Screens, Aerators, Valves, and Surfaces
Remove softened mineral debris from accessible water restrictions.
After descaling, loose particles can migrate to small screens and outlets.
Clean faucet aerators
- Close the drain stopper so small parts cannot disappear.
- Wrap the aerator with a cloth.
- Unscrew it by hand or with protected pliers.
- Photograph the washer and screen order.
- Soak acid-compatible parts in vinegar for 15 to 30 minutes.
- Brush them gently.
- Rinse thoroughly.
- Reassemble in the original order.
Clean appliance inlet screens
Turn off the appliance’s water supply before removing an inlet screen. Use the manual’s procedure. Brush the screen with vinegar or the approved solution, rinse it, reinstall it correctly, and reopen water gradually.
For a tankless heater with low hot-water pressure but normal cold pressure, inspect the approved inlet filter screen and repeat the isolation-valve flush if necessary.
Clean exterior scale
For stainless steel, glazed ceramic, or other acid-safe surfaces:
- Wet a cloth with a diluted, approved descaler.
- Lay it on the deposit for 5 to 15 minutes.
- Keep the area damp without flooding seams or controls.
- Wipe with a microfiber cloth.
- Repeat rather than scraping aggressively.
- Rinse with clean water.
- Dry the surface.
Never use a razor blade on coated glass, plastic, stainless-steel finishes, heating coils, or unknown coatings.
You’ll know it worked when screens transmit water freely, aerators produce an even stream, and accessible deposits wipe away without scratches or discoloration.
Common mistake: Removing parts without recording their orientation. Photograph each assembly before disassembly.
Phase 6: Verify Results and Prevent Recurrence
Step 10: Test Every Appliance and Select Scale Control
Run a complete test cycle and match prevention to the measured hardness.
Test performance
For each appliance, inspect all disturbed connections before starting.
Tankless heater
- Run hot water for 5 to 10 minutes.
- Check temperature stability.
- Compare hot and cold flow.
- Confirm that no error code appears.
- Inspect purge caps and filters for leakage.
Tank water heater
- Verify that the tank is completely full.
- Check the drain valve and supply fittings.
- Listen for reduced popping or rumbling.
- Confirm normal hot-water recovery.
Dishwasher
- Run a normal load.
- Check spray performance.
- Inspect glassware for removable film.
- Confirm complete drainage.
Washing machine
- Run a small towel load after the empty rinse.
- Confirm normal filling, agitation, draining, and spinning.
- Check hose connections and the door gasket.
You’ll know it worked when the appliance completes its normal operation without leaks, error codes, restricted flow, acid odor, or fresh white residue.
Choose a prevention method
Ion-exchange water softener
Choose an ion-exchange softener when the main goal is removing calcium and magnesium throughout the home.
The resin exchanges hardness ions for sodium or potassium ions. Proper sizing depends on:
- Tested hardness
- Iron and manganese content
- Number of occupants
- Daily water use
- Desired regeneration interval
- Available drain and electrical connections
The uploaded brief gives a typical installed range of $1,500 to $4,500 and salt costs of approximately $10 to $25 per month. Treat these figures as planning estimates, not quotations.
A nominal 32,000 to 48,000 grain unit may suit some suburban households, but equipment should be sized from tested compensated hardness and realistic water use rather than tank marketing labels.
TAC salt-free conditioner
Choose template-assisted crystallization when reducing scale adhesion is more important than creating conventionally softened water.
TAC media changes how minerals crystallize but does not remove them from the water. Hardness test strips and total dissolved solids readings may therefore remain high after treatment.
The source estimates:
- $1,200 to $3,000 installed
- Media replacement every 3 to 5 years
- Approximately $200 to $500 for replacement media
TAC can reduce adhesion inside plumbing, but spots can remain where treated water evaporates.
Polyphosphate appliance filter
Choose an inline anti-scale cartridge for a single compatible appliance when whole-house treatment is impractical.
The source estimates:
- $150 to $400 for a housing kit
- $40 to $90 per replacement cartridge
- Replacement approximately every 6 months
Verify that the cartridge is certified and permitted for the intended potable-water and appliance application.
Private-well treatment stack
Test private well water for hardness, iron, manganese, pH, hydrogen sulfide, bacteria, and other locally relevant parameters before buying treatment equipment.
Orange staining or metallic taste may indicate iron. Rotten-egg odor can involve hydrogen sulfide or bacterial activity. A common treatment sequence may include oxidation or air injection, filtration, and ion exchange, but the correct order depends on laboratory results.
Set a maintenance schedule
Use the hardness level and prior buildup to choose an interval:
- Every month: Inspect visible scale and refill dishwasher rinse aid.
- Every 3 months: Check faucet aerators and appliance screens in severe conditions.
- Every 6 months: Descale heavily used appliances when hardness is extreme or scale returns quickly.
- Every 6 to 12 months: Flush or descale the water heater according to its manual.
- Approximately every 2 years: Arrange an anode inspection when appropriate for the tank and local water conditions.
- Every 3 to 5 years: Replace TAC media when required.
- Approximately every 6 months: Replace point-of-use anti-scale cartridges unless pressure, capacity, or the label requires earlier service.
Maintain the water heater near 120°F to 125°F when this setting is suitable for the household and manufacturer. Lower settings reduce scald risk and may slow mineral precipitation compared with unnecessarily high temperatures. Household health requirements, storage design, local codes, and manufacturer instructions can affect the appropriate setting.
Common Mistakes and How to Fix Them
Mixing Bleach With an Acidic Descaler
Problem: Bleach remains in the tub, dispenser, or drain system when vinegar or citric acid is added.
Recovery: Stop the process. Do not add another chemical. Leave the area, ventilate it without exposing yourself, and avoid breathing fumes. Contact emergency services or poison-control professionals if anyone has coughing, chest tightness, breathing difficulty, eye irritation, or significant exposure.
Restoring Power to an Empty Water Heater
Problem: An electric tank is energized before it has completely refilled.
Recovery: Turn off the breaker immediately. Refill the tank until an open hot-water faucet produces a steady, air-free stream. If the heater no longer heats normally, have the elements and controls tested.
Using the Wrong Descaler
Problem: A strong acid, toilet cleaner, CLR-type product, or concentrated chemical is used without appliance approval.
Recovery: Stop circulation, drain the chemical safely under its label instructions, and flush repeatedly with fresh water. Inspect seals and metal components. Arrange professional inspection when discoloration, leakage, odor, or surface damage appears.
Failing to Clean Filters After Descaling
Problem: Loosened mineral particles move into an inlet screen, aerator, dishwasher filter, or pump area.
Recovery: Shut off the appropriate water source, remove accessible screens according to the manual, clean them with a soft brush, rinse them, and reinstall them. Repeat the appliance rinse before normal use.
Mistaking Glass Etching for Removable Film
Problem: Cloudy glassware remains cloudy after vinegar treatment.
Recovery: Test one glass with vinegar. If the haze does not change, it may be permanent etching rather than mineral film. Lower detergent dosage if excessive, use rinse aid, confirm water hardness, avoid unnecessarily aggressive cycles, and replace badly etched pieces.
Forcing a Blocked Drain Valve
Problem: A tank water heater barely drains, so the valve is twisted harder or probed with metal.
Recovery: Stop before the valve breaks. Close it carefully, place a catch pan underneath, and arrange professional service. A plumber may replace the drain valve or remove sediment through another approved access point.
Variations for Different Homes
Renters and Condo Residents
Do not alter shared plumbing or install whole-house equipment without written authorization.
Focus on:
- Manufacturer-approved dishwasher cleaning
- Washer maintenance cycles
- Removable faucet aerators
- Approved shower or appliance cartridges
- Written maintenance requests for water heaters
- Photographs of scale, leaks, reduced flow, and error codes
A renter should not open a building-owned water heater or modify a condo association’s plumbing system.
Homes With Tankless Water Heaters
Prioritize service-valve access and annual descaling. If the heater has no isolation kit, professional installation of approved service valves may be required before routine circulation cleaning becomes practical.
When scale returns in less than 6 months, test the incoming hardness and consider whole-house treatment or an approved point-of-use scale-control cartridge.
Private-Well Homes
Do not assume hardness is the only issue. Obtain a laboratory water analysis before selecting treatment.
Iron, manganese, sulfur odor, acidity, sediment, and bacterial conditions can interfere with softeners or create deposits that ordinary citric acid does not correct. Install treatment in the order recommended from the complete water analysis.
Homes Without Safe DIY Access
Use a licensed professional when:
- Gas components must be opened
- The unit lacks isolation valves
- Water is contacting electrical parts
- A tank is leaking
- Valves are corroded or seized
- The heater is installed overhead or in a confined space
- The appliance repeatedly trips a breaker
- Scale has blocked internal heat-exchanger passages
- The cleaning procedure requires sealed-component disassembly
How Long Does It Take and What Does It Cost?
DIY Time
| Task | Typical Time |
|---|---|
| Hardness testing and diagnosis | 15–30 minutes |
| Tankless water-heater descaling | 1.5–3 hours |
| Tank water-heater flushing | 1–2 hours, excluding cooling |
| Dishwasher descaling | 1.5–3 hours |
| Washing-machine cleaning | 1–2.5 hours |
| Aerator or inlet-screen cleaning | 15–45 minutes |
The lower end applies to accessible, regularly maintained equipment. The upper end applies to heavy buildup, slow draining, multiple rinse cycles, or awkward installation.
DIY Cost
| Item | Planning Range |
|---|---|
| Hardness test kit | $10–$40 |
| Distilled white vinegar | $3–$20 |
| Food-grade citric acid | $8–$25 |
| Commercial appliance descaler | $10–$40 |
| Utility pump and hose kit | $40–$150 |
| Brushes, gloves, cloths, and pan | $10–$40 |
Long-Term Treatment Cost
| System | Source Planning Range |
|---|---|
| Ion-exchange softener | $1,500–$4,500 installed |
| TAC conditioner | $1,200–$3,000 installed |
| Polyphosphate housing kit | $150–$400 |
| TAC media replacement | $200–$500 every 3–5 years |
| Inline cartridge | $40–$90 about every 6 months |
| Softener salt | $10–$25 monthly |
Final pricing depends on plumbing access, household flow rate, drain availability, tested water chemistry, equipment certification, permits, bypass valves, electrical work, and installer warranty.
Frequently Asked Questions
Can I use vinegar in every appliance?
No. Vinegar is suitable only when the appliance manufacturer permits it and the concentration, placement, and exposure time are compatible with the unit. Acid can damage certain seals, coatings, metals, grout, stone, and rubber parts. Check the exact model manual before using vinegar, citric acid, or a commercial descaler.
Is citric acid better than vinegar for scale?
Citric acid is less odorous and allows more precise concentration control, while vinegar is widely available and appears in some manufacturer procedures. Neither is universally better. Use the substance approved for the appliance. Do not increase strength or soak time simply because the first treatment does not remove thick scale.
How often should Central Florida appliances be descaled?
A practical starting interval is every 6 to 12 months for water heaters and scheduled maintenance cycles for dishwashers and washers. Use the shorter interval when hardness is high, hot-water use is heavy, or scale returns quickly. Test the water and inspect actual buildup rather than following the calendar alone.
Why is my hot-water pressure lower than cold pressure?
Scale may be restricting a tankless heat exchanger, hot-side valve, inlet filter, fixture cartridge, or faucet aerator. Clean accessible screens and aerators first. If every hot fixture has low pressure, follow the manufacturer’s tankless descaling process or have the heater and hot-water piping professionally diagnosed.
Will a salt-free conditioner remove existing scale?
No. TAC and similar salt-free conditioners are primarily intended to reduce new mineral adhesion. They do not physically remove hardness minerals and should not be expected to dissolve a thick existing deposit. Descale affected appliances first, then install and maintain the conditioner to reduce future buildup.
Why do dishes still have white spots after descaling?
The dishwasher may be clean while incoming hard water continues leaving droplets that dry into spots. Refill rinse aid, use detergent formulated for hard water, confirm the correct detergent dose, clean spray arms and filters, and test the water. Permanent glass etching will not disappear after descaling.
Conclusion
The reliable way to fix hard water scale on Central Florida appliances is to diagnose the deposit, measure hardness, follow the exact appliance manual, isolate utilities safely, use a compatible acid treatment, rinse completely, clear loosened debris, and verify normal operation. Once the appliances are clean, control the incoming water or repeat maintenance every 6 to 12 months.