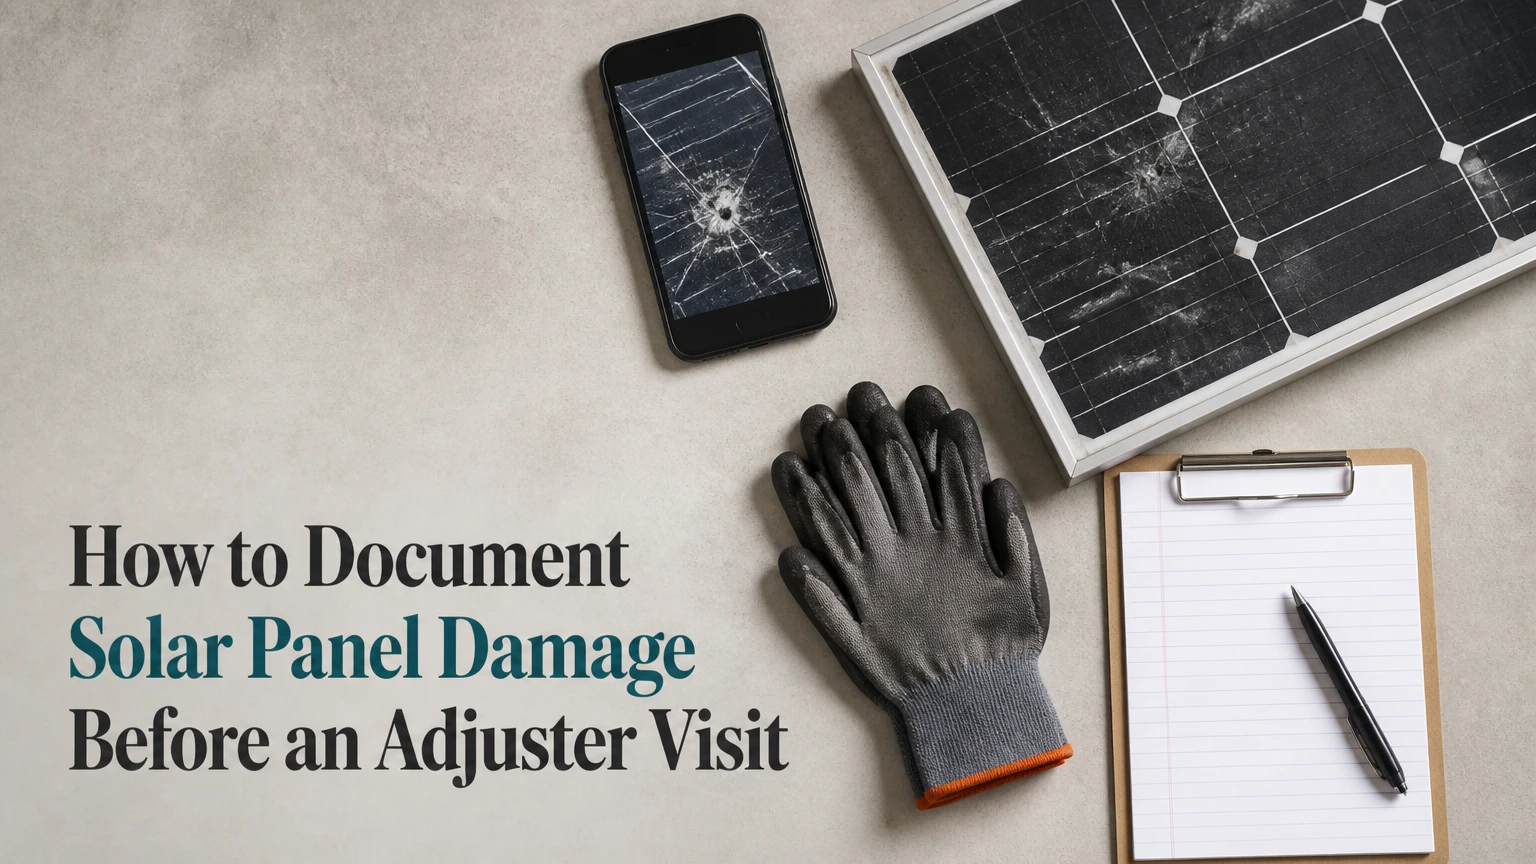
To document solar panel damage before an insurance adjuster visit, preserve the scene, record the storm timeline, photograph the PV system from safe locations, export performance data, and assemble ownership and repair records. Submit original files plus an indexed damage inventory, while avoiding roof access, electrical testing, cleaning, or repairs that could destroy evidence.
Key Facts
Solar panel documentation should connect a specific physical or functional defect to a dated event and a covered peril.
A universal 90-day insurance filing deadline does not exist; the policy, state law, and claim type determine notice requirements.
A smartphone can document visible damage, but it cannot reliably confirm every cell crack, insulation fault, or unsafe mounting condition.
Solar modules can produce DC voltage in daylight even when an inverter or AC disconnect is switched off.
Infrared drone imagery identifies temperature anomalies, but a qualified technician must interpret whether an anomaly requires repair.
A leased or power-purchase-agreement system may require the equipment owner to inspect, claim, and repair the array.
What does pre-adjuster documentation prove?
Pre-adjuster documentation is an organized evidence record showing what changed, when the change occurred, which property was affected, and what repair or replacement may cost. For solar panels, the strongest file combines dated photographs, storm records, monitoring data, component identification, installation documents, and a qualified inspection report.
The evidence does not automatically establish coverage. The insurance policy controls covered perils, exclusions, deductibles, depreciation, matching rules, cosmetic-damage provisions, and claim deadlines. Documentation gives the insurer a factual basis to evaluate those terms.
A useful claim file follows an evidence chain:
- Baseline: The system’s condition before the event.
- Event: The date, time, location, and severity of hail, wind, lightning, fire, falling objects, or vandalism.
- Change: Physical damage, production loss, alarms, or safety defects after the event.
- Scope: Every affected module, inverter, battery, racking component, roof area, and electrical part.
- Cost: A line-item estimate separating labor, equipment, permits, disposal, testing, and code-related work.
Before You Start: time, cost, and equipment
Most homeowners can create an initial evidence file in 60-120 minutes without climbing onto the roof. Typical direct cost is $0 for smartphone documentation, while a qualified solar diagnostic commonly costs $250-$600 and a commercial thermal drone survey commonly costs $300-$1,200.
| Requirement | Typical value | Practical specification | Risk control |
|---|---|---|---|
| Initial documentation time | 60-120 minutes | Complete before moving debris | Stop during rain, lightning, or unstable conditions |
| Smartphone storage | 2-5 GB | Original photos and 4K video | Upload to two separate locations |
| Professional diagnostic | $250-$600 | Written findings and test results | Verify license, insurance, and solar experience |
| Residential thermal drone survey | $300-$1,200 | Weather-dependent aerial imaging | Use a lawful, insured operator |
| Claim file assembly | 2-4 hours | Indexed PDF plus source files | Keep originals unchanged |
| Roof inspection | Professional only | Ladder, roof, and electrical assessment | Do not enter a damaged roof |
Before recording anything, confirm your ownership status, policy number, claim reporting method, and emergency contact. If the event created exposed conductors, fire damage, structural movement, or water entry, keep people away and call emergency services or a qualified electrical professional.
Step 1: Make the solar site safe
Turn off the system only through the manufacturer’s normal shutdown procedure and only if the disconnects are accessible from a safe location. An AC disconnect does not eliminate voltage at the modules, and some systems retain hazardous DC voltage in conductors, batteries, rapid-shutdown equipment, or damaged components.
Never touch cracked glass, exposed wiring, melted conduit, wet equipment, loose racking, or a damaged battery. OSHA’s electrical-safety guidance states, “Always de-energize electrical equipment before working on it,” but solar modules exposed to daylight can continue producing DC electricity, so homeowners should not treat a switch position as proof that the array is safe.
You will know this step worked when: everyone is outside the hazard zone, the utility or emergency electrician has addressed active danger, and no one needs to climb the roof for photographs.
Common mistake: Testing a damaged string with a household multimeter. A PV string can exceed the meter’s rating and create arc-flash or shock hazards. Photograph the display, breakers, labels, and visible conditions instead.
Step 2: Establish the event and system timeline
Record the storm date, approximate start and end time, property address, weather direction, nearby damage, and the first moment you noticed a production or alarm change. Download weather records before websites replace radar images with later data.
| Timeline evidence | What to capture | Useful source or record | Why it matters |
|---|---|---|---|
| Storm occurrence | Date, time, location, radar image | National Weather Service, local emergency management | Places the peril at the property |
| Hail or wind intensity | Hail reports, wind gusts, warnings | NOAA Storm Events Database, NWS office | Supports event severity |
| System baseline | Prior production and condition | Monitoring portal, installation photos | Counters unsupported wear claims |
| First observed failure | Alarm, outage, visible breakage | App timestamp, utility notice, written log | Links damage to the event |
| Temporary protection | Tarp, electrician, emergency work | Invoices, receipts, photographs | Supports reasonable mitigation costs |
The National Weather Service and NOAA provide event and warning records, but a regional report does not prove that every module on one roof was struck. Pair public weather information with property-specific signs such as damaged gutters, dented vehicles, broken skylights, fallen branches, or neighbor reports.
You will know this step worked when: a third party can understand the sequence without relying on your memory.
Common mistake: Treating an app’s current production graph as a permanent record. Export the data or save PDF screenshots that show the system name, date range, and time zone.
Step 3: Photograph the system without changing the scene
Photograph from safe ground positions in a consistent sequence: property context, roof plane, array section, individual component, and scale reference. Take both still images and slow video, and preserve the original files because messaging apps can remove metadata and reduce resolution.
Use a file name such as 2026-05-14_1430_roof-east_array-2_hail.jpg. Record the camera location and direction in a simple photo index. A coin, ruler, or known module dimension can establish scale, but never place an object on a damaged panel or climb to position it.
| Shot category | Minimum capture | Include in frame | Evidence purpose |
|---|---|---|---|
| Property context | 4 images | Roof, neighboring damage, trees, vehicles | Shows event scope and location |
| Array layout | 1 per roof plane | Full rows, gaps, tilted modules | Maps damage to system sections |
| Component detail | 2-4 per defect | Glass, frame, junction box, wiring | Shows defect shape and severity |
| Equipment labels | 1 readable image each | Inverter, battery, gateway, panel label | Identifies covered property |
| Functional evidence | 2-6 screenshots | Error code, production graph, outage | Connects defect to performance |
| Video sweep | 30-90 seconds | Slow continuous view of each plane | Preserves spatial context |
Photograph undisturbed debris before removing anything. If emergency mitigation requires moving a loose panel or covering an opening, photograph the original position first, keep removed parts, and save every invoice.
You will know this step worked when: the photo index identifies every roof plane, array section, visible defect, equipment label, and related property item.
Common mistake: Taking only close-ups. A crack without location, orientation, and surrounding context may not prove that the photographed module belongs to the insured system.
Step 4: Export performance and alarm records
Download production data from the manufacturer’s monitoring platform, such as Enphase Enlighten, SolarEdge Monitoring, Tesla, SMA Sunny Portal, or the installer’s portal. Capture the system overview, affected device list, event log, daily production graph, and a comparable period before the event.
The useful comparison is not simply “production fell.” Identify whether one microinverter, optimizer, string, inverter, battery, or communications gateway changed state immediately after the storm. A whole-home power outage can explain missing data, whereas a persistent ground-fault alarm after grid restoration may require electrical diagnosis.
| System evidence | Record before event | Record after event | Interpretation limit |
|---|---|---|---|
| Daily production | 7-30 comparable days | Event day plus 7 days | Weather and shading affect output |
| Microinverter status | Device map and normal state | Offline or zero-output devices | Offline communication is not always physical damage |
| String inverter | Voltage, current, alarm history | Ground fault or arc-fault code | Qualified testing is required |
| Battery | State of charge and alerts | Isolation, temperature, or fault code | Do not open battery enclosures |
| Utility connection | Outage notification | Reconnection time | Separates grid outage from array failure |
Save screenshots as PDFs and export raw data when the platform allows it. Ask the installer to preserve gateway records if the homeowner lacks administrator access.
You will know this step worked when: the records show a readable date range, system identifier, time zone, and device-level change.
Common mistake: Calling an offline monitoring gateway proof that panels are destroyed. Internet, router, cellular service, grid power, and gateway hardware can fail independently of module damage.
Step 5: Build a component and ownership inventory
Create one line for every potentially affected asset, including modules, optimizers, microinverters, string inverters, batteries, racking, clamps, rails, conduit, roof penetrations, disconnects, monitoring gateways, and electrical service equipment. Match each line to a photograph, location, model, serial number, and estimated action.
Collect the installation contract, final invoice, permit, utility interconnection approval, financing agreement, manufacturer warranty, service records, prior inspection, and any prior claim documents. These records establish age, ownership, original specifications, and whether replacement must meet current electrical or building requirements.
| Component | Identification record | Damage or symptom | Requested assessment |
|---|---|---|---|
| PV module | Manufacturer, model, serial, wattage | Cracked glass, frame bend, delamination | Test, repair, or replace |
| Microinverter or optimizer | Brand, model, serial, array position | Offline, fault code, enclosure impact | Diagnose and replace if unsafe |
| String inverter | Model, serial, rating, alarm history | Surge mark, ground fault, no output | Electrical diagnostic |
| Battery system | Model, serial, capacity, warranty | Alert, enclosure damage, water entry | Manufacturer-authorized inspection |
| Racking and roof attachment | Rail, clamp, flashing type | Uplift, missing hardware, torn seal | Structural and roof assessment |
| Monitoring gateway | Model, serial, connection status | No communication after event | Network or hardware diagnosis |
For a financed system, the homeowner usually remains responsible for reporting damage under the property policy, but the lender may have notification requirements. For a lease or PPA, contact the equipment owner first because the contract may assign inspection and repair duties to that company.
You will know this step worked when: an adjuster can trace each requested line item to a location, document, and proposed repair action.
Common mistake: Listing “solar panels” as one item. A 32-module array can contain 32 module serials, 32 microinverters, multiple racking assemblies, and separate roof work.
Step 6: Preserve evidence and submit a claim-ready package
Create a folder with the original images, an unchanged video file, exported monitoring records, weather evidence, invoices, ownership documents, and a one-page chronology. Create a separate working copy for annotations, because drawing arrows or changing file formats can alter the original metadata.
Send the insurer a concise package through its documented claim channel and keep delivery confirmation. Ask for the assigned adjuster’s name, inspection scope, required forms, deductible type, emergency-mitigation rules, and the deadline for supplemental damage.
Include a damage schedule with these columns:
- Item and location
- Observed condition
- Date first observed
- Supporting file names
- Suspected cause
- Safety or functional consequence
- Temporary action
- Contractor estimate
- Warranty or third-party responsibility
Do not state that a particular peril caused a hidden defect unless a qualified inspection supports that conclusion. Use accurate language such as “production stopped on inverter 2 after the hail event; diagnostic testing requested.”
You will know this step worked when: the adjuster can review the chronology, photos, monitoring evidence, and inventory before arriving.
Common mistake: Sending only a cloud link. Provide a downloadable index and retain local copies because permissions can expire or files can be overwritten.
Which evidence matches each damage type?
The best evidence depends on the suspected peril and the component affected. Hail needs impact patterns and module testing, wind needs racking and roof evidence, and lightning needs electrical diagnosis plus event and outage records.
| Damage type | Visible evidence | Functional evidence | Specialist confirmation |
|---|---|---|---|
| Hail impact | Circular pits, star fractures, shattered glass | Device-level output loss | Electroluminescence or electrical test |
| Wind uplift | Shifted modules, bent rails, missing clamps | String dropout, repeated faults | Roofer and solar installer report |
| Lightning or surge | Burn marks, melted conduit, damaged electronics | Inverter, gateway, or battery fault | Licensed electrician or manufacturer technician |
| Falling object | Point impact, frame deformation, roof penetration | Localized module or optimizer failure | Solar inspection and roof report |
| Fire or smoke | Soot, melted insulation, heat discoloration | Shutdown, insulation, or inverter alarms | Fire investigator and electrical professional |
| Water intrusion | Wet junction areas, roof opening, corrosion | Ground fault or insulation alarm | Roofer and solar technician |
A 0.5-inch hailstone is not a universal minimum for module breakage or insurance coverage. Glass type, impact speed, angle, module construction, age, mounting, and repeated strikes alter the result, so hail size is supporting context rather than a coverage threshold.
Microcracks and hotspots require special caution. Infrared imaging can locate abnormal heating under suitable irradiance and equipment conditions, but it cannot independently determine every cause, and a cool inspection day can produce a false negative.
How should you compare documentation methods?
Use smartphone documentation immediately, then add a qualified solar inspection when the roof is inaccessible, production changed, or damage may be hidden. Thermal drone mapping is most useful for large or difficult arrays, but it is an inspection tool, not automatic proof of an insured loss.
| Method | Typical cost | Best evidence | Main limitation |
|---|---|---|---|
| Smartphone photos and video | $0-$30 | Location, visible breakage, scene context | Cannot safely inspect hidden roof defects |
| Solar technician report | $250-$600 | Device testing, scope, line-item estimate | Scheduling and regional storm demand |
| Licensed electrician visit | $150-$400 | Surge, wiring, disconnect, safety faults | May not assess module construction |
| Thermal drone survey | $300-$1,200 residential | Hotspots, array mapping, inaccessible areas | Weather, irradiance, pilot, interpretation |
| Roofer inspection | $150-$500 | Flashing, membrane, structural roof damage | May not diagnose PV electronics |
Independent reports can strengthen a claim, but the professional should be given the event chronology without being instructed to reach a predetermined conclusion. Ask for photographs, test conditions, instruments used, serial or location references, and a clear distinction between observed damage and recommended replacement.
An honest limitation matters: a contractor estimate is not coverage evidence by itself. It supports scope and cost, while the policy and causation evidence determine whether the insurer owes payment.
What should you do if the system is leased or inaccessible?
Leased and PPA customers should notify the solar provider immediately, while homeowners should also follow their insurance policy’s property-claim instructions. The provider may own the modules and inverter, but roof damage, interior damage, and personal property can fall under different contracts.
For a ground-mounted array, photograph post foundations, torque points, buried conduit routes, fencing, vegetation, and adjacent structures. For a rooftop array, document roof coverings, flashing, penetrations, gutters, attic staining, and ceiling damage from the ground or interior.
Do not use a selfie stick, ladder, or drone near energized overhead conductors. A drone operator should carry appropriate insurance and comply with applicable Federal Aviation Administration rules, including Part 107 requirements for commercial operations.
How much time do documentation and inspection take?
Initial photographs and records should be captured as soon as conditions are safe, preferably within 24-48 hours. Professional appointments commonly occur within 3-10 business days after a regional storm, although widespread demand can extend that period.
There is no universal legal 90-day claim deadline. Policies may require prompt notice, specify a shorter notice period, or impose a limitation period for filing a lawsuit, and state law can modify enforcement. Report the loss promptly, then read the policy declarations, conditions, endorsements, and applicable state instructions.
| Action | Typical timing | Typical cost | Deadline risk |
|---|---|---|---|
| Scene photographs | Same day to 48 hours | $0 | Debris and weather can erase evidence |
| Weather record download | Within 72 hours | $0 | Radar and news pages may change |
| Insurer notice | Promptly under policy | $0 | Late notice may complicate causation |
| Solar diagnostic | 3-10 business days | $250-$600 | Storm demand delays appointments |
| Emergency mitigation | Same day if unsafe | Varies | Obtain approval when practical |
| Supplemental evidence | After inspection | Varies | Follow insurer claim instructions |
Deductibles also vary. A policy may apply a flat deductible, a percentage wind or hail deductible, a special endorsement, or separate treatment for detached structures. The $150-$350 figure sometimes quoted for solar-specific riders is not a dependable national benchmark.
Common mistakes and how to fix them
Cleaning panels before photographing them
Soot, ash, glass fragments, and debris can show impact direction and event timing. Photograph first, preserve samples when safe, and clean only when a qualified professional says cleaning is necessary.
Relying on phone metadata alone
Metadata can be stripped by social platforms, altered by device settings, or lost during export. Keep the original file, photograph a visible clock or dated notice when practical, and maintain a written evidence log.
Reporting only total production loss
Cloud cover, grid outages, inverter communication, shading, and utility curtailment can reduce output. Pair whole-system graphs with device-level status and weather records.
Allowing emergency repairs without a record
Emergency work may be reasonable, but undocumented removal can make later causation difficult to evaluate. Photograph the hazard, retain damaged parts, obtain an itemized invoice, and request a written description of the pre-repair condition.
Accepting an oral coverage conclusion
Ask the insurer to identify the relevant policy section, exclusion, deductible, and factual basis in writing. A written explanation lets you correct missing evidence or submit a supplement without arguing from memory.
What if the adjuster misses hidden or later damage?
Notify the adjuster promptly when a later inspection identifies additional damage, and label the submission as supplemental evidence rather than replacing the original file. Include the new report, affected serial numbers or array positions, test conditions, photographs, and the reason the damage was not visible initially.
Ask the installer whether the new condition requires immediate shutdown or temporary protection. Do not authorize full replacement solely because a panel has cosmetic marks, but do not operate equipment with exposed conductors, water intrusion, repeated arc-fault alarms, or battery safety warnings.
The adjuster’s first visit may be a general property inspection rather than a photovoltaic diagnostic. Confirm whether the appointment includes module testing, inverter testing, roof inspection, battery inspection, and code-compliance review.
FAQ
Does a cracked solar panel always qualify for insurance coverage?
No. Coverage depends on the policy, cause, exclusions, deductible, and whether the crack is accidental damage or excluded deterioration. Photograph the crack, preserve the event timeline, and obtain a technician’s report that distinguishes impact damage from age-related delamination, manufacturing defects, or gradual microcracking.
Can I file a solar panel claim without an installer report?
Yes, you can usually report a loss with photographs, records, and a written description, but an installer report can clarify hidden electrical or mounting damage. Submit the claim promptly rather than waiting weeks for a contractor, then add the professional assessment as supplemental evidence.
How do I prove solar damage is not pre-existing?
Use dated installation or maintenance photographs, prior monitoring data, earlier inspection records, and evidence of the specific storm. A before-and-after comparison is strongest when it identifies the same array section, component, and performance metric rather than merely showing that a storm occurred nearby.
Should I remove broken glass from a solar panel?
Do not remove broken glass from a roof-mounted module yourself. Keep people away, photograph the fragments, and ask a qualified solar technician about safe handling. If emergency cleanup is necessary, document the condition before removal, retain damaged parts where safe, and keep disposal or mitigation receipts.
Will homeowner insurance pay for solar panel replacement?
Homeowner insurance may cover permanently installed solar equipment when a covered peril damages it, but policy treatment varies by insurer, location, ownership structure, endorsements, limits, and deductible. Leased equipment, detached ground arrays, batteries, and roof repairs may follow different contractual or coverage rules.
Can infrared imaging prove every solar cell is damaged?
No. Infrared imaging can reveal thermal anomalies under appropriate sunlight, temperature, and equipment conditions, but it cannot identify every microcrack or establish causation alone. A qualified technician may combine thermography with electroluminescence, insulation testing, IV-curve testing, visual inspection, and monitoring data.
The Bottom Line
The most defensible approach to How to document solar panel damage before an insurance adjuster visit is to preserve safety first, establish the event timeline, photograph the entire system without changing the scene, export monitoring records, inventory every component, and submit organized original evidence. Report the loss promptly, follow the actual policy deadline, and use a qualified solar professional when hidden damage, electrical faults, inaccessible roofs, batteries, or disputed causation are involved.