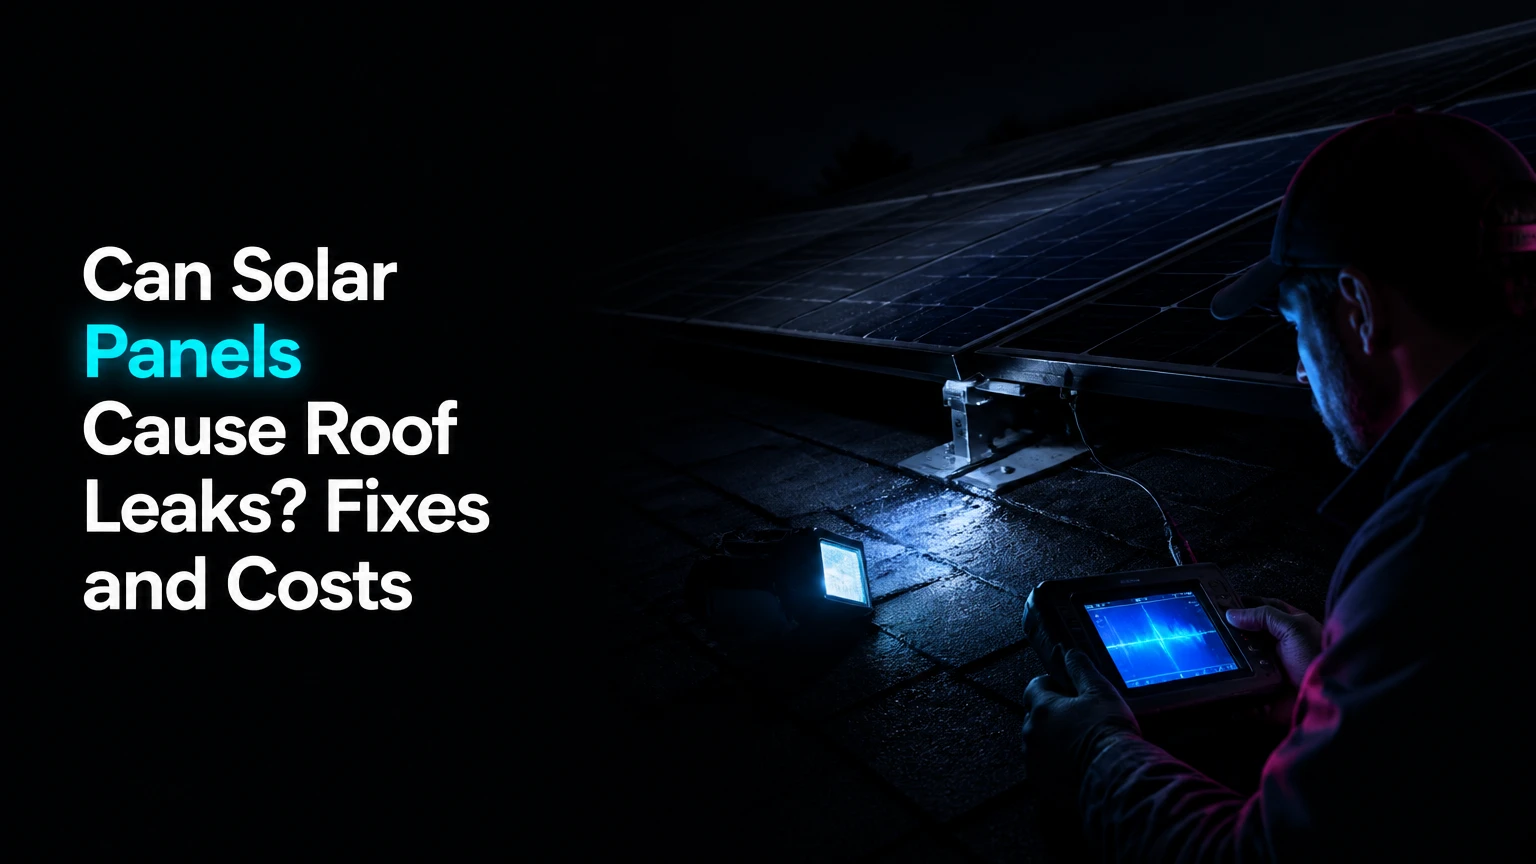
Solar panels can cause roof leaks when mounting hardware, flashing, sealants, or roof materials are installed incorrectly or have deteriorated. Solar panels themselves do not produce water, but roof-mounted arrays can create leak paths through penetrations, cracked tiles, damaged shingles, failed metal details, or blocked drainage. A sound roof and code-compliant installation greatly reduce the risk.
Key Facts
A properly installed solar array should remain watertight for the roof system’s service life.
Penetrating mounts commonly create roughly 10-40 attachment points on a residential array, although system design varies.
Standing-seam clamps and some ballasted systems avoid roof-deck penetrations, but they introduce wind, structural, or roof-membrane limitations.
A ceiling stain under a panel is not proof that the panel caused the leak because water can travel several feet along decking, rafters, or underlayment.
Leaks that begin immediately after installation suggest installation or pre-existing roof damage; leaks appearing years later may involve sealant, flashing, tiles, fasteners, or roof aging.
Never disconnect solar equipment or walk beneath damaged electrical components during active rain; contact the installer and a qualified electrician when electrical damage is possible.
Can Solar Panels Cause Roof Leaks?
Yes, solar panels can be associated with roof leaks, but the failure normally occurs at the mounting interface rather than in the photovoltaic panel. A lag screw, bracket, flashing plate, tile hook, or metal-roof fastener can create a water path if the installer misses structural framing, damages the roof covering, uses incompatible materials, or leaves drainage details incomplete.
The important distinction is causation. Solar installation can cause a new leak, expose an existing weakness, or make an unrelated roof problem more difficult to access. Roof valleys, chimneys, plumbing vents, skylights, eaves, and aged shingles can leak beneath or near an array without the solar system being defective.
A solar array can also reduce ultraviolet exposure and direct weathering on the roof surface beneath the modules. That protective effect does not repair old shingles or compensate for poor flashing. Panels can shade a roof while also limiting visual inspection and making debris removal harder.
How Does a Solar Roof Mount Stay Watertight?
A roof-mounted solar system stays watertight through layered water management, not through caulk alone. The attachment must connect to structural framing, while flashing and the roof covering direct water downhill around the penetration and preserve the roof’s drainage plane.
The main mounting components
| Component | Typical material or feature | Primary job | Failure consequence |
|---|---|---|---|
| Lag screw | Stainless or coated steel, commonly 5/16 or 3/8 inch | Connects mount to rafter or truss | Loose attachment or water path |
| Mounting foot | Aluminum or galvanized steel | Holds rail above roof surface | Localized flashing stress |
| Step or base flashing | Aluminum, galvanized steel, or engineered polymer | Sheds water over the penetration | Water enters under shingles |
| Sealant or gasket | Polyurethane, butyl, or EPDM | Supplements the mechanical flashing | Cracking, shrinkage, or chemical incompatibility |
| Rail and clamp | Aluminum rail with stainless hardware | Supports modules and transfers wind load | Movement or uneven roof loading |
The flashing should integrate with the roof covering according to the racking manufacturer’s instructions and local building requirements. On composition shingles, installers generally place flashing beneath an uphill shingle course so water flows over the metal. Sealant may supplement that detail, but exposed caulk should not be the sole water barrier.
A useful practitioner rule is simple: if an installer describes sealant as the primary waterproofing method, ask for the exact flashing detail and installation manual. Sealant is a maintenance-sensitive secondary measure. Properly integrated flashing manages water even after a sealant bead has aged.
What is the actual water path?
Water usually enters beside a penetration, travels along the underside of the roof covering or over the roof deck, and then follows framing before appearing indoors. The lag bolt can contribute to the path, but water does not always travel down the fastener threads in a neat vertical line.
The failure sequence often looks like this:
- A flashing plate is missing, displaced, undersized, or installed above the wrong shingle course.
- Rain moves laterally or downhill beneath the roof covering.
- Water reaches an unsealed hole, cracked tile, exposed fastener, or damaged underlayment.
- Roof decking, rafters, insulation, or wiring becomes wet.
- A ceiling stain appears at the first low point, which may be several feet from the source.
Roof slope, wind-driven rain, ice accumulation, capillary action, and roof geometry affect the route. An attic inspection therefore identifies a wet area, not necessarily the original entry point.
Which Roof Types Have the Lowest Leak Risk?
Standing-seam metal roofs generally have the lowest penetration-related leak risk because engineered clamps can attach to raised seams without drilling through the roof panels. Ballasted flat-roof arrays also avoid attachment holes in some designs, but ballast weight and wind uplift require structural engineering.
| Roof and mounting type | Roof penetrations | Typical leak exposure | Main limitation |
|---|---|---|---|
| Standing-seam metal clamps | 0 through roof panels | Low at attachment points | Requires compatible seam profile |
| Ballasted flat roof | 0 attachment holes in membrane | Low from mounting holes | Added dead load and wind movement |
| Asphalt-shingle flashed mounts | About 10-40 typical attachment points | Low when flashed correctly | Requires sound shingles and rafters |
| Corrugated metal fasteners | Often 10-40 fasteners or brackets | Moderate at gasketed fasteners | Washer aging and panel movement |
| Clay or concrete tile hooks | About 10-40 structural attachments | Moderate because tiles must be altered | Cracked, poorly notched, or displaced tiles |
| Membrane roof curb or penetration mount | Project-specific | Moderate to high if details fail | Requires compatible membrane flashing |
These categories describe relative exposure, not guaranteed outcomes. A badly installed clamp can damage a standing-seam roof, and an expertly flashed shingle installation can remain dry for decades.
Asphalt shingles
Asphalt shingle installations are common because flashing feet can be integrated with existing courses. The installer must locate rafters or approved structural members, drill the correct pilot hole, use the specified fastener length, and avoid placing hardware where water naturally collects.
Old shingles become brittle when lifted. A roof that is 12-15 years into a typical asphalt shingle service life deserves a professional condition assessment before solar work. The exact replacement threshold depends on shingle quality, climate, ventilation, storm exposure, and local roofing practice.
Tile roofs
Tile roofs require more handling than shingle roofs. Installers typically remove or temporarily lift tiles, attach hooks to structural framing, and modify or replace tiles so the finished surface does not bear directly on the hook or mounting hardware.
Tile damage may be immediate or delayed. A hairline crack can admit water during wind-driven rain, while a poorly supported tile may break months later under thermal movement, maintenance traffic, or panel-related loading. Spare matching tiles should be available before work begins.
Metal roofs
Standing-seam clamps avoid holes in the metal panels, but the seam must be verified as compatible with the clamp manufacturer’s tested profile. Corrugated and exposed-fastener roofs use a different approach, usually involving fasteners with EPDM washers or purpose-designed brackets.
Rubber washers age under ultraviolet exposure and temperature cycling. The installer should follow the metal-roof manufacturer’s fastener pattern and avoid mixing dissimilar metals that could accelerate galvanic corrosion.
Flat roofs
Ballasted systems place concrete blocks, pavers, or engineered weights on a protective layer above the roof membrane. They can reduce penetration risk, but the building must support the added dead load and resist wind uplift under local conditions.
Ballasted mounting is not automatically the best choice. Mechanical equipment, drainage paths, parapets, insulation compression, and maintenance clearances still matter. A structural engineer or qualified roof professional should review the design for commercial or large residential systems.
What Installation Mistakes Cause Solar Roof Leaks?
The most common solar-related leak mistakes are incorrect flashing, missed structural members, damaged roof coverings, incompatible sealants, and fasteners installed with the wrong depth or torque. Each mistake can create either an immediate leak or a delayed failure after thermal cycling and weather exposure.
| Failure mode | When symptoms may appear | What to inspect | Appropriate correction |
|---|---|---|---|
| Fastener misses rafter | First heavy rain or within weeks | Hole location and structural attachment | Remove, repair hole, and reattach to approved framing |
| Flashing installed uphill or exposed incorrectly | First rain, especially wind-driven rain | Shingle overlap and downhill drainage | Reinstall manufacturer-approved flashing |
| Tile cracked during hook installation | Days to several seasons | Tile edges, corners, and hook clearance | Replace tile and correct support detail |
| EPDM washer over-compressed | Months to several years | Flattened, split, or displaced washer | Replace fastener or gasket per roof system |
| Sealant incompatible with roof material | Months to several years | Shrinkage, adhesion loss, hardening | Remove failed material and use approved product |
| Rail or foot over-torqued | Immediate movement or delayed cracking | Stripped wood, crushed gasket, distorted metal | Replace damaged components and torque correctly |
Over-torquing is especially deceptive. A tight-looking bolt can crush a gasket, strip wood fibers, deform flashing, or crack a tile, reducing rather than improving long-term water resistance. Torque values belong to the racking and roof system instructions, not to guesswork with an impact driver.
Another frequent error is drilling without confirming the rafter position. A pilot hole that misses framing is not merely a structural concern. The unused hole must be repaired with a compatible roofing method, and the final attachment must meet the system’s engineering requirements.
How Can You Tell Whether Solar Caused the Leak?
A leak is more likely to be solar-related when it begins immediately after installation, aligns with an attachment point, worsens after the array is installed, or disappears after a mounting detail is corrected. Timing helps, but only a roof and attic investigation can establish the source.
Use a safe diagnostic sequence
- Record the timing. Note the installation date, first leak date, rainfall intensity, wind direction, and whether the stain occurs under the array or near its edges.
- Inspect the attic from a dry, stable location. Use a flashlight and avoid contact with wiring, inverters, junction boxes, and wet insulation. Look for wet decking, rusted fasteners, dark framing, and water trails.
- Map the stain and water path. Measure the indoor location relative to roof penetrations, valleys, vents, chimneys, and array edges.
- Inspect from the ground first. Look for displaced tiles, lifted shingles, exposed flashing, sagging gutters, and debris. Do not walk on modules or climb a wet roof.
- Arrange controlled testing. A qualified roofer may use low-flow water testing in sections, while the solar contractor identifies attachment points and system components.
- Document before repairs. Photograph the roof, attic, ceiling, equipment labels, flashing, and any damaged insulation for warranty and insurance records.
A ceiling stain directly below a solar module does not prove the module caused it. Water may enter at an uphill valley or vent and travel downhill under the underlayment before dropping into the room.
Which signs point elsewhere?
Roof valleys, plumbing vents, skylights, chimney flashing, ridge caps, gutters, and condensation can imitate a solar leak. Wind can also lift shingles near an array without any installation defect, especially where the roof already has brittle or poorly bonded tabs.
| Possible source | Distinguishing clue | Usual inspection area | Solar connection |
|---|---|---|---|
| Solar attachment | Leak follows array location or installation date | Flashing feet and fasteners | Direct or likely |
| Plumbing vent | Stain clusters around bathroom or kitchen line | Pipe boot and collar | Usually unrelated |
| Roof valley | Leak worsens with heavy runoff | Valley metal or membrane | May be hidden by array |
| Attic condensation | Moisture appears in cold weather without rain | Nail tips, insulation, ventilation | Usually unrelated |
| Gutter overflow | Exterior wall or eave staining | Gutter, fascia, downspout | Debris near array may worsen runoff |
| Chimney or skylight | Stain follows roof penetration outside array | Counterflashing or curb | Usually unrelated |
How Much Does a Solar Roof Leak Repair Cost?
A typical solar-related leak investigation may cost about $200-$600, while localized roof repairs commonly range from $300-$1,500 before any panel removal. Detaching and reinstalling panels can add roughly $2,500-$6,000, and extensive decking, drywall, insulation, or mold work can increase the total substantially.
| Work item | Typical cost range | Typical duration | Main price variable |
|---|---|---|---|
| Roof and attic diagnosis | $200-$600 | 1-3 hours | Access and testing complexity |
| Local flashing or fastener repair | $300-$1,500 | 2-8 hours | Number of failed details |
| Tile replacement and hook correction | $500-$2,000 | 4-12 hours | Tile access and matching stock |
| Panel detach and reset | $2,500-$6,000 | 1-3 days | Array size and electrical layout |
| Roof replacement beneath array | $8,000-$30,000+ | 1-3 weeks | Roof area, material, and region |
| Interior drying and drywall repair | $500-$3,500+ | 2-10 days | Moisture duration and damage extent |
These are typical planning ranges, not universal prices. Labor rates, roof pitch, permitting, battery equipment, local access, and whether the array uses optimizers or microinverters can change the estimate.
Do not approve a roof replacement before determining whether a localized repair is viable. Conversely, do not accept a patch when the roof is near the end of its service life and the array will require removal again soon.
Who Should Repair a Leak Under Solar Panels?
The original solar installer should usually inspect a suspected installation-related leak first, while a qualified roofing contractor should assess roof materials, underlayment, decking, and flashing. The best repair plan assigns responsibility after inspection rather than assuming either trade caused the problem.
Contact the solar installer before authorizing a third party to detach modules. Many solar workmanship warranties cover roof penetrations for 10-25 years, but contract language differs, and unauthorized removal can create disputes over racking, wiring, or equipment coverage.
A coordinated repair commonly follows this sequence:
- Solar contractor documents the array and makes the system safe.
- Roofing contractor locates the entry point and specifies roof repairs.
- Solar contractor detaches only the modules and hardware necessary for access.
- Roofer repairs decking, underlayment, flashing, shingles, tile, or metal.
- Solar contractor reinstalls the system using approved hardware and torque values.
- Both parties document a water test, photos, invoices, and warranty responsibility.
An independent roofer may still be the right professional for an unrelated valley, chimney, or vent leak. The issue is coordination, not trade loyalty.
Are No-Drill Solar Mounts Safer?
No-drill mounts remove leak paths caused by roof-deck holes, but they do not eliminate every roof risk. Standing-seam clamps can be an excellent choice on compatible metal roofs, while ballasted systems require careful structural and wind analysis and are unsuitable for many steep or lightweight roofs.
| Mounting alternative | Best roof application | Penetration count | Important trade-off |
|---|---|---|---|
| Seam clamp | Compatible standing-seam metal | 0 | Profile compatibility and clamp spacing |
| Ballasted rack | Low-slope membrane roof | 0 in membrane, if designed so | Added weight and wind uplift |
| Ground mount | Yard, field, or suitable structure | 0 on house roof | Land, trenching, and permitting |
| Carport mount | Engineered parking structure | 0 on main roof | Higher structural and foundation cost |
| Adhesive mount | Limited specialty applications | 0 | Wind, aging, and manufacturer restrictions |
A nonpenetrating system is not automatically safer for the entire building. Ballast can compress insulation, obstruct drains, increase uplift demand, and complicate membrane maintenance. Ground mounts eliminate roof penetrations but may expose wiring to landscaping, vehicles, animals, and vandalism.
What Should You Check Before Installing Solar?
Inspect the roof before signing the solar contract, and replace or repair a roof that cannot reasonably outlast the planned array. A pre-installation condition report should record roof age, material, slope, flashing condition, attic ventilation, structural framing, and the proposed attachment layout.
Use this decision table:
| Roof condition | Solar decision | Reasonable action | Recheck interval |
|---|---|---|---|
| New roof, no active defects | Proceed after structural review | Use approved flashing and documentation | At installation and after first major storm |
| 8-12-year asphalt roof | Case-specific | Compare remaining life with array warranty | Annual visual review |
| 12-15-year asphalt roof | Often replace first | Obtain roofer assessment and replacement quote | Before contract signing |
| Cracked tile or active leak | Do not install yet | Repair roof and verify dryness | After one or more rain events |
| Standing-seam metal roof | Often favorable | Confirm seam profile and clamp engineering | Fastener and seam inspection |
| Flat membrane roof near replacement | Usually delay solar | Replace membrane before array | Per membrane manufacturer |
Before signing, request the attachment plan, racking model, flashing model, structural calculations where required, electrical scope, roof-workmanship warranty, removal-and-reset terms, and process for future roof replacement.
The installer should also explain who pays when the roof requires work under the array. A low solar price can become expensive if detach-and-reset labor is excluded.
What Happens When the Roof Needs Replacement?
Panels normally need to be detached and reinstalled when roofing work occurs beneath their footprint. A roof replacement should be scheduled with the solar contractor because modules, wiring, rails, microinverters, and optimizers can be damaged by uncoordinated removal.
The owner should obtain a written scope covering module count, labeling, electrical shutdown, storage, flashing replacement, rail reuse, reinstallation, inspection, and production verification. Roof replacement is also the right time to correct undersized rafters, damaged decking, poor ventilation, and incompatible flashing.
Do not assume the original solar company still operates. If it has closed, identify the equipment manufacturers, locate permit records, and hire a solar contractor familiar with the racking and inverter system. A roofing company should not cut or disconnect energized photovoltaic wiring without qualified electrical support.
What Should You Do During an Active Leak?
Move valuables away from the stain, contain dripping water, and contact the solar installer promptly. Do not climb onto a wet roof, touch wet electrical equipment, drill into the ceiling near wiring, or disconnect modules yourself.
If water is near an inverter, battery, electrical panel, or ceiling light, shut off power only if the location can be reached safely and the electrical service procedure is known. Call an electrician or emergency service when there is sparking, a burning smell, heat, smoke, or water inside electrical equipment.
Temporary measures can reduce damage, but they are not permanent repairs. A tarp installed by a qualified professional may protect an exposed roof while the contractor schedules a detach-and-reset or flashing repair.
How Can You Prevent Solar Roof Leaks?
Prevent solar roof leaks with a sound roof, a documented attachment plan, manufacturer-approved flashing, qualified installation, and post-installation inspection. The strongest prevention measure is not a particular sealant brand; it is a roof detail that manages water mechanically and remains serviceable after sealant ages.
Use an installer checklist
- Verify the roof age and obtain a written roof-condition assessment.
- Confirm every structural attachment location before drilling.
- Request the racking manufacturer’s flashing and torque instructions.
- Confirm the installer will replace cracked tiles and damaged shingles.
- Ask whether sealants are compatible with the roof membrane and flashing metals.
- Photograph concealed flashing before modules cover the work.
- Keep permits, invoices, serial numbers, roof photos, and warranty terms together.
- Clarify detach-and-reset pricing before the array is installed.
- Schedule an inspection after the first major storm and at regular roof-maintenance visits.
- Keep leaves, branches, nesting material, and snow from obstructing drainage around the array.
An expert rule of thumb is to judge workmanship by concealed details, not by tidy visible rails. A straight row of modules can conceal a missed rafter or incorrectly layered flashing.
Frequently Asked Questions
Do solar panels protect shingles from weather?
Solar panels can reduce direct ultraviolet exposure and rainfall on the roof surface beneath them, which may slow some surface weathering. Solar panels do not restore brittle shingles, repair failed underlayment, or protect roof areas outside the array. Covered areas also become harder to inspect and repair.
Can birds or rodents cause a leak under solar panels?
Birds and rodents can contribute indirectly by nesting beneath modules, displacing roofing materials, damaging wiring, and obstructing drainage. Bird guards and regular roof maintenance can reduce the problem, but guards must not be attached in a way that damages flashing or blocks required ventilation.
Will solar panels void a roof warranty?
Solar panels do not automatically void every roof warranty, but an installation can limit coverage if the installer is unauthorized, penetrations are improper, or the roof manufacturer excludes alterations. Review the roof warranty, solar contract, racking instructions, and installer credentials before work begins.
Can hail damage cause a leak around solar panels?
Hail can crack tiles, damage shingles, deform flashing, or damage the solar modules themselves. A leak after a hailstorm is not automatically an installation defect. Photograph the roof and array, contact the solar installer and insurer, and avoid walking on modules while damage remains unassessed.
How often should a roof with solar panels be inspected?
A roof with solar panels should receive a professional inspection at installation, after a severe storm, and at least every two to five years depending on roof material, climate, and warranty requirements. Older roofs, tile roofs, and roofs with recurring debris or wildlife problems justify more frequent checks.
The Bottom Line
Can solar panels cause roof leaks? Yes, but the panels are rarely the direct cause. Leaks usually result from failed flashing, incorrect fasteners, damaged roof materials, aging sealants, poor structural attachment, or an old roof that was unsuitable for solar installation.
A properly designed and installed array can remain watertight and may reduce weather exposure beneath the modules. If a leak appears, document its timing, contact the original solar installer, coordinate with a qualified roofer, and avoid panel removal until warranty and electrical responsibilities are clear.