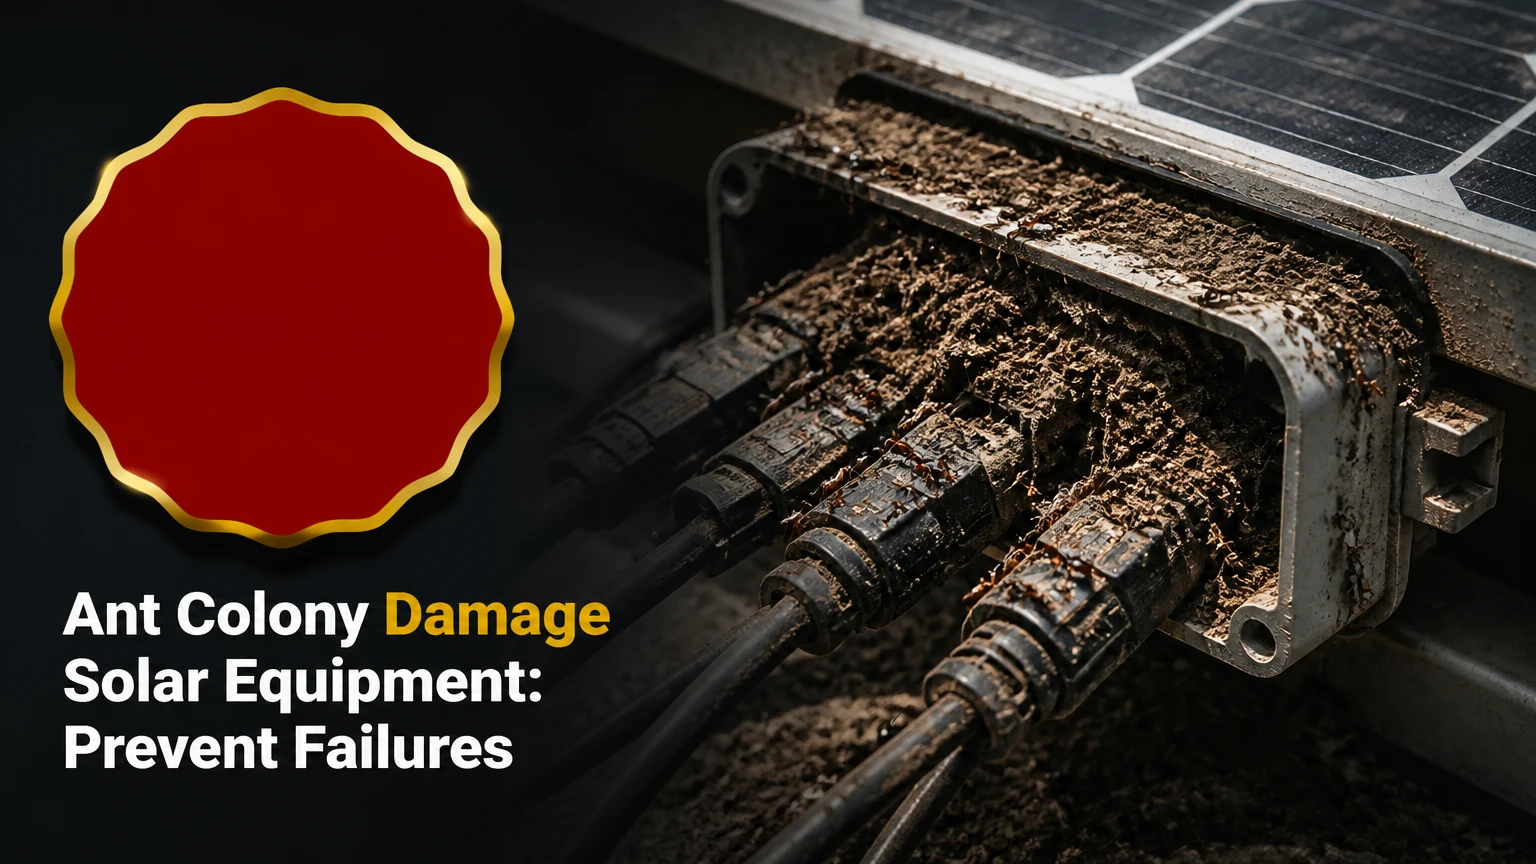
Ant colony damage to solar equipment occurs when ants enter inverters, isolators, combiner boxes, junction boxes, or cable pathways and cause contamination, electrical bridging, corrosion, overheating, or component failure. Ants usually seek warmth, shelter, and protected cavities rather than electricity itself, although energized contacts can kill ants and create conductive debris.
Key facts
Solar inverters and DC isolators are generally more vulnerable than photovoltaic panel glass.
Dead insects, soil, moisture, and nesting debris can bridge terminals or contaminate circuit boards.
Ant bait controls the colony outside the equipment, but it does not repair energized components or remove internal contamination.
Never spray liquid insecticide into an inverter, isolator, vent, connector, or energized enclosure.
Typical professional costs range from $150-$350 for inspection and cleaning, $400-$900 for some board repairs, and $1,500-$4,500 or more for inverter replacement.
Warranty coverage depends on the manufacturer’s terms, evidence of pest ingress, installer workmanship, and the failed component.
What Is Ant Colony Damage to Solar Equipment?
Ant colony damage is a pest-related failure pattern in which ants, nesting material, soil, moisture, or dead insects interfere with photovoltaic electrical equipment. The damage may begin as intermittent inverter faults and progress to insulation failure, corroded terminals, blown fuses, damaged relays, failed fans, or a complete shutdown.
The phrase includes several different conditions. A few ants walking across an enclosure are not the same as a colony inside a switch. External trails indicate access or food nearby, while soil deposits, dead insects, and repeated faults suggest internal occupation. A qualified technician must distinguish those conditions before opening equipment.
Solar arrays provide several attractive features for opportunistic ants: elevated equipment can remain dry during rain, inverter housings retain heat, and cable conduits create sheltered travel routes. Roof-mounted systems may also connect wall penetrations, attic spaces, and parapets to established indoor or garden colonies.
Why Do Ants Enter Inverters and Electrical Boxes?
Ants enter solar equipment because the enclosure offers warmth, shelter, and a protected cavity near established travel routes. Small species can use cable glands, imperfect seals, conduit openings, damaged gaskets, ventilation paths, or unused entry points, but no universal 0.5 mm threshold applies to every ant or enclosure.
The commonly repeated claim that ants possess a special attraction to inverter electromagnetic fields is not established as a general explanation for solar infestations. Switching electronics can produce heat, vibration, odors, and localized fields, but field attraction should not be treated as a proven diagnostic rule. Physical access and habitat conditions are more actionable.
Ant colonies also follow edges and protected lines. Conduit, racking, building corners, and inverter mounting rails can form continuous routes from soil to equipment. A roof array may be exposed to ants nesting beneath tiles or in wall cavities; a ground array may sit above active nests and dense vegetation.
How Does Ant Damage Cause Electrical Failure?
Ant-related electrical failure occurs when insects or nesting debris bridge conductive points, obstruct heat transfer, contaminate contacts, or create moisture-retaining deposits. A single insect can trigger a fault if it bridges a sensitive low-voltage circuit, but widespread failure usually requires repeated ingress, debris accumulation, moisture, or an existing sealing defect.
An ant contacting an energized gap can be electrocuted. The body may leave residue, and additional insects can accumulate around the same location. However, the dramatic idea of a predictable colony-wide “electro-cascade” is too absolute. Alarm pheromones influence ant behavior in some contexts, yet the evidence does not establish that every electrocuted ant summons hundreds of workers into a solar contact.
The practical mechanism is still serious. Conductive debris can create leakage paths, while soil and organic material absorb moisture and reduce creepage distance between terminals. Repeated heating and cooling then expands the damage by loosening connections, degrading insulation, and stressing capacitors or power semiconductors.
The Typical Degradation Sequence
| Stage | Physical condition | Electrical consequence | Technician finding |
|---|---|---|---|
| Access | Open gland, gap, conduit, or damaged gasket | No immediate fault required | Ant trails near entry |
| Nesting | Soil, plant fibers, carcasses, or larvae | Reduced clearance and airflow | Debris inside housing |
| Moisture retention | Wet soil, condensation, or residue | Leakage current and insulation stress | Oxidation or staining |
| Thermal obstruction | Blocked fan, filter, heat sink, or vent | Higher operating temperature | Thermal derating or fan fault |
| Contact contamination | Residue on relays, terminals, or PCB | Intermittent operation or resistance rise | Burn marks, pitting, corrosion |
| Failure | Short circuit, ground fault, or arc event | Shutdown, tripping, or fire risk | Blown fuse or failed board |
Formic acid can occur in ant secretions, but attributing all corrosion to it is misleading. Copper corrosion inside solar equipment more often reflects the combined effect of humidity, condensation, salts, dust, biological residue, dissimilar metals, and heat. Corrosion diagnosis should identify moisture entry and contamination rather than assume acid alone caused the failure.
Which Solar Components Are Most Vulnerable?
Solar inverters and DC isolators usually deserve the highest inspection priority because they contain switching devices, terminals, circuit boards, and heat-management components inside outdoor housings. Combiner boxes and junction boxes also present meaningful risks, while panel laminates are rarely damaged directly by ants.
| Component | Typical access route | Common damage | Inspection priority |
|---|---|---|---|
| String inverter | Cable gland, conduit, vent, unused knockout | PCB contamination, fan blockage, relay failure | Very high |
| Microinverter | Connector gap, roof debris, gasket failure | Connector corrosion, shutdown, insulation fault | High |
| DC isolator | Housing seam, shaft seal, cable entry | Contact bridging, pitting, heat damage | Very high |
| Combiner box | Gland, lid gasket, unused port | Fuse contamination, terminal corrosion, ground fault | High |
| Junction box | Cable entry, enclosure crack | Moisture and terminal contamination | Medium to high |
| PV cable | Damaged insulation, unsupported run | Insulation breach, chewing, abrasion | Medium |
| Panel laminate | Usually no practical ant entry route | Rare direct glass or cell damage | Low |
Ants generally do not consume photovoltaic glass or silicon cells. Damage attributed to “the panels” often originates in the panel junction box, MC4-style connector, cable insulation, or nearby isolator. That distinction matters because replacing modules will not fix an infestation that remains in a wall-mounted inverter or conduit.
Can Ants Damage PV Cables?
Ants can damage PV cables indirectly through nesting, contamination, abrasion, and exposure to other pests, but widespread chewing of properly specified solar cable is not the default ant failure mode. Rodents, birds, weathering, sharp edges, ultraviolet exposure, and poor cable management are more common causes of insulation damage.
Inspect cable runs for unsupported loops, contact with roofing or metal edges, bite marks, exposed conductor, melted insulation, and soil-packed conduit ends. Do not assume a cable is safe because the outer jacket appears intact. Insulation resistance testing and connector examination may reveal defects that visual inspection misses.
What Does Ant Damage Look Like?
Ant infestation may present as repeated inverter restarts, unexplained ground faults, tripped DC isolators, reduced output, fan alarms, visible trails, soil at cable entries, or a sudden system outage after rain or temperature changes. Monitoring data often provides the first warning because electronic faults can precede visible external evidence.
| Symptom | More likely explanation | Safe owner action | Professional test |
|---|---|---|---|
| System offline overnight | AC trip, inverter fault, communications loss | Check the switchboard status only | Fault-log and AC measurements |
| DC isolator trips repeatedly | Contamination, overload, or damaged switch | Do not repeatedly reset it | DC insulation and contact inspection |
| Output falls during heat | Vent blockage, failed fan, thermal derating | Keep vents unobstructed | Thermal and airflow assessment |
| Ground fault after rain | Moisture, damaged cable, contamination | Isolate according to manual | String-by-string insulation test |
| Ant trails on housing | Nearby colony or access route | Place bait away from equipment | Entry-path and enclosure inspection |
| Burning smell or crackling | Arcing or overheated connection | Keep clear and call emergency support | De-energized component examination |
A fault code alone cannot prove ant damage. The same code may result from a failed connector, lightning surge, insulation breakdown, water ingress, or an ordinary component failure. Evidence of insects or nesting material should accompany the pest diagnosis.
What Should You Do If Ants Enter Solar Equipment?
If ants may be inside solar equipment, stop repeated resets, keep clear of damaged hardware, and arrange a licensed solar technician. Owners can perform an external visual check and follow the manufacturer’s shutdown procedure, but they should not remove inverter covers, disconnect PV connectors, or probe live equipment.
Step 1: Check for Immediate Electrical Danger
Look for smoke, visible arcing, melted plastic, crackling, burning odor, or heat concentrated around an isolator. Keep people away from the equipment and contact emergency services if a fire is developing. Solar modules can continue producing DC electricity in daylight, even when the building supply is switched off.
Step 2: Follow the Manufacturer’s Shutdown Sequence
Use the exact sequence printed on the inverter or in its manual. Many systems require switching off the AC supply and then the PV DC isolator, but some manufacturers specify a different order or additional battery isolation. Do not rely on a generic sequence for a hybrid system with batteries.
NFPA 70, the National Electrical Code, states in Section 110.2 that “only qualified persons shall be permitted to work on electrical equipment.” That rule is particularly relevant to PV systems because array voltage can remain present after an apparent shutdown.
Step 3: Document External Evidence
Photograph ant trails, soil deposits, damaged seals, fault codes, switch positions, and monitoring graphs without opening the housing. Record the date, weather, last normal production, and whether faults occur during heat, rain, or switching.
This record helps separate pest ingress from unrelated electrical failures. It also preserves evidence for an installer assessment or warranty claim.
Step 4: Control the Colony Outside the Equipment
Place a labeled slow-acting bait station along the ant route, several inches to several feet from the equipment, according to the product label. Bait may reduce the colony, but it should not be placed inside an enclosure, on a circuit board, in a vent, or where children and pets can reach it.
Quick-kill sprays often remove visible workers without eliminating the nest. Bait selection depends on species and season, so a pest-control professional may be more effective than repeatedly changing retail products.
Step 5: Arrange Internal Inspection
A technician should de-energize the system, open the approved access points, remove contamination with equipment-safe methods, inspect terminals and circuit boards, test insulation, and verify enclosure seals. Internal cleaning alone is inadequate when residue has damaged relays, connectors, conformal coatings, or printed circuit boards.
How Can You Prevent Ant Colony Damage Solar Equipment?
The strongest prevention plan combines physical exclusion, colony control, cable management, and scheduled electrical inspection. No single spray, sealant, or cable product prevents every infestation because ants can enter through construction defects, adjacent vegetation, wall cavities, and damaged enclosure components.
| Prevention measure | Typical material or action | Maintenance interval | Main limitation |
|---|---|---|---|
| Seal unused entries | Manufacturer plugs, rated glands, electrical duct seal | Inspect every 6-12 months | Must not block drainage or ventilation |
| Improve cable routing | UV-rated clips, bend control, protected conduit | Inspect annually | Does not eliminate nearby nests |
| Use external bait | Label-approved bait station | Check weekly at first | Colony control may take 1-3 weeks |
| Manage vegetation | Remove contact with array and enclosure | Every 1-3 months in growth season | Habitat can return after rain |
| Inspect isolators | Visual and torque check by qualified technician | Every 6-12 months | Live electrical work is restricted |
| Monitor production | Inverter portal and alerts | Daily automated monitoring | Detects symptoms, not the cause |
Seal cable penetrations with components approved for the enclosure and environment. Do not fill ventilation slots, pressure equalization paths, drainage holes, fan outlets, or manufacturer-required clearances. Expanding foam can trap water, obstruct cooling, degrade under ultraviolet exposure, and complicate future servicing.
Is Ant Bait Better Than Insecticide?
Ant bait is usually better for reducing an established colony because workers can carry the active ingredient back to the nest, whereas perimeter insecticide mainly kills exposed ants. Bait works slowly, often over several days, and requires correct placement, species acceptance, and protection from rain.
| Control option | Typical onset | Best location | Use around electronics |
|---|---|---|---|
| Slow-acting granular bait | 3-14 days | Ant trail or nest perimeter | Outside only |
| Enclosed liquid bait station | 3-14 days | Wall base or equipment route | Outside only |
| Residual perimeter treatment | Hours to days | Soil and structural perimeter | Never inside equipment |
| Physical exclusion | Immediate after cure | Glands, ports, and seams | Technician-approved areas |
| Professional nest treatment | 1-7 days | Confirmed nest locations | Away from live hardware |
Liquid insecticide inside electrical equipment can create an immediate conductive path and chemically damage plastics, coatings, and contacts. Perimeter treatments also require label compliance, environmental precautions, and attention to runoff near drains, waterways, gardens, and livestock.
How Much Does Ant Damage Repair Cost?
Typical professional costs range from $150-$350 for inspection and cleaning, $400-$900 for some replaceable boards or components, and $1,500-$4,500 or more for a complete residential inverter replacement. Local labor rates, equipment voltage, battery integration, permits, shipping, and parts availability can move the final price substantially.
| Repair level | Typical cost | Typical duration | Appropriate when |
|---|---|---|---|
| Inspection and external treatment | $100-$250 | 1-2 hours | No internal damage confirmed |
| Cleaning and resealing | $150-$350 | 1-3 hours | Debris present, components test sound |
| Switch or fuse replacement | $200-$600 | 2-5 hours | Localized hardware failure |
| PCB or power-stage repair | $400-$900 | 2-5 business days | Board is serviceable and available |
| Inverter replacement | $1,500-$4,500+ | 1-2 weeks | Severe damage, age, or unavailable parts |
| Commercial equipment repair | $1,000-$10,000+ | 1-6 weeks | Larger inverters and engineered access |
A technician should not recommend board replacement before checking the surrounding terminals, cable insulation, surge protection, fans, and enclosure integrity. Replacing one board while leaving moisture or contaminated wiring in place can produce a second failure.
When Should You Repair or Replace the Inverter?
Repair is usually sensible when contamination is localized, the inverter is relatively new, replacement boards remain available, and insulation tests pass. Replacement is often more defensible when corrosion reaches multiple boards, the unit has repeated faults, parts are discontinued, or labor approaches the cost of a new compatible inverter.
| Decision factor | Repair indication | Replacement indication |
|---|---|---|
| Equipment age | Under 5-7 years | Over 10 years |
| Board condition | Local residue, no trace damage | Deep corrosion or carbonized PCB |
| Parts status | OEM board available | Discontinued or uncertain supply |
| Fault history | First isolated event | Repeated trips after cleaning |
| Cost ratio | Under 40-50% of replacement | Over 50-60% of replacement |
| Enclosure | Seal can be restored | Cracked, warped, or repeatedly penetrated |
These percentages are practical decision thresholds, not universal manufacturer rules. A battery system, export-control requirement, or older compliance standard can make replacement more complex than the invoice price suggests.
Does Ant Damage Void a Solar Warranty?
Pest ingress may be excluded from a solar equipment warranty, but “0% warranty coverage” is not a defensible universal rule. Manufacturer terms vary, and a claim may still involve workmanship, a defective gasket, an incorrectly fitted cable gland, or a component defect unrelated to the ants.
Ask the installer or manufacturer to identify the exact exclusion and preserve the failed parts until the assessment is complete. A service report should state whether the evidence indicates pest ingress, water ingress, installation error, manufacturing failure, or a combination.
A warranty exclusion for insects does not automatically excuse poor installation. An unused knockout left open, an incorrectly tightened gland, or a missing enclosure plug can create a separate workmanship issue. Photograph the installation before repairs alter the evidence.
Which Prevention Method Fits Each Solar Situation?
Roof-mounted systems need attention at wall penetrations, inverter mounting locations, tile cavities, and conduit routes. Ground-mounted systems face greater exposure to nests, vegetation, irrigation, agricultural debris, and low-hanging cables, so perimeter management and frequent inspection become more important.
| Site condition | Highest-priority action | Inspection frequency | Common overlooked issue |
|---|---|---|---|
| Roof array near garden | Seal wall entries and remove trails | Every 6-12 months | Ant route inside conduit |
| Ground array in dry soil | Map nests and use labeled bait stations | Every 3-6 months | Equipment mounted near active mound |
| Agricultural installation | Protect low cable runs and control vegetation | Monthly during growing season | Irrigation and fertilizer residue |
| Coastal property | Check salt, moisture, and corrosion | Every 6 months | Corrosion mistaken for ant damage |
| Battery hybrid system | Inspect inverter, battery enclosure, and isolators | Every 6 months | Generic shutdown sequence |
| Rental property | Document condition and notify owner | After every fault | Unauthorized enclosure opening |
Anti-rodent or insect-resistant cable can help in high-risk agricultural settings, but cable upgrades do not stop ants entering an inverter. Physical exclusion at the enclosure remains the primary defense.
Common Mistakes That Make Damage Worse
Spraying Into the Inverter
Liquid pesticides can short electronics, soften seals, and leave corrosive residues. Treat the external route and colony instead, then have a qualified technician inspect the enclosure.
Blocking Cooling Vents
Tape, silicone, foam, and improvised mesh can restrict airflow and cause thermal shutdown or component damage. Seal only designated cable entries and unused ports.
Resetting a Tripping Isolator
Repeated resets can re-energize a contaminated contact and increase arcing damage. Record the fault and leave the switch in the manufacturer-recommended safe state.
Opening the Housing in Daylight
PV modules generate electricity whenever illuminated. Even after AC isolation, DC voltage may remain in the array, inverter, and conductors.
Replacing the Inverter Without Finding the Route
A new inverter can be reinfested if the colony still travels through the same conduit or wall penetration. Treat the habitat and correct the access defect before commissioning replacement equipment.
FAQ
Can ants cause a solar inverter to shut down?
Yes. Ants, carcasses, soil, and moisture can create leakage paths, contaminate relays, block cooling, or trigger protective shutdowns. The same symptoms can result from water ingress, damaged cables, surge events, or failed components, so an ant trail alone does not establish causation.
Are fire ants more dangerous to solar systems?
Fire ants can create significant problems around ground-mounted arrays because colonies occupy soil near posts, conduits, and low cable runs. The danger comes from access, debris, stinging exposure, and electrical contamination rather than a unique ability to attack photovoltaic cells. Local species identification improves bait selection.
Can I clean ants from an inverter myself?
Homeowners should limit work to external observation and the manufacturer’s shutdown procedure. Opening an inverter can expose lethal DC voltage, stored energy, and energized components. A qualified solar electrician should remove internal debris, test insulation, evaluate boards, and restore enclosure protection.
How long does ant bait take to work?
Slow-acting bait commonly takes 3-14 days, although weather, colony size, species, and bait acceptance can change the result. Workers must continue carrying the bait to the nest. Replacing bait too quickly or combining it with repellent spray can reduce feeding and delay colony control.
Can ants damage solar panels without entering the inverter?
Ants rarely damage the glass or silicon cells directly. They can occupy a panel junction box, contaminate connectors, affect cable routes, or nest beneath mounting hardware. A module-level fault therefore requires inspection of junction boxes, connectors, and wiring, not only the visible panel surface.
How do I prove ant damage for a warranty claim?
Photograph external trails and entry points, save inverter fault logs, record dates and weather, and request a written technician report before cleaning or replacing parts. The report should identify insect debris, corrosion, water ingress, installation defects, and failed components separately. That evidence supports a fair warranty decision.
The Bottom Line
Ant colony damage solar equipment when insects and nesting debris enter electrical enclosures, bridge contacts, retain moisture, obstruct cooling, or expose existing sealing defects. Inverters, DC isolators, combiner boxes, and junction boxes deserve priority over panel glass. The safest response is to stop repeated resets, follow the system-specific shutdown procedure, control the colony outside the equipment, and arrange qualified inspection. Prevent recurrence by sealing approved entry points, preserving ventilation and drainage, managing vegetation, monitoring production, and inspecting high-risk systems every 3-12 months according to site conditions.