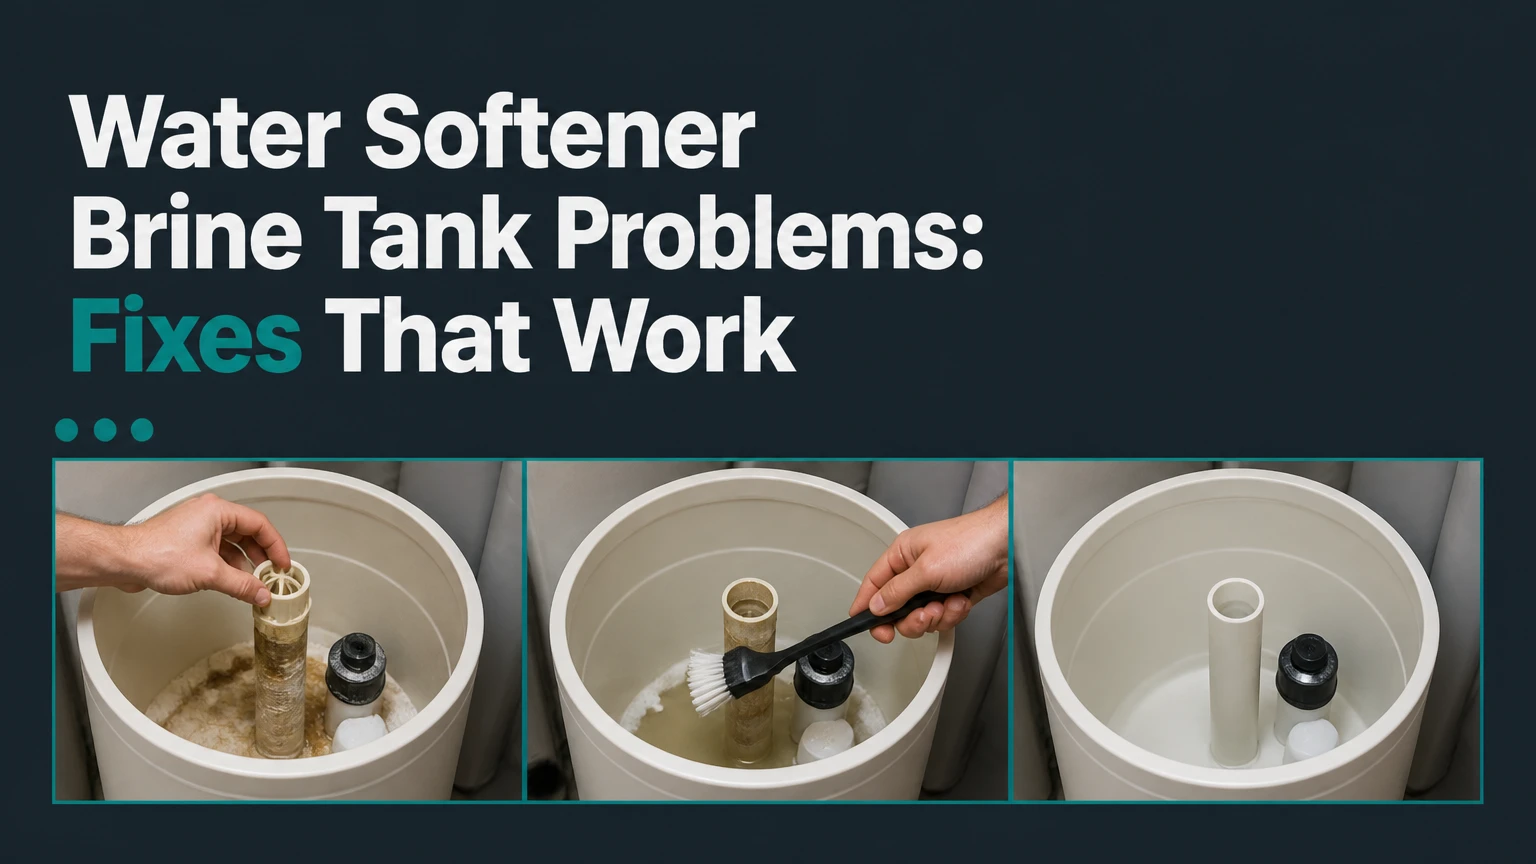
Water softener brine tank problems usually come from restricted brine flow, a salt bridge, salt mush, a stuck safety float, an injector blockage, or incorrect control settings. The fastest diagnosis starts with the symptom, then checks the drain path, float assembly, brine line, salt condition, and regeneration history before replacing parts.
Key Facts at a Glance
A brine tank stores salt or potassium chloride and water; the resin tank performs the hardness-removal ion exchange.
A visible water layer is normal in many systems, but the correct level depends on the valve design and regeneration method.
A salt bridge can leave the tank apparently full while the bottom contains little usable brine.
An overflowing tank usually indicates a drain, float, injector, brine-line, or control-valve problem.
Hard water after regeneration does not prove that the salt is defective; bypass mode, settings, resin age, and brine draw also matter.
Never mix bleach, resin cleaner, acids, or other treatment chemicals.
What Does a Brine Tank Do?
A water softener brine tank prepares concentrated salt solution for regeneration, while the separate resin tank removes calcium and magnesium from household water. During brine draw, the control valve pulls brine through the resin bed, exchanges sodium or potassium ions for hardness ions, and sends the waste stream to a drain.
A typical system has five connected functions: backwash removes sediment, brine draw regenerates resin, slow rinse displaces hardness ions, fast rinse removes residual brine, and refill meters water into the brine tank. Some modern valves refill before regeneration, while others refill afterward, so the tank may appear nearly dry at different points in the cycle.
The brine tank does not soften water directly. A tank with clean salt can still produce hard water if the injector cannot create suction, the valve is stuck, the resin is exhausted, or the unit remains in bypass.
Which Parts Matter During Diagnosis?
| Component | Normal function | Common failure | Observable clue |
|---|---|---|---|
| Safety float | Limits brine-water height | Sticks from salt residue | Water rises too high |
| Brine line | Carries brine to valve | Crack, kink, loose fitting | Air bubbles or no brine draw |
| Injector or nozzle | Creates suction | Sediment or iron blockage | Tank water does not fall |
| Control valve | Selects cycle and flow | Worn seals or motor fault | Incorrect or incomplete cycle |
| Drain line | Carries rinse water away | Kink, clog, frozen section | Overflow or poor regeneration |
| Resin bed | Exchanges hardness ions | Fouling or exhaustion | Hardness returns despite salt |
How Much Water Should Be in a Brine Tank?
The correct brine-tank water level is the level specified by the softener’s valve and programming, not a universal six-to-ten-inch measurement. Many metered residential systems hold only a shallow layer after regeneration, whereas older or differently configured systems may retain substantially more water.
Measure the level after the unit has been idle for several hours, not during brine draw or refill. A rising level between cycles is more significant than the absolute number. If the tank repeatedly gains water, reaches the salt platform, or overflows, treat the change as a flow-control fault.
Do not remove water simply because the tank looks wet. First identify the model, regeneration sequence, and salt-platform design. Removing normal water can prevent the next dose of salt from dissolving correctly.
Normal Versus Abnormal Levels
| Observation | Typical interpretation | First check | Escalation point |
|---|---|---|---|
| Shallow water below salt | Normal for many metered valves | Manual or model instructions | No escalation if hardness is controlled |
| Water near salt platform | Possible normal level on some systems | Tank design and cycle position | Rising level requires diagnosis |
| Water above salt | Usually abnormal | Float and drain line | Service if level continues rising |
| Tank nearly dry | Normal in some dry-brine systems | Refill timing | Inspect if no brine forms |
| Water at cabinet bottom | Potentially normal or problematic | Cabinet manual and leaks | Inspect immediately if outside tank |
| Repeated overflow | Fault condition | Shut off or bypass safely | Technician if basic checks fail |
Why Is the Brine Tank Full of Water?
A full or overflowing brine tank most often results from a blocked drain, restricted injector, stuck float, failed control valve, or brine-line air leak. The tank cannot complete its intended water movement, so the next refill adds water faster than the system removes it.
Begin by checking whether the tank is actually overflowing or merely holding its normal post-refill level. Keep children away from standing water, place the softener in bypass if water is approaching the electrical control head, and avoid disassembling a pressurized valve.
A Safe Diagnostic Sequence
- Check the drain line. Look for kinks, crushed tubing, ice, sediment, and an improperly submerged drain end. Confirm that the drain connection has an air gap where local plumbing rules require one.
- Inspect the float. Remove the brine-well cover if the design permits it. Move the float gently; it should travel without scraping or sticking.
- Inspect the brine line. Tighten fittings and look for splits near compression nuts. A small air leak can stop brine pickup without producing a visible water leak.
- Check the injector. Follow the manufacturer’s service procedure. Sediment and iron can block the small nozzle that creates suction.
- Run a controlled regeneration. Observe whether water leaves through the drain, the brine level falls during draw, and refill stops at the programmed point.
You will know the primary fault is resolved when the drain flows during rinse, the water level falls during brine draw, and the next refill stops without a continuing rise.
What Does Each Overflow Pattern Mean?
| Pattern | Most likely cause | Useful test | Typical repair |
|---|---|---|---|
| Level rises every day | Float or valve not stopping refill | Lift float gently | Clean float or service valve |
| Level stays high after regeneration | Injector or brine line restriction | Observe brine draw | Clean nozzle or replace tubing |
| Overflow occurs only in freezing weather | Frozen drain line | Inspect exposed drain | Thaw and insulate correctly |
| Salt is dry but water rises | No brine pickup | Check suction during draw | Repair air leak or injector |
| Water leaks outside tank | Cracked tank or fitting | Dry and observe seam | Replace tank or fitting |
How Do You Remove a Salt Bridge?
A salt bridge is a hardened layer that spans the tank above an empty cavity, preventing new salt from contacting water. Turn off or bypass the unit, press a blunt plastic or wooden handle gently through the crust, and avoid sharp tools that can puncture the polyethylene tank or brine well.
A bridge is different from a low salt level. Tap the salt surface and probe vertically near the tank wall. A hollow sound or sudden drop through a hard shelf indicates bridging. Do not lean your full weight on the handle because the tank wall and internal components can crack.
After breaking the crust, remove loose pieces and confirm that salt reaches the water. A small amount of warm water can soften residue, but excessive water creates dilution and may trigger another bridge. Allow the system to use the restored salt during its next properly programmed regeneration.
High humidity, overfilling, temperature changes, and fine or impure salt increase bridging risk. Keep the salt below the tank’s maximum fill line and inspect monthly, or every two to three weeks in damp utility spaces.
Why Is There Salt Mush at the Bottom?
Salt mush is a wet, compacted sludge that forms when undissolved salt remains in a concentrated water layer for too long. The mush can cover the brine pickup point, so the control valve appears to regenerate while the resin receives little or no concentrated brine.
A mush layer requires more than a surface probe. Scoop usable dry salt into clean containers, remove the sludge with a plastic scoop, and avoid pulling or bending the float, brine well, or pickup assembly. Follow the equipment manual before adding any cleaner.
Rinse the empty tank with clean water and remove all residue. Sanitize only when the manufacturer permits it, using the stated product and dose; a generic bleach quantity is unsafe for every tank, valve, seal, and local wastewater arrangement. Never pour bleach into the resin tank unless the manufacturer specifically instructs that procedure.
Salt Choices and Their Effects
| Material | Appropriate use | Main advantage | Main concern |
|---|---|---|---|
| Evaporated pellets | Most residential softeners | Low insoluble residue | Usually higher purchase price |
| Solar crystals | Compatible residential valves | Broad availability | Can bridge in humid conditions |
| Rock salt | Only when manual permits | Lower initial cost | More sediment and mush risk |
| Block salt | Specialized designs only | Useful in specified tank shapes | Can dissolve unevenly |
| Potassium chloride | Sodium-reduction preference | Adds potassium instead of sodium | Higher cost and altered programming |
Why Is the Water Still Hard?
Hard water after a regeneration cycle usually indicates bypass mode, insufficient brine draw, incorrect hardness capacity, exhausted resin, excessive iron loading, or a water-demand change. Salt consumption alone does not prove that regeneration succeeded because the valve must first dissolve, transport, and rinse the brine correctly.
Test untreated and treated water with a hardness kit or laboratory analysis. Compare the result with the control head’s hardness setting, which may need adjustment for iron, manganese, or the unit’s stated capacity. A sudden return of hardness points toward a mechanical or settings problem; gradual decline can indicate resin fouling or age.
| Symptom | Likely explanation | Confirmation |
|---|---|---|
| Hardness immediately after installation | Bypass or unconditioned first volume | Check bypass handle and plumbing |
| Hardness only after heavy use | Capacity or metering error | Compare gallons used with setting |
| Salt level never changes | Bridge, mush, or failed brine draw | Observe draw cycle |
| Salt disappears too quickly | Leak, overregeneration, or setting error | Review history and water meter |
| Hardness plus iron staining | Resin or pretreatment limitation | Test iron and manganese |
| Hardness after ten or more years | Resin exhaustion or valve wear | Service assessment and capacity test |
An independent water test is often cheaper than replacing a softener based on a single test strip. A softener also cannot remove every contaminant, and salt-based treatment does not disinfect microbiologically unsafe water.
Which Brine Tank Configuration Is Better?
A separate brine tank is generally easier to clean and service, while a cabinet-style softener saves floor space. The better configuration depends on access, salt demand, humidity, household size, and whether a technician can reach the valve and brine well without moving appliances.
Separate Tank Versus Cabinet Tank
| Criterion | Separate tank | Cabinet-style tank |
|---|---|---|
| Typical salt capacity | 200-400 pounds | 100-150 pounds |
| Utility footprint | Approximately 2 units | Approximately 1 compact enclosure |
| Cleaning access | High | Moderate to low |
| Refill frequency | Lower for high-demand homes | Higher for high-demand homes |
| Electronics exposure | Lower salt-vapor exposure | Greater enclosed humidity exposure |
| Best setting | Utility room or basement | Closet, apartment, or tight crawlspace |
A separate tank is the stronger service choice for large families, high-hardness water, and well systems with iron. A cabinet system is practical where floor space controls the decision, but its smaller opening can make salt removal and sludge cleanup laborious.
Which Salt Should You Use?
Use the salt form and purity grade listed in the softener manual, with evaporated pellets or solar crystals being common residential choices. “Higher purity” reduces insoluble residue, but no salt type can compensate for a blocked injector, incorrect capacity setting, or poor drainage.
Avoid table salt unless the manufacturer explicitly approves it. Do not assume rock salt is forbidden in every system, because some manuals allow it while warning about sediment. Potassium chloride is a valid alternative for some households, but it costs more and may require a manufacturer-specified dose or programming change.
Do not add salt to the brim. Keep enough free space for the salt to move and inspect the water layer. If the tank repeatedly forms bridges or mush despite correct filling, changing salt grade may help, but humidity and water-level faults still require correction.
How Do You Clean and Sanitize the Tank?
Clean a brine tank when salt mush, heavy sediment, foreign material, or persistent odor remains after the mechanical fault is corrected. A routine emptying is usually unnecessary for a clean, correctly operating tank, and aggressive cleaning can damage the float, seals, or nearby flooring.
- Put the softener in bypass and unplug the control head if the manual requires it.
- Remove usable salt and dispose of contaminated salt according to local rules.
- Scoop out water and mush without forcing the brine well.
- Wash the tank with clean water and a nonabrasive brush.
- Rinse until no detergent remains.
- Sanitize only with an approved product and dose.
- Refill with the specified salt quantity and return the valve to service.
- Run a regeneration if the manual calls for it.
A rotten-egg smell can originate in source water, plumbing, or a drain trap rather than the brine tank. Test the home’s cold water before attributing the odor to salt.
What If the Home Uses Well Water?
Well-water homes need iron, manganese, sediment, and hardness testing before a softener is adjusted. Dissolved ferrous iron can load resin, while oxidized iron can obstruct the injector and brine line; a softener may handle limited iron only when the manufacturer allows it.
Use sediment filtration or oxidation treatment when the test results exceed the softener’s limits. Iron-removal salt additives and resin cleaners are not interchangeable, and both should follow the valve manufacturer’s compatibility guidance.
A well system also adds pressure variability. Low inlet pressure can weaken injector suction, while a pressure-tank fault can interrupt regeneration. Check pressure and flow before replacing a brine valve.
How Much Do Repairs and Replacement Cost?
Typical homeowner repair costs range from $0 for clearing a bridge or kink to about $30-$100 for common float, tubing, or injector parts. A service visit commonly totals $100-$350, while a complete residential brine tank may cost approximately $80-$250 before labor; local rates and brand-specific parts change the result.
| Work or part | Typical materials | Typical total range | Replacement signal |
|---|---|---|---|
| Clear salt bridge | $0-$15 | $0-$40 DIY | No replacement needed |
| Brine tubing or fittings | $10-$35 | $50-$180 serviced | Repeated cracking |
| Float assembly | $30-$70 | $100-$300 serviced | Float remains unreliable |
| Injector or nozzle | $15-$60 | $100-$300 serviced | Repeated blockage |
| Brine tank | $80-$250 | $250-$700 installed | Crack or structural leak |
| Control valve service | $50-$250 parts | $200-$600 serviced | Seal or motor failure |
| Complete softener | $500-$2,000 typical | $800-$3,000 installed | Multiple aged failures |
Replacement makes more sense when a tank is cracked, the resin is exhausted, the valve needs several major parts, and the system is near or beyond its typical 10-15-year service life. A single bridge or replaceable float rarely justifies complete replacement.
What Should You Check Before Calling a Technician?
Record the water level, salt condition, bypass position, model number, error code, regeneration date, and hardness result before requesting service. These observations reduce diagnostic time and prevent a technician from treating a visible symptom while missing the actual failure.
Use this order:
- Check for leaks and electrical hazards.
- Confirm the bypass valve is in service.
- Check for a bridge or mush.
- Inspect the drain line and brine tubing.
- Observe a regeneration only if the manual permits it.
- Test treated-water hardness.
- Photograph fittings, settings, and error codes.
Stop DIY work if the tank is cracked, the control valve leaks under pressure, wastewater backs up, wiring is wet, or the unit is connected to an unusual drain arrangement. Pressurized plumbing can release water rapidly, and incorrect drain connections can create a sanitation hazard.
Common Mistakes That Make Problems Worse
- Breaking a bridge with a screwdriver: Sharp metal can puncture the tank or brine well. Use a blunt plastic or wooden tool.
- Adding several bags of salt to a blocked tank: More salt hides the bridge and increases compaction.
- Removing all tank water without checking the design: Some systems require a measured water dose for the next cycle.
- Pouring bleach into every component: Chlorine can damage seals, resin, or wastewater systems when used outside the manual.
- Changing hardness settings randomly: Overregeneration wastes salt and water; underregeneration leaves hardness untreated.
- Replacing the float first: A float cannot fix an injector blockage, drain restriction, worn valve seal, or failed meter.
One practitioner rule is especially useful: diagnose brine movement, not salt quantity. A tank full of salt can still deliver zero brine to the resin tank.
Frequently Asked Questions
Can a water softener work without salt?
A salt-based ion-exchange softener cannot regenerate its resin effectively without sodium chloride or an approved potassium chloride alternative. The unit may continue passing water, but hardness capacity declines until calcium and magnesium break through. Salt-free conditioners use a different mechanism and do not perform the same ion exchange.
How often should a brine tank be inspected?
Inspect the salt surface and tank condition monthly under ordinary conditions. Check every two to three weeks when the utility area is humid, the tank bridges frequently, the household uses rock salt, or the softener serves high-iron well water.
Why is the salt level unchanged after regeneration?
An unchanged salt level can result from a bridge, salt mush, failed brine draw, incorrect regeneration programming, or a low-dose metered system where the change is difficult to see. Break the bridge only after confirming the tank is safe, then observe whether water leaves during the brine-draw stage.
Can a brine tank overflow when the softener is in bypass?
A brine tank can continue overflowing in bypass if the bypass arrangement still permits refill, the valve is leaking internally, or the tank already contains excessive water. Bypass stops softened-water production; it does not automatically repair a float, drain, injector, or control-valve fault.
Does a larger brine tank soften water better?
A larger brine tank does not automatically improve water quality. Brine-tank size mainly changes salt storage and refill frequency, while resin volume, hardness capacity, flow rate, salt dose, and control programming determine softening performance.
The Bottom Line
Water softener brine tank problems are usually flow or control problems rather than simple salt shortages. Check the tank design, bypass position, salt bridge, mush, float, drain line, brine tubing, injector, and hardness setting in that order. Clear simple obstructions first, follow the manufacturer’s chemical instructions, and replace the tank or valve only when testing identifies a structural or mechanical failure. A properly diagnosed water softener brine tank problems issue is usually repairable without replacing the entire softener.