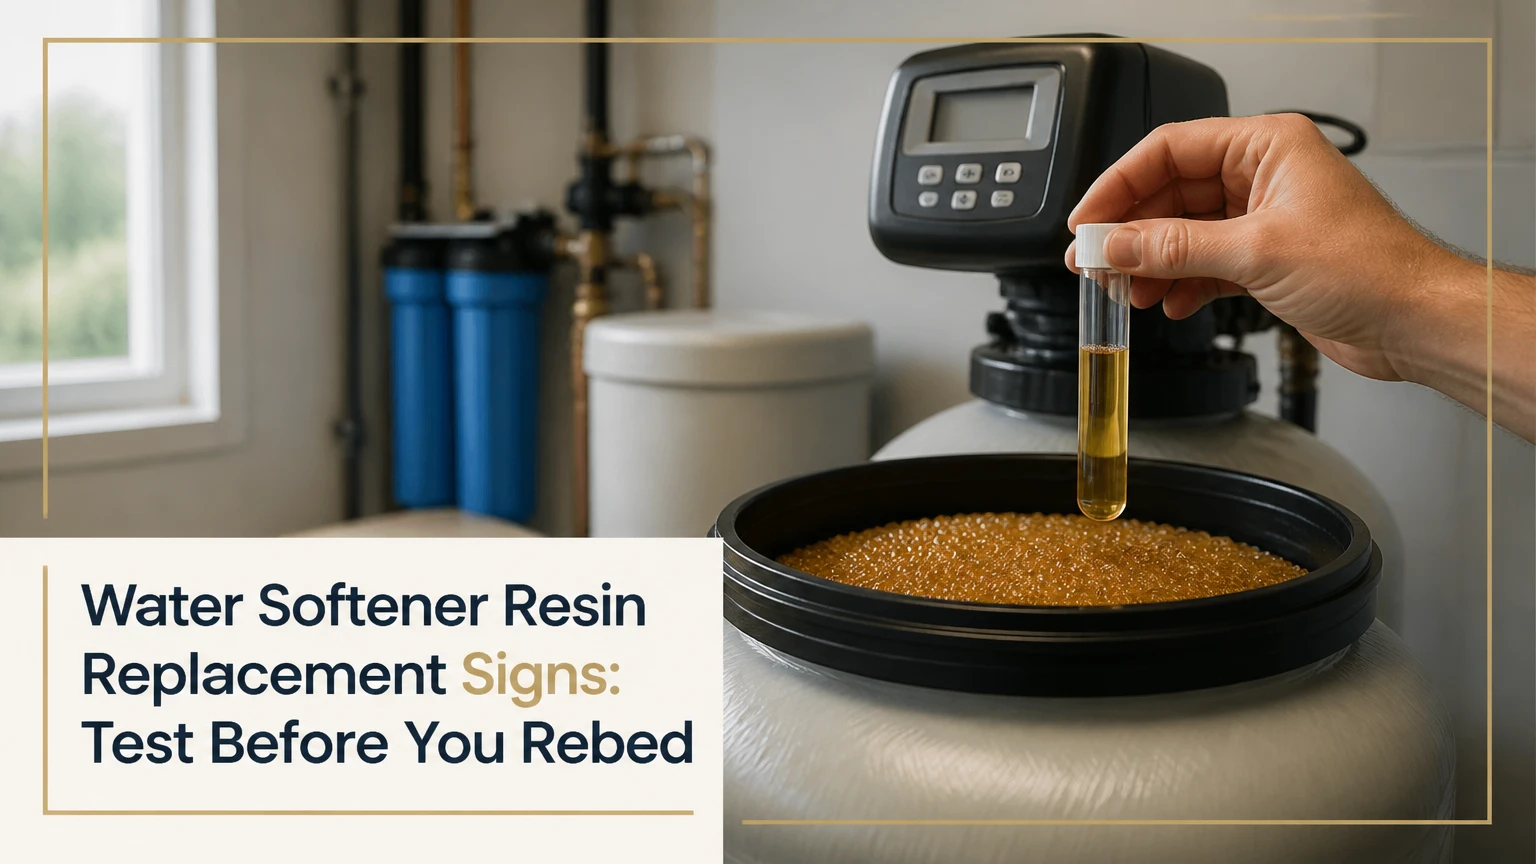
Water softener resin replacement signs include hard water immediately after a correctly completed regeneration, resin beads or fines in fixtures, and persistent capacity loss after brine and valve faults are excluded. A home water hardness test, regeneration check, and inspection for iron fouling can distinguish exhausted resin from a clogged injector, failed brine draw, or damaged distributor.
Key Facts at a Glance
- Standard water softener resin commonly lasts 10-15 years, but chlorine, chloramine, iron, oxidants, heat, and poor backwashing can shorten its life.
- Hardness after regeneration is the strongest practical sign of exhausted or damaged resin, provided the system actually brined and rinsed correctly.
- Frequent regeneration and high salt consumption indicate lost capacity, incorrect programming, leaking toilets, or valve problems; they do not prove resin failure alone.
- Orange, amber, or dark particles may be resin, iron sediment, corrosion, or carbon media, so a particle sample should be identified before replacing the bed.
- A typical residential rebed costs about $90-$180 in materials for DIY work and $300-$600 through a service company.
- Resin selection depends on chlorine exposure, iron concentration, sediment, tank design, and the control valve’s programmed capacity.
What Is Water Softener Resin?
Water softener resin is a bed of negatively charged, cross-linked polymer beads that exchanges calcium and magnesium for sodium or potassium. The beads usually contain polystyrene cross-linked with divinylbenzene, and the cross-link percentage affects physical strength and resistance to oxidative damage.
A mineral tank commonly holds 0.75-2.0 cubic feet of resin. During service, hard water flows downward or upward through the bed, depending on the valve design, while calcium and magnesium attach to the resin. During regeneration, concentrated sodium chloride or potassium chloride brine restores the exchange sites and sends displaced hardness to the drain.
Water softener resin does not disinfect water, remove dissolved gases, reduce total dissolved solids, or reliably eliminate every form of iron. A softener can reduce ferrous iron under suitable conditions, but ferric iron, tannins, manganese, hydrogen sulfide, sediment, and bacteria often require separate treatment.
How Long Does Softener Resin Last?
Softener resin typically lasts 10-15 years in a moderately chlorinated supply with appropriate backwashing, although well-water iron and oxidants can reduce useful life to 5-10 years. The calendar is a screening clue, not a replacement schedule.
| Operating condition | Typical useful life | Main failure mechanism | First maintenance check |
|---|---|---|---|
| Low-chlorine private well | 12-20 years | Physical attrition or iron fouling | Iron and sediment test |
| Chlorinated municipal water | 8-15 years | Oxidative polymer damage | Free chlorine test |
| Chloraminated municipal water | 5-12 years | Stronger oxidative exposure | Chloramine or disinfectant data |
| Well water with 2-5 mg/L iron | 5-10 years | Iron coating and reduced exchange | Resin cleaner and iron control |
| High sediment or poor backwash | 3-8 years | Bed compaction and distributor blockage | Sediment filter and flow check |
Manufacturers commonly rate resin by capacity under defined salt doses, flow rates, and water chemistry. A household that uses the softener beyond its design flow or allows the bed to foul will obtain less capacity than the laboratory rating.
Which Water Softener Resin Replacement Signs Matter?
The strongest water softener resin replacement signs are immediate hardness after a verified regeneration, resin particles in house plumbing, and continued failure after the brine system, injector, programming, and bypass valve operate correctly. Secondary signs include rising salt use, shorter service runs, low pressure, and discoloration.
Hard Water Returns After Regeneration
Test hardness at a cold-water tap after the softener has completed a full regeneration and at least one rinse cycle. If hardness is near the untreated-water level immediately afterward, the resin bed may be exhausted, chemically damaged, badly fouled, or missing enough volume to provide capacity.
Use a drop-count hardness kit rather than judging by soap lather or scale alone. Collect one sample before the softener and one after it, then compare the results in grains per gallon or milligrams per liter as calcium carbonate.
| Test result | Likely interpretation | Next action |
|---|---|---|
| Treated water is below 1 grain per gallon | Softener is producing conventionally soft water | Monitor normally |
| Treated water rises slowly before regeneration | Capacity, programming, or water use issue | Check settings and leakage |
| Treated water is hard directly after regeneration | Brine, valve, bypass, or resin failure | Verify regeneration stages |
| Treated water equals raw water after verified regeneration | Resin bed or distributor problem is likely | Inspect or rebed the tank |
A failed brine draw can mimic dead resin. Confirm that the brine level falls during the brine-draw stage, the drain flows, and the injector is unobstructed before buying media.
Resin Beads or Fines Appear in Fixtures
Small amber, tan, orange, or dark-brown particles in faucet aerators, toilet tanks, shower screens, or appliance inlet screens can indicate resin breakdown. A cracked lower distributor, damaged upper basket, split riser tube, or incorrect startup can also release intact beads without proving that the resin itself is old.
Capture particles in a clean glass. Resin beads usually feel smooth and uniform, while iron sediment may smear orange or settle as irregular grit. Do not run suspected resin through water heaters, washing machines, refrigerator valves, or thermostatic mixing valves until the source is located.
Water Pressure Drops Across the House
A failing resin bed can create pressure loss when degraded beads compact, produce fines, or block the lower distributor. Pressure loss also comes from a clogged sediment filter, restricted bypass, fouled injector, partially closed supply valve, or a blocked whole-house cartridge.
Compare pressure with the softener in service and bypass. If pressure returns in bypass, the softener or its prefilter is restricting flow. If pressure remains low in bypass, resin replacement will not solve the household pressure problem.
Salt Use or Regeneration Frequency Increases
A softener that regenerates more often or consumes salt faster may have lost usable capacity, but the same symptom results from a leaking toilet, a new household occupant, incorrect hardness programming, a stuck valve, or a failed meter.
A useful field comparison is salt use per regeneration, not salt use per month alone. Record the programmed salt dose, meter gallons, regeneration interval, and actual water demand for two to four weeks.
| Symptom pattern | More probable cause | Resin replacement confidence |
|---|---|---|
| Hardness immediately after regeneration | Resin, brine, or valve failure | Medium to high |
| More frequent cycles with soft output | Water use or meter setting | Low |
| More salt with hard output | Lost capacity or brine fault | Medium |
| Beads in fixtures plus pressure loss | Distributor or resin breakdown | High |
| Rusty water only from hot taps | Water heater corrosion | Low |
What Causes Resin to Fail Early?
Chlorine and chloramine attack the polymer structure, iron coats exchange sites, and mechanical abrasion creates fines. Poor backwashing, excessive flow, heat, oxidizing chemicals, and sediment can accelerate capacity loss even when the tank is less than ten years old.
Chlorine and Chloramine Damage
Eight-percent cross-link resin is widely used and can perform well on non-chlorinated water. Ten-percent cross-link resin generally provides greater oxidative resistance, making it a sensible choice for many municipal supplies, although the correct selection depends on the manufacturer’s specifications and actual disinfectant exposure.
A carbon prefilter can reduce chlorine entering the softener, but carbon requires correct sizing, replacement, and protection from bacterial growth. It does not automatically solve chloramine exposure because chloramine reduction requires suitable contact time and media.
Iron Fouling
Dissolved ferrous iron can occupy resin exchange sites and produce rusty water during regeneration. Ferric iron particles are more difficult because they can coat the bed, restrict flow, and settle as sediment.
Resin cleaners may restore some iron-fouled capacity. Cleaning will not reverse oxidative polymer damage, broken beads, or a distributor that has already failed.
Sediment and Insufficient Backwash
Sediment fills the spaces between beads and reduces bed expansion during backwash. An undersized drain line, low flow rate, blocked injector, or incorrectly programmed backwash can leave the tank compacted and dirty.
An underfilled tank also produces poor capacity, while an overfilled tank leaves insufficient freeboard for expansion. The control valve manual takes priority over generic fill percentages.
Which Resin Type Should You Choose?
Choose 10% cross-link cation resin for many chlorinated municipal supplies, standard 8% resin for suitable low-oxidant water, fine-mesh resin for selected ferrous-iron applications, and specialty shallow-shell media only when its capacity and programming instructions match the valve. No resin type fixes severe sediment, bacterial contamination, or ferric iron by itself.
| Resin option | Typical cross-link or structure | Suitable water condition | Important limitation |
|---|---|---|---|
| Standard cation resin | 8% DVB | Low-chlorine water, ordinary hardness | Lower oxidative resistance |
| Heavy-duty cation resin | 10% DVB | Chlorinated municipal water | Higher purchase price |
| Fine-mesh resin | 8-10% DVB, smaller beads | Selected ferrous iron applications | Needs compatible distributor and clean water |
| Shallow-shell specialty resin | Inert-core construction | High-efficiency salt operation | Requires manufacturer-specific settings |
| Macroporous specialty resin | Larger pore structure | Certain organic or fouling conditions | Not a universal household replacement |
Fine-mesh resin is not automatically the best iron treatment. Water testing should establish iron form, concentration, pH, manganese, tannins, and hydrogen sulfide before selection.
How Much Resin Does a Tank Need?
Common residential tanks use approximately 0.75 cubic feet in an 8-inch by 44-inch tank, 1.0 cubic foot in a 9-inch by 48-inch tank, 1.5 cubic feet in a 10-inch by 54-inch tank, and 2.0 cubic feet in a 12-inch by 52-inch tank. The valve manual and original media volume override estimates based only on outside dimensions.
| Mineral tank size | Typical resin volume | Approximate dry resin mass | Typical application |
|---|---|---|---|
| 8 x 44 inches | 0.75 cubic feet | 45-55 pounds | Small household |
| 9 x 48 inches | 1.00 cubic foot | 60-75 pounds | Two to three occupants |
| 10 x 54 inches | 1.50 cubic feet | 90-110 pounds | Larger household |
| 12 x 52 inches | 2.00 cubic feet | 120-150 pounds | High demand |
Resin occupies only part of the mineral tank because the bed needs freeboard for backwash expansion. A common planning range is 30-40% empty space above the media, but the required volume varies by bead density, valve design, and backwash rate.
Can You Replace the Resin Yourself?
A capable homeowner can rebed a conventional single-tank softener in roughly 1-3 hours, with typical material costs of $90-$180. The work becomes risky when the tank is large, the valve is integrated with rigid plumbing, the tank cannot be safely moved, or the distributor and valve model are unknown.
Before You Start
| Requirement | Typical value | Why it matters |
|---|---|---|
| Work time | 1-3 hours | Includes draining and flushing |
| DIY materials | $90-$180 | Resin, lubricant, funnel, disposal supplies |
| Professional service | $300-$600 | Labor, media, inspection, disposal |
| Helpers | 1 additional person | A filled tank can exceed 150 pounds |
| Test kit | 1 hardness kit | Confirms performance before and after |
| Safety equipment | Gloves, eye protection, tarp | Prevents contact and water damage |
Obtain the valve manual, resin specification, distributor dimensions, replacement O-rings, silicone lubricant approved for potable-water equipment, a wide funnel, buckets, hose, and a method for disposing of wet media. Turn off electricity before disconnecting a powered valve.
Step 1: Isolate and Depressurize
Put the softener in bypass, close the supply if the plumbing arrangement requires it, and initiate a manual regeneration only if the valve instructions permit pressure relief that way. Unplug the control valve after water pressure has been relieved.
You will know the tank is safe to open when the plumbing no longer hisses and fittings can be loosened without force. The common mistake is opening the tank under pressure, which can eject the valve or water unexpectedly.
Step 2: Remove the Valve and Old Media
Disconnect the brine line and plumbing connections, then remove the control valve without twisting or lifting the central riser tube. Keep the riser tube centered and cover its opening with tape before pouring or flushing media.
Drain the tank into a suitable container or outdoor area allowed by local disposal rules. Do not send resin beads into household drains because beads can obstruct traps, aerators, and small appliance passages.
Step 3: Inspect the Distributor
Examine the lower distributor, riser tube, top basket, valve seal, and tank opening for cracks, missing screens, swelling, or resin residue. A new resin bed cannot compensate for a broken distributor.
Replace damaged parts before loading media. The practitioner rule is simple: if beads previously reached the plumbing, inspect every retention component rather than replacing resin alone.
Step 4: Load the New Resin
Keep the riser tube taped and vertical, use a funnel, and add only the manufacturer-specified gravel support layer. Pour the measured resin slowly so the tank neck, riser, and distributor remain undamaged.
Remove the tape only after all media is inside the tank. Confirm that the riser tube remains centered before reinstalling the valve, because an off-center tube can miss the valve seal and send untreated water around the bed.
Step 5: Reassemble and Start Slowly
Clean the tank threads and apply potable-water silicone lubricant to suitable O-rings. Reconnect the valve, brine line, and plumbing, then open the bypass gradually to fill the tank without a water hammer.
You will know the startup is controlled when air leaves the nearest open cold-water tap and no resin appears. Petroleum jelly is a poor substitute for silicone lubricant because petroleum products can damage some elastomers.
Step 6: Regenerate and Flush
Run the valve’s complete regeneration sequence, including backwash, brine draw, slow rinse, fast rinse, and refill. Flush cold-water fixtures individually until air, color, odor, and particles disappear before using the water for drinking or appliances.
A bleach dose should follow the softener manufacturer’s sanitation instructions, not a universal recipe. Excess bleach can damage resin and seals, while an incorrect dose may fail to sanitize the tank.
What Alternatives Exist Before Resin Replacement?
Clean or repair the existing system when resin remains structurally sound and the problem comes from iron fouling, brine failure, or programming. Replace the entire softener when the tank, valve, distributor, or electronics are obsolete or when repair costs approach a modern unit.
| Remedy | Typical cost range | Best use case | Expected result |
|---|---|---|---|
| Iron resin cleaner | $15-$45 | Reversible iron fouling | Restores some capacity |
| Injector or screen cleaning | $0-$150 | Failed brine draw | Restores regeneration |
| Distributor replacement | $40-$180 | Cracked screen or riser | Stops bead migration |
| Resin rebed | $90-$600 | Dead or degraded media | Restores exchange capacity |
| Complete softener replacement | $700-$2,500 installed | Old valve and tank | Replaces multiple failure points |
A salt-free conditioner is not a direct resin substitute. Most conditioners alter scale behavior without removing calcium and magnesium, so they cannot deliver the same hardness reduction, soap performance, or sodium exchange result.
Why Does a New Resin Bed Still Produce Problems?
Post-replacement problems usually come from trapped air, distributor damage, incorrect programming, incomplete flushing, or resin in the valve injector. Salty water after a cycle points more often to a rinse or brine problem than to the resin chemistry itself.
| Post-replacement symptom | Likely fault | Corrective response |
|---|---|---|
| Beads at faucets | Cracked distributor or untaped riser | Bypass, inspect, flush plumbing |
| Salty taste after regeneration | Incomplete rinse or injector fault | Run full cycle and inspect injector |
| No brine draw | Air leak, clogged injector, blocked line | Check tubing, seals, and nozzle |
| Hard water immediately | Bypass open or wrong programming | Verify valve position and capacity |
| Tank leaks at valve | Damaged O-ring or cross-threading | Depressurize and reseal |
| Low pressure after rebed | Resin fines or blocked basket | Bypass, flush, inspect distributor |
Do not repeatedly regenerate a system that is sending beads into the plumbing. Continued operation can damage refrigerator solenoids, faucet cartridges, washing-machine valves, and water heaters.
FAQ
Can a water softener stop working because it ran out of salt?
A water softener can produce hard water when the brine tank lacks salt, but that condition does not prove resin failure. Add the correct salt, verify water enters and leaves the brine tank, and run a complete regeneration. Test treated hardness afterward before deciding whether the resin bed needs replacement.
Can old resin be cleaned instead of replaced?
Old resin can sometimes be cleaned when iron or organic fouling blocks otherwise sound exchange sites. Cleaning cannot restore beads damaged by chlorine oxidation, heat, abrasion, or physical breakdown. If cleaning produces particles, fails to restore hardness removal, or the bed is beyond its typical service life, replacement is the more reliable remedy.
How do I tell resin beads from iron sediment?
Resin beads are generally smooth, rounded, and similar in size, while iron sediment is irregular, gritty, and capable of leaving an orange-brown smear. A sample in a clear glass can provide an initial clue, but a water-treatment technician should inspect the distributor and test the source when particles continue.
Does a bigger resin tank make water softer?
A larger resin tank increases potential exchange capacity and can support higher flow, but it does not automatically reduce hardness below the softener’s design capability. Correct resin volume, salt dose, regeneration frequency, flow distribution, and valve programming determine performance. Oversizing can also waste salt and water if programming is not adjusted.
Should a private well use fine-mesh resin?
A private well should use fine-mesh resin only after testing confirms suitable ferrous iron and low sediment. Fine beads can remove selected dissolved iron more effectively than standard media, but they can clog when ferric iron, sand, manganese, or organic matter enters the tank. Pretreatment is often the safer design.
How often should a hardness test be performed?
Test raw and treated water after installation, after any programming change, and whenever hardness, salt use, or regeneration frequency changes. A practical household schedule is every three to six months, with an additional test after a prolonged salt outage or well-water event.
The Bottom Line
The most reliable water softener resin replacement signs are hard water after a verified regeneration, persistent capacity loss after brine and valve checks, resin particles in plumbing, and pressure restriction isolated to the softener. Test hardness first, identify the particle source, inspect the distributor, and match replacement media to chlorine, iron, sediment, and tank specifications. Water softener resin replacement is justified when the bed has lost structural integrity or cannot recover capacity after correct cleaning and regeneration.