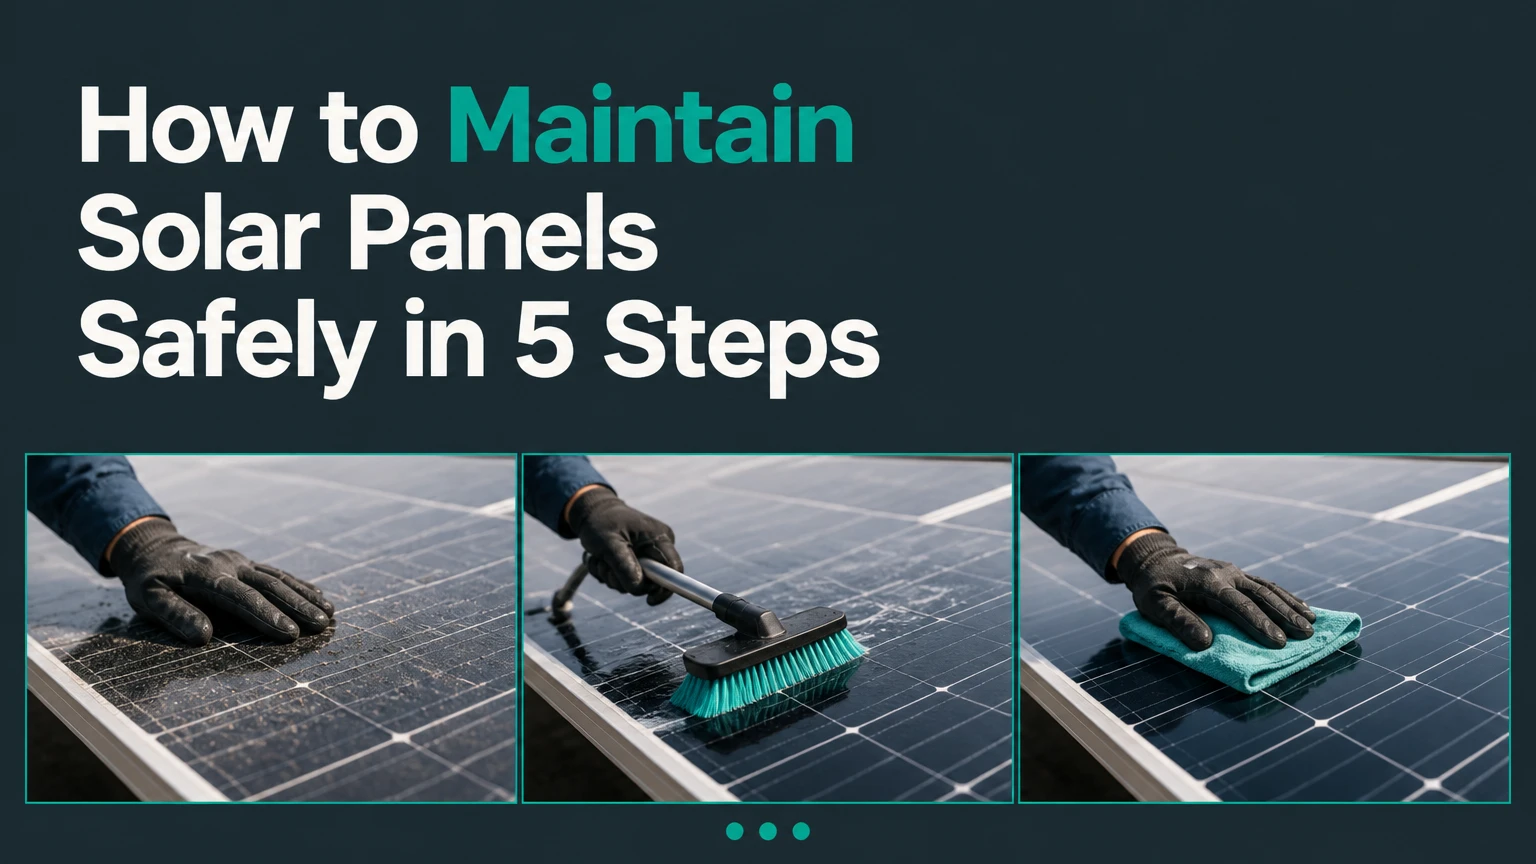
Solar panel maintenance means monitoring production, inspecting modules and wiring, removing harmful soiling, and arranging qualified electrical repairs when needed. Most homeowners can safely monitor and wash an accessible array from the ground, but roof access, live DC wiring, damaged modules, and inverter faults require a trained professional.
Key facts at a glance
Solar panel owners should inspect system performance monthly and physically inspect accessible equipment at least twice yearly.
Cleaning frequency depends more on dust, pollen, bird droppings, rain, and panel angle than on a fixed calendar.
Cool water, a soft non-abrasive brush, and a clean squeegee are safer than pressure washers or household glass cleaners.
Never walk on photovoltaic modules, disconnect plugs under load, or open an inverter unless qualified to do so.
A sudden production loss usually indicates a fault, shading change, inverter issue, or wiring problem rather than ordinary dirt.
Professional cleaning commonly costs about $150-$350 for a typical residential array, while electrical repairs cost substantially more.
What does solar panel maintenance include?
Solar panel maintenance includes performance monitoring, visual inspection, surface cleaning, vegetation control, wiring checks, inverter ventilation, and corrective repairs. The objective is not to make glass look polished; it is to preserve energy yield, identify defects early, and keep the photovoltaic system safe.
A solar array contains more than modules. The balance-of-system equipment includes racking, DC cabling, connectors, combiner boxes, disconnects, inverters, optimizers, meters, batteries, and sometimes trackers. Each component has a different failure mode and service interval.
Solar panels convert photons into direct-current electricity through the photovoltaic effect. Dust, pollen, soot, salt, leaves, and bird droppings reduce the light reaching the cells. The effect is uneven when one dropping shades a small area, because bypass diodes and module strings can change current flow.
The National Renewable Energy Laboratory’s PV Performance Modeling Collaborative identifies soiling as a site-specific loss factor that depends on deposition, rainfall, tilt, and cleaning events, rather than a universal annual percentage. That distinction matters: a dry agricultural site may need frequent cleaning, while a steep, rainy suburban array may need very little.
How does dirt reduce solar output?
Soiling reduces solar output by blocking or scattering light at the module surface. Uniform dust usually causes a gradual production decline, while bird droppings, leaves, and localized shade can create disproportionate losses or hot areas.
A shaded cell does not always reduce the entire array by the same percentage. Module design, string layout, bypass diodes, power optimizers, microinverters, and the location of the obstruction determine the result. Claims that one dirty cell always cuts an entire string are too broad.
The most useful diagnostic is a trend in monitored kilowatt-hours under comparable weather conditions. Compare clear days in the same season, not a cloudy day before cleaning with a sunny day afterward.
How often should you maintain solar panels?
Inspect a residential solar system twice per year, then clean when monitoring data or visible soiling shows a meaningful loss. Monthly monitoring is more valuable than blindly scheduling twelve cleanings because rainfall and local contamination vary widely.
Use the following schedule as a starting point, then adjust it after observing production and site conditions:
| Site condition | Physical inspection | Typical cleaning trigger | Main concern |
|---|---|---|---|
| Steep suburban roof with regular rain | Every 6 months | Visible droppings or persistent film | Safe access |
| Dry rural property near an unpaved road | Every 2-3 months | Dust visible across most glass | Abrasion from dry dust |
| Coastal property with salt exposure | Every 3-6 months | Salt haze or bird residue | Corrosion and deposits |
| Tree-lined property with pollen and sap | Every 3-4 months in spring | Sticky residue or pollen film | Organic buildup |
| Snow-prone ground array | Before and after winter | Snow remains after natural shedding | Structural and snow-load damage |
Rain can remove loose dust, but rain does not reliably remove oily soot, bird droppings, salt deposits, pollen, or dried mineral residue. A steep panel receives more rinsing than a low-slope panel, and clean rainfall is more effective than brief showers followed by dust.
A useful practitioner rule is to clean when the expected extra electricity value exceeds the service cost, but homeowners should first use monitoring data to establish whether a visible deposit affects output. Cleaning a lightly soiled array may produce no measurable financial return.
Before you start: safety, tools, and prerequisites
Before cleaning solar panels, confirm that the array can be reached without walking on the roof and that the manufacturer permits owner cleaning. The minimum safe setup includes cool modules, stable ground, an insulated reach tool, clean water, and no damaged or exposed electrical equipment.
| Item | Typical quantity or specification | Purpose | Avoid |
|---|---|---|---|
| Soft solar brush | 1, non-abrasive nylon head, 10-16 inches | Loosen dust and residue | Wire or stiff bristles |
| Extension pole | 1, 12-30 feet as needed | Clean from safe ground | Unstable ladders |
| Hose | 1, low-pressure, adjustable nozzle | Rinse glass | Pressure washer |
| Water | 10-25 gallons for a typical home array | Remove suspended dirt | Hot water on hot glass |
| Squeegee | 1, soft rubber, clean edge | Remove standing water | Scratched or gritty blade |
| Personal protective equipment | Eye protection and non-slip footwear | Protect during ground work | Roof work without fall protection |
Do not use a ladder as a substitute for a fall-protection plan. A ladder can provide access but does not make a sloped roof safe. Do not touch exposed conductors, unplug MC4-style connectors, open junction boxes, or test DC voltage unless you are trained and authorized.
Manufacturer instructions take priority. Some warranties specify approved cleaning methods, and frameless or building-integrated photovoltaic products may require different procedures.
How to maintain solar panels in five steps
The complete homeowner cleaning process usually takes 30-90 minutes for 15-25 modules when the array is accessible from the ground. The sequence is inspection first, washing second, and electrical troubleshooting only by qualified personnel.
Step 1: Check the system and choose a safe time
Schedule maintenance in the early morning, late afternoon, or an overcast dry period when module glass is cool. Review the monitoring app for the previous seven days and record the date, weather, energy production, and any inverter alerts.
Do not clean during lightning, high wind, freezing conditions, or active rain. Water and electricity require distance, and wet roofs increase fall risk.
You will know this step worked when: the modules are cool, the ground is stable, weather is calm, and no error message or damaged cable requires immediate escalation.
Common mistake: starting with water before checking for cracks, loose cables, or a failed inverter. Water cannot fix an electrical fault.
Step 2: Inspect modules, racking, and cables
From the ground, use binoculars or a camera zoom to inspect module glass, aluminum frames, roof attachments, conduit, and the underside visible from a safe position. Look for cracks, discoloration, bubbling, delamination, corrosion, loose clamps, animal nests, chewed insulation, and cables resting in standing water.
Do not tighten a roof clamp by guesswork. Mounting hardware has specified torque values, and incorrect tightening can damage the frame or compromise wind resistance.
A dark rectangular mark, repeated inverter fault, burning smell, melted connector, or visible arcing requires immediate professional attention. Keep people away from the equipment and follow the system’s emergency shutdown instructions.
You will know this step worked when: the array has no obvious physical damage, the racking appears aligned, and no cable or connector is visibly compromised.
Common mistake: inspecting only the glass. Wiring, connectors, and ventilation often cause more expensive failures than surface dirt.
Step 3: Remove loose debris without abrasion
Use a soft brush or air from a safe distance to remove leaves, twigs, and dry loose dust. Move the brush in one direction with light pressure, and do not drag grit across the glass.
Never stand, kneel, sit, or place a ladder on a module. Even intact glass can hide cell microcracks after mechanical loading, and damage may appear later as a hotspot or output decline.
If debris has accumulated beneath the array, remove it only when the area is safely reachable. Bird nesting material can block ventilation, attract rodents, and damage insulation. Bird guards may reduce recurrence, but installation should not obstruct drainage or create a new cable-rubbing point.
You will know this step worked when: loose debris is gone and no grit remains on the glass before wet cleaning begins.
Common mistake: dry-scrubbing caked bird droppings. Soften those deposits with water first to reduce scratching.
Step 4: Wash with cool, clean water
Rinse the modules with low-pressure water, then use a soft brush or microfiber applicator with plain water. For stubborn organic residue, use only a small amount of manufacturer-approved, pH-neutral soap, followed by a thorough rinse.
Water quality matters. Hard water can leave calcium and magnesium spots, especially in hot, dry climates. A deionized or softened-water rinse reduces residue, although ordinary clean water is acceptable when the surface is dried with a clean squeegee.
Keep the water temperature close to the module temperature. Avoid pouring cold water onto glass heated by direct sun, because rapid temperature changes can stress glass and seals. Never use a pressure washer, abrasive pad, bleach, ammonia, solvent, automotive wax, or household window cleaner.
Work from the highest reachable edge downward. Keep the brush and squeegee free of grit.
You will know this step worked when: the glass has no visible film, droppings, soap, or mineral spots after drying.
Common mistake: allowing tap water to evaporate in full sun. Mineral deposits can remain as a new optical obstruction.
Step 5: Record production after cleaning
Allow the system to return to its normal operating state according to the manufacturer’s instructions. Do not repeatedly switch AC or DC disconnects to force a restart, and do not open electrical enclosures to verify voltage.
Record the next clear-day production alongside comparable pre-cleaning data. A single instantaneous power reading is weak evidence because cloud cover, temperature, irradiance, and household loads change throughout the day.
You will know this step worked when: the monitoring platform reports normal operation without new alerts and production follows the expected weather-adjusted pattern.
Common mistake: expecting an immediate 15% gain from every wash. Light soiling may have little economic effect, while a fault may remain after perfectly clean modules.
Which maintenance tasks can homeowners do?
Homeowners can usually monitor production, remove ground-level debris, wash accessible modules, trim nearby vegetation, and photograph visible damage. Electrical testing, roof work, connector replacement, inverter repair, and battery service should be assigned to qualified personnel.
| Task | Homeowner suitability | Typical interval | Escalation condition |
|---|---|---|---|
| Check monitoring app | Suitable | Monthly | Repeated unexplained decline |
| Ground-level visual inspection | Suitable | Every 6 months | Cracks, corrosion, damaged cable |
| Ground-level module washing | Suitable if safe | Site-dependent | Sloped or fragile roof |
| Roof racking inspection | Professional preferred | Every 1-3 years | Loose hardware or roof leak |
| Inverter diagnostics | Limited to display and app | Monthly | Arc, ground fault, overheating |
| Battery inspection | Follow manufacturer limits | Monthly visual check | Swelling, odor, heat, alarm |
Professional service is usually the better choice for a steep roof, a multi-story building, an array over fragile roofing, or any system with faults. Insurance, fall protection, specialized water filtration, thermal imaging, and electrical test equipment can justify the service cost.
Robotic cleaners are mainly suitable for large commercial or utility arrays where repeated labor and water use justify capital equipment. A robot is not automatically safer: it adds motors, rails, batteries, weight, and another maintenance requirement.
What is the safest cleaning method?
The safest general cleaning method is a cool-water rinse followed by a soft, non-abrasive brush and clean squeegee used from stable ground. Plain water is preferable to chemical cleaners, and deionized water helps prevent mineral spotting where local tap water is hard.
| Cleaning approach | Typical cost | Best scale | Main limitation |
|---|---|---|---|
| Ground-level DIY rinse | $0-$50 per visit | 1-25 modules | Limited reach and fall safety |
| Water-fed soft brush | $50-$200 equipment | 10-40 modules | Storage and water quality |
| Professional purified-water cleaning | $150-$350 residential visit | 15-25 modules | Recurring labor cost |
| Commercial manual cleaning | $0.10-$0.40 per watt, typical | 25-500 kW | Site access and scheduling |
| Robotic or automated cleaning | Project-specific, often thousands | Large arrays | Capital and mechanical upkeep |
Cleaning products are not a performance upgrade. Soap can help release grease or bird residue, but excess detergent leaves a film and increases rinsing time. Always follow the module manufacturer’s written instructions when they specify a product.
How do costs and maintenance time compare?
Typical residential solar panel cleaning costs $150-$350 per professional visit, while a safe DIY wash may cost $50-$200 in reusable equipment. Electrical inspections, roof repairs, inverter replacement, and battery work are separate services and should not be bundled into a cleaning estimate without an itemized scope.
| Service | Typical residential cost | Typical duration | What the price should include |
|---|---|---|---|
| DIY equipment purchase | $50-$200 one time | 1-2 hours setup | Pole, brush, hose fittings |
| Professional cleaning | $150-$350 per visit | 1.5-3 hours | Wash, rinse, basic visual check |
| Electrical inspection | $200-$500 | 2-4 hours | Inverter, wiring, protection checks |
| Module replacement | $250-$700 each installed | 1-3 hours each | Matching module and labor |
| String inverter replacement | $1,500-$3,500 | 3-6 hours | Hardware, commissioning, labor |
Prices vary by region, roof height, array size, access, licensing, and whether lift equipment is required. Ask for proof of liability insurance and request confirmation that the contractor will not use a pressure washer or abrasive brush.
The financial test is simple: compare estimated annual production recovered with cleaning cost. A small system with minor soiling may not recover a paid cleaning visit quickly, whereas a dusty commercial array can justify frequent service because every lost kilowatt-hour affects operating revenue.
What changes for different solar systems?
Maintenance depends on module construction, mounting location, power electronics, and environmental exposure. Residential roof arrays prioritize fall safety, commercial arrays require systematic inspections, and trackers add motors, bearings, controls, and alignment checks.
| System type | Maintenance priority | Typical service focus | Owner action |
|---|---|---|---|
| Pitched residential roof | Safe access and soiling | Glass, roof penetrations, inverter | Monitor and inspect from ground |
| Flat commercial roof | Drainage and thermal conditions | Ballast, drains, strings, HVAC shade | Use scheduled O&M service |
| Ground-mounted array | Vegetation and animals | Fences, erosion, rodents, weeds | Keep clearance around modules |
| Single-axis tracker | Mechanical reliability | Drive units, bearings, alignment | Professional service only |
| Thin-film or frameless BIPV | Product-specific cleaning | Seals, surface compatibility | Follow manufacturer procedure |
| Battery-backed system | Thermal and electrical safety | Battery alarms, ventilation, terminals | Do not open battery enclosure |
Thin-film modules are not automatically maintenance-free. Frameless products may shed less dirt at the lower edge, but their coatings, seals, and mounting systems can be more sensitive to incompatible tools or chemicals.
Ground arrays need vegetation control without herbicide overspray on modules. Maintain clearance that prevents plants from shading the lower rows and allows inspection of cables, fences, and drainage.
What are the most common maintenance mistakes?
The most damaging maintenance mistakes are pressure washing, abrasive scrubbing, walking on modules, using unsuitable chemicals, cleaning hot glass with cold water, and treating a production fault as a cleaning problem. These errors can cause microcracks, coating damage, water ingress, falls, or missed electrical hazards.
- Using a pressure washer: High pressure can damage seals, connectors, backsheets, and glass. Use a gentle hose rinse instead.
- Walking on modules: Mechanical loading can crack cells even when the top glass looks intact.
- Scrubbing dry grit: Water-soften deposits before brushing.
- Using household glass cleaner: Ammonia, solvents, and residues may damage coatings or leave a film.
- Ignoring hard-water spots: Use purified water or squeegee the surface before evaporation.
- Cleaning during peak heat: Cool the work window naturally; never create a sharp temperature change.
- Resetting faults repeatedly: A ground-fault or arc-fault alarm needs diagnosis, not repeated switch cycling.
A counterintuitive field lesson is that clean panels do not prove a healthy system. A failed optimizer, loose connector, or shaded string can reduce production while every module looks spotless.
How do you troubleshoot low solar production?
Troubleshoot low solar production by comparing weather-adjusted monitoring data, checking for new shade or visible damage, and reviewing inverter alerts before arranging service. A gradual decline across the whole array suggests soiling or seasonal conditions, while a sudden drop in one string suggests equipment, wiring, or shade problems.
| Symptom | Likely causes | Safe first action | Professional threshold |
|---|---|---|---|
| Gradual whole-array decline | Dust, pollen, seasonal sun angle | Compare clear days and inspect glass | Decline persists after cleaning |
| Sudden 30-50% drop | Inverter, string, shade, connector | Check app and error log | Any unexplained sudden loss |
| One module underperforms | Optimizer, bypass diode, crack, shade | Photograph and report module number | Electrical testing required |
| Inverter is blank | AC breaker, outage, inverter fault | Check whether other home circuits work | Breaker is on but display remains dead |
| Ground or arc fault | Damaged insulation, moisture, connector | Keep clear and call technician | Immediate escalation |
| Hotspot or brown mark | Cell damage, diode or connection fault | Stop physical contact with module | Prompt module inspection |
Do not use a household multimeter on unfamiliar solar DC circuits. PV strings can remain energized in daylight, and incorrect probing can create an arc. Qualified technicians can use insulation-resistance testing, IV-curve tracing, thermal imaging, and string-level measurements.
The International Electrotechnical Commission’s IEC 62446-1 standard defines documentation and testing practices for grid-connected photovoltaic systems, including verification and commissioning information that can support later maintenance. Keeping the original commissioning report makes fault comparisons more reliable.
How should you maintain panels in winter, snow, or coastal areas?
Winter maintenance should prioritize safe snow shedding, ice avoidance, and post-storm inspection rather than aggressive manual removal. Coastal maintenance should prioritize salt removal, corrosion inspection, and clean water rinsing because salt film can persist after light rain.
Do not climb onto an icy roof. Many residential systems shed snow naturally because modules are smooth and warmer than surrounding surfaces, but the rate depends on tilt, weather, snow depth, and mounting design.
Avoid metal snow rakes, shovels, and scraping tools that can scratch glass or strike frames. If snow removal is necessary, use only a manufacturer-approved tool from a safe ground position or hire a qualified service.
After hail, high wind, or a major storm, inspect from the ground and check monitoring alerts. Hail damage can be difficult to see, so an unexplained production change may justify a professional thermal or electrical inspection.
When should you hire a professional?
Hire a professional when the work requires roof access, electrical measurement, module removal, battery service, connector repair, or investigation of an inverter fault. Professional service is also appropriate when the array is inaccessible from stable ground or when a warranty claim may depend on documented inspection.
Ask the contractor four specific questions:
- Is the company insured for roof and electrical work?
- Which water, brush, and cleaning products will technicians use?
- Will the quote include before-and-after production records?
- Will the technician document cracks, wiring condition, inverter alerts, and roof penetrations?
A cleaning-only contractor may not be qualified to diagnose DC faults. Conversely, an electrical contractor may not include surface washing. The written scope should identify each service separately.
Frequently asked questions
Do solar panels need maintenance if they are still producing electricity?
Yes. Solar panels can continue producing electricity while dirt, shading, cracked cells, loose connectors, or inverter faults reduce output. Monitor monthly and inspect twice yearly, even when the inverter reports normal operation. Normal operation means the system is connected, not that it is delivering its expected weather-adjusted energy.
Can I clean solar panels with tap water?
Yes, if the water is clean and the surface is dried before mineral deposits form. Hard tap water may leave calcium spots, so a deionized or softened-water final rinse is preferable in high-mineral areas. Never use hot water on sun-heated glass, and avoid any additive that the module manufacturer does not approve.
Is solar panel cleaning worth the cost?
Solar panel cleaning is worth the cost when soiling is persistent, production has declined, and the expected recovered electricity exceeds the visit price. Cleaning is less likely to pay back quickly on a rainy, steep roof with light contamination. Use monitoring data and comparable clear-weather days instead of assuming a fixed percentage gain.
How long do solar panels last with proper maintenance?
Most modern photovoltaic modules carry performance warranties of about 25-30 years, while actual service life can extend beyond the warranty period when modules, racking, connectors, and inverters remain sound. Inverters generally have shorter expected service lives than modules, so long-term maintenance planning should budget for at least one inverter repair or replacement event.
Does cleaning solar panels improve efficiency?
Cleaning can improve energy yield when dirt blocks or scatters sunlight, but the gain depends on soiling severity, rainfall, module angle, and system design. A clean surface cannot correct a failed inverter, new shade, damaged cell, or wiring fault. Measure production before and after cleaning under comparable weather conditions.
Should I turn off solar panels before cleaning?
Follow the system and module manufacturer’s shutdown instructions, but do not assume that switching off a household breaker makes every PV conductor safe. Modules can generate DC electricity whenever illuminated. Ground-level washing without touching wiring still requires caution, while any electrical work or roof access requires a qualified professional.
The bottom line
To maintain solar panels, monitor production monthly, inspect the array and balance-of-system equipment twice yearly, and clean only when soiling affects performance or creates a visible deposit. Use cool clean water, a soft brush, and a squeegee, never a pressure washer or abrasive tool. Keep roof, wiring, inverter, and battery work with qualified professionals.
The safest maintenance plan is site-specific. A dusty rural array may need cleaning every few months, while a rainy suburban system may need only occasional washing. Track weather-adjusted output, document every service, and treat sudden faults as electrical problems rather than assuming that cleaning will restore production.