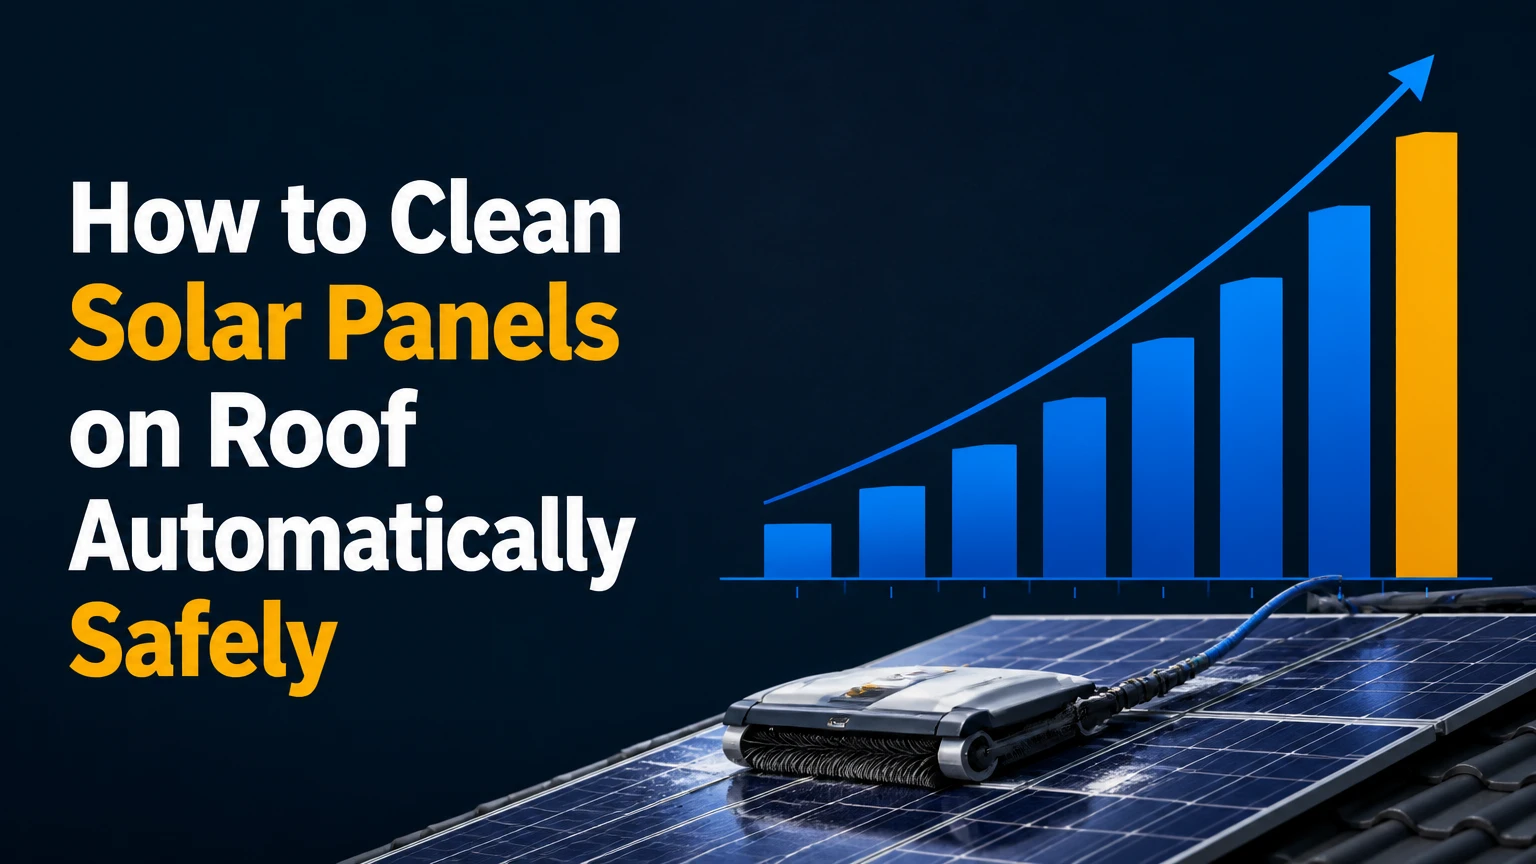
An automatic solar panel cleaning system removes dust, pollen, soot, and light bird residue from roof-mounted photovoltaic panels with programmed sprinklers, moving brushes, or a passive coating. For most homes, the safest approach is a professionally designed low-pressure spray system or a track-compatible robot operated when panels are cool, with treated water and independent electrical protection.
Key Facts at a Glance
- Automatic solar panel cleaning is usually semi-automatic on residential roofs, because installation, inspection, and occasional spot cleaning still require people.
- Deionized or suitably softened water prevents mineral spotting; hard water can leave calcium and magnesium deposits on glass.
- A cleaning cycle should use weather, temperature, freeze, leak, and equipment-fault checks before water or a robot reaches the array.
- Solar panels remain electrically live in sunlight, even when the inverter is switched off, so cleaning automation must never rely on inverter shutdown alone.
- Typical automatic system costs range from about $1,500-$5,500 for residential equipment before major roof plumbing or electrical work.
- Cleaning only pays when measured soiling losses exceed the system’s water, maintenance, and installation costs.
What Automatic Solar Panel Cleaning Means
Automatic cleaning means a permanently installed or remotely operated system removes surface soiling without a person carrying a brush across the roof for every cycle. The system can use fixed nozzles, a rail-guided or crawler robot, dry polymer brushes, vibration, electrostatic dust rejection, or a water-shedding coating.
Residential installations vary significantly. A fixed spray bar can run from a timer, while a robotic unit may require a person to place it on the first row, supervise its return, or clear a bird dropping that the brush cannot remove. A coating reduces adhesion but does not remove accumulated dirt by itself.
The practical objective is not maximum visual cleanliness. The objective is restoring enough light transmission to justify equipment, water, maintenance, and roof risk. The International Energy Agency Photovoltaic Power Systems Programme identifies soiling as a site-specific performance factor, and its guidance treats cleaning frequency as dependent on local dust, rainfall, tilt, and economic conditions rather than a universal calendar.
What does an automatic cleaning cycle do?
A typical cycle checks site conditions, wets or brushes the modules, removes loosened soil, confirms that water drains correctly, and records the resulting power output. A controller can use a timer, weather service, rain sensor, panel-temperature sensor, water-pressure switch, leak detector, or inverter-monitoring data.
The following sequence is suitable for a fixed low-pressure wash system:
- Check weather and temperature. Reject cycles during high wind, lightning, freezing conditions, or unusually hot glass.
- Confirm equipment status. Check filter pressure, reservoir level, pump status, nozzle pressure, and leak sensors.
- Protect electrical equipment. Keep junction boxes, connectors, cable penetrations, and inverters dry; follow the panel and inverter manufacturer’s shutdown procedure.
- Pre-wet the array. Use a short, low-pressure rinse to soften dust and droppings.
- Agitate only when needed. Use a manufacturer-approved soft brush or robot roller for bonded residue.
- Rinse with treated water. Use enough flow to carry loosened material beyond the lower frame.
- Inspect and record. Confirm no streaks, clogged nozzles, standing water, or robot errors, then compare production under similar irradiance.
The controller should not automatically re-energize equipment merely because a timer expires. A solar installer or qualified electrician should determine whether the cleaning design needs a controlled shutdown, and the system must comply with local electrical rules.
Which Automatic Cleaning System Fits a Roof?
The best system depends on array size, roof pitch, water availability, soiling type, and whether the roof can support service access. Fixed sprinklers suit uniform dust on arrays with drainage, robots suit larger installations with compatible framing, and coatings suit owners who want to reduce adhesion rather than eliminate maintenance.
| System | Typical residential cost | Water use | Best operating condition |
|---|---|---|---|
| Fixed spray bar | $2,300-$5,500 installed | 1.5-3 L/m² per cycle | Uniform dust, accessible plumbing, adequate drainage |
| Crawler robot | $2,000-$5,500 equipment | 0-2 L/m² | Compatible module rows, moderate pitch, no roof access during use |
| Rail-guided robot | $10,000-$40,000+ commercial | 0-2 L/m² | Large flat-roof commercial arrays |
| Hydrophobic coating | $200-$1,200 | Reduces rinse demand | Light dust and pollen, periodic maintenance acceptable |
| Dry brush carriage | $1,500-$8,000 typical project range | 0 L/m² | Arid sites where water is restricted |
Fixed spray systems
Fixed spray systems use header pipes and nozzles mounted near the upper or side edge of each module row. They have few moving roof components, but they need correct nozzle spacing, filtration, drainage, freeze protection, and a pump sized for the pressure loss through the pipework.
A spray bar cannot scrub baked bird droppings, oily soot, lichen, or salt crust effectively. It also creates a failure mode that manual cleaning does not: one blocked nozzle can leave a narrow dirty strip that remains unnoticed until production falls.
Use a sediment filter before the pump and a water-softening or reverse-osmosis/deionization stage where local water contains substantial minerals. A TDS value below 50 parts per million is a practical target for spot-free rinsing, while near-zero TDS water provides a larger margin against visible residue; the exact requirement depends on evaporation rate and glass temperature.
Autonomous cleaning robots
A solar-panel robot uses wheels, tracks, or a rail carriage to move a roller or brush across module surfaces. Commercial units may include edge detection, obstacle sensing, battery charging, remote alarms, return-to-start functions, and dry-cleaning modes.
Robot safety depends more on compatibility than on the advertised slope limit. A unit rated for a 15-25 degree incline may still damage a module if its wheel load, track pressure, turning force, or bridge span exceeds the panel manufacturer’s limits. The frame, not the glass, should carry any required track or guide hardware.
Do not place an unapproved robot on modules simply because the machine is lightweight. The National Renewable Energy Laboratory warns that module performance and durability depend on installation and operating conditions, while manufacturer warranties commonly exclude damage from unauthorized mechanical loading or cleaning methods.
Coatings, vibration, and waterless cleaning
Hydrophobic coatings cause water to bead and can reduce adhesion from dust and pollen. Hydrophilic treatments spread water into a film that may carry soil downward. Neither technology guarantees self-cleaning, and neither reliably removes thick bird droppings.
Electrostatic and vibration-based systems can reduce fine dust deposition without water, but residential availability, retrofit compatibility, durability, and cost remain limiting factors. Dry polymer brushes are more practical for many dusty sites, although they must be used only when loose grit will not be dragged across the glass.
How to Install and Run an Automatic Cleaning System
A safe installation requires a roof and electrical assessment before equipment selection. Plan on one to three days for a residential fixed system when plumbing, filtration, controls, and commissioning are included; a robot may take less installation time but more product-compatibility checking.
Before You Start
| Requirement | Typical specification | Why it matters |
|---|---|---|
| Array survey | Panel count, row length, roof pitch | Determines nozzle coverage or robot travel |
| Water test | TDS, hardness, sediment, pH | Prevents scale, clogging, and residue |
| Pressure check | 40-60 psi at design flow, if specified | Maintains even spray distribution |
| Electrical review | Inverter, isolators, cable routes | Prevents water intrusion and unsafe assumptions |
| Weather controls | Rain, wind, freeze, temperature inputs | Blocks damaging or wasteful cycles |
| Roof review | Load path, drainage, attachment points | Protects structure and roof warranty |
Step 1: Measure the Array and Roof
Record the number of modules, row length, module orientation, roof pitch, lower-frame clearance, gutters, drains, vents, skylights, and cable routes. Photograph the array from the ground and mark areas where bird droppings or chimney soot accumulate.
A fixed system needs spray coverage that reaches the full glass width without flooding roof penetrations. A robot needs a continuous travel path, edge clearance, traction, and a secure starting or docking location.
You will know this step worked when every module row has a defined cleaning path and no nozzle or robot route crosses an unprotected cable or roof opening. A common mistake is measuring only panel area and ignoring the lower frame, where runoff and grime collect.
Step 2: Test Water and Select Filtration
Test the source water before buying a pump or nozzle set. Hard tap water can leave white mineral rings after evaporation, while sediment can block fine spray orifices.
Use sediment filtration first, then a softener, reverse-osmosis system, or deionization cartridge according to the measured chemistry. Keep a TDS meter at the outlet and replace resin or filters when readings rise or spotting appears.
The water-quality target should be based on evaporation conditions, but less than 50 ppm TDS is a reasonable operational threshold for spot-free work. You will know this step worked when a small test rinse dries without a powdery film. A common mistake is testing water before the filter rather than at the nozzle outlet.
Step 3: Choose Controls and Safety Interlocks
Program the controller to run during cool, low-wind periods, usually near dawn or after sunset when the system design permits it. Add a rain forecast lockout, freeze lockout, low-pressure alarm, high-pressure cutoff, reservoir sensor, and leak detector.
Do not assume a cleaning cycle needs to shut down the photovoltaic array. Solar modules produce DC electricity whenever illuminated, and switching off the inverter does not make module wiring safe. The correct approach is to keep water away from live electrical connections and have a qualified installer define any required isolation procedure.
You will know this step worked when a simulated low-water, leak, high-wind, and freeze signal cancels the cycle. A common mistake is using only a timer, which can start a wash during a heat wave, storm, or frozen pipe condition.
Step 4: Install Nozzles, Tracks, or a Dock
Mount spray headers to approved framing or independent supports, not by drilling module glass or compromising roof flashing. Set nozzle orientation so water crosses the glass and drains beyond the lower frame rather than pooling against seals.
For robots, install tracks only where the panel and mounting-system manufacturer permits them. Verify maximum slope, turning radius, wheel pressure, battery temperature range, edge detection, and emergency return before the first unattended run.
You will know this step worked when every row receives an even test pattern and the robot completes a supervised route without slipping. A common mistake is aiming nozzles directly at junction boxes or using a track that leaves a persistent shadow on cells.
Step 5: Run a Cool-Panel Pre-Rinse
Start with a short pre-rinse that wets the array without blasting grit across the glass. The pre-rinse should soften dust and droppings for several minutes before any brush makes contact.
Avoid pressure-washing. High-pressure water can force moisture into seals, damage labels, loosen frames, and spread debris into cable or drainage areas. The Solar Energy Industries Association recommends following the module manufacturer’s maintenance instructions because cleaning methods and warranty conditions differ by product.
You will know this step worked when loose soil flows away and hardened spots soften without spray reaching electrical housings. A common mistake is beginning with a dry rotating brush, which can drag quartz-like sand across anti-reflective glass.
Step 6: Brush or Wash the Surface
Use only a soft, non-abrasive brush approved for photovoltaic glass, or operate a robot with a clean polymer microfiber roller. Keep brush pressure low and avoid rotating contact over dry grit.
A fixed spray system may need two passes for bird residue, with a pause between them. A robot should move at the manufacturer’s specified speed, commonly around 10-20 metres per minute for commercial equipment, rather than being forced to run faster.
You will know this step worked when the glass has no visible bands, the lower frame is not holding sludge, and the robot reports a complete route. A common mistake is using household detergent, abrasive pads, or a brush contaminated with roof grit.
Step 7: Complete the Pure-Water Rinse
Rinse from the upper edge toward the lower drainage path, using treated water until loosened material leaves the frame. Do not use a squeegee unless the module manufacturer specifically approves it, because trapped grit can scratch the coating.
Let panels air-dry when water quality is suitable. If streaks remain, stop repeating cycles and test TDS, nozzle alignment, and filter condition first.
You will know this step worked when the dried glass has no white residue and the gutters or drains are not blocked with loosened material. A common mistake is using more pressure to remove streaks caused by exhausted DI resin.
Step 8: Verify Output and Inspect the Hardware
Compare production after cleaning with a similar irradiance period before cleaning, using inverter monitoring or a dedicated irradiance sensor. A raw power increase does not prove cleaning paid off because clouds, temperature, shading, and grid curtailment also change output.
Inspect clamps, cable clips, roof penetrations, nozzles, robot wheels, tracks, and drainage. Record the date, water TDS, cycle duration, faults, and output change.
You will know this step worked when the array shows improved output under comparable sunlight and the system has no leaks or mechanical marks. A common mistake is judging success from a brighter-looking panel without checking performance data.
How Often Should Automatic Cleaning Run?
Automatic cleaning should run only when measured or visible soiling justifies it, not every day by default. A practical starting schedule is every four to eight weeks in moderate urban conditions, every one to two weeks during prolonged dust events, and after exceptional ash, pollen, or agricultural exposure.
| Site condition | Starting interval | Preferred method | Adjustment trigger |
|---|---|---|---|
| Coastal salt air | 2-4 weeks | Treated-water rinse | Salt film or sea spray |
| Urban dust and pollen | 4-8 weeks | Spray plus spot brush | Output loss or visible haze |
| Desert dust | 1-2 weeks | Dry brush or low-water robot | Dust storm frequency |
| Heavy bird activity | As needed | Spot treatment plus wash | Droppings on active cells |
| Snow or freezing climate | Seasonal | Manual/professional review | Ice, freeze, or roof access risk |
Rain is not a reliable cleaning method. Light rain can dissolve dust and then leave concentrated streaks, while heavy rain may remove loose soil but cannot remove oily deposits or bird droppings. NREL’s photovoltaic performance resources emphasize measuring site conditions and system output rather than applying a universal cleaning assumption.
What Does Automatic Solar Panel Cleaning Cost?
A typical residential automatic cleaning project costs approximately $2,300-$7,500 when equipment, filtration, plumbing, controls, and professional installation are included. Equipment-only robot prices can be lower, but a robot still needs compatible modules, safe storage, charging, maintenance, and a plan for faults.
| Cost component | Typical range | Recurrence | Main cost driver |
|---|---|---|---|
| Residential spray equipment | $1,500-$3,500 | One-time | Array length and pump size |
| Filtration and DI resin | $300-$1,500 | 6-36 months | TDS, water volume, local prices |
| Plumbing and installation | $800-$2,000 | One-time | Roof access and pipe routing |
| Crawler robot | $2,000-$5,500 | Battery and brushes | Slope, width, sensors |
| Annual maintenance | $100-$500 | Yearly | Filters, brushes, seals, battery |
Cleaning automation is financially sensible when annual recovered energy exceeds annual operating cost and the system does not create disproportionate roof or warranty risk. For a small, rain-washed suburban array, occasional professional cleaning may cost less than permanent automation.
Calculate payback with measured data:
Annual cleaning value = recovered kilowatt-hours × electricity value
Then subtract water, filter media, electricity, replacement brushes, service, and expected repairs. Do not use a generic 15-30% production gain. That range can occur in severe soiling environments, but many residential arrays experience much smaller losses, and the result depends on rainfall, tilt, dust chemistry, and bird activity.
Common Problems and How to Fix Them
| Symptom | Likely cause | Corrective action | Prevention |
|---|---|---|---|
| White powder or rings | High TDS or exhausted DI resin | Replace resin and flush lines | Measure outlet TDS |
| Uneven wetting | Blocked nozzle or low pressure | Clean filter and nozzle | Add pressure alarm |
| Robot stops mid-row | Dirty sensor, low battery, slope issue | Clean sensor and test return | Supervised commissioning |
| Dirty lower strip | Poor drainage or short spray pattern | Extend rinse coverage | Inspect frame runoff |
| Output does not improve | Soiling was not limiting power | Compare irradiance-normalized data | Measure before automating |
| Leaking near roof | Poor penetration or loose fitting | Stop system and repair flashing | Use approved supports |
A robot that stops on a roof should not be retrieved by climbing onto wet modules without a fall-protection plan. Use its remote return function if available, then call a qualified service provider when the route cannot be made safe from the ground.
Persistent bird droppings, moss, lichen, cement dust, and oily industrial residue often exceed the capability of automatic rinsing. Spot cleaning may require a manufacturer-approved soft brush, and roof access may require a professional solar maintenance contractor.
Which Approach Works for Different Sites?
| Site profile | Recommended first choice | Avoid | Reason |
|---|---|---|---|
| Small suburban array, 20-30 degrees | Manual service or fixed rinse | Heavy robot | Automation may not repay its cost |
| Dusty desert array | Dry brush robot | Daily water washing | Water scarcity and mud formation |
| Coastal commercial roof | Treated-water rail system | Untreated tap water | Salt and mineral residue compound |
| Flat commercial array | Rail-guided robot | Loose crawler without docking | Repeated rows favor guided travel |
| Steep residential roof | Fixed system installed by professionals | DIY roof placement | Fall and loading risk dominate |
| Freezing climate | Seasonal professional cleaning | Water left in pipes | Freeze damage can exceed cleaning benefit |
When should you choose a fixed sprinkler system?
Choose fixed sprinklers when the array has uniform rows, reliable water access, adequate drainage, and a roof structure that accepts permanent supports. Fixed systems are usually quieter and simpler than robots, but they cannot reach every stubborn deposit without occasional manual intervention.
When should you choose a robot?
Choose a robot when the array is large enough to justify equipment, the panel layout provides a continuous route, and the manufacturer confirms module-load compatibility. A robot is a poor choice for a small steep residential roof where retrieval, edge protection, and warranty concerns outweigh labor savings.
When is a coating enough?
Choose a coating only when the main problem is light dust or pollen and the owner accepts periodic inspection and reapplication. A coating cannot prevent soot, salt, bird droppings, or mineral scale from becoming visible, and its performance depends on correct glass preparation.
FAQ
Can rain replace automatic solar panel cleaning?
Rain can remove loose dust but usually cannot remove bird droppings, oily soot, salt crust, or bonded mineral residue. Light rain may create streaks by dissolving and redepositing soil. Use rainfall as one input for scheduling, not as proof that the array is clean.
Can I use tap water on roof-mounted solar panels?
You can use tap water for an initial rinse only when its mineral content is low and the water will not dry on the glass. For reliable spot-free results, test outlet TDS and use softened, reverse-osmosis, or deionized water when mineral content is elevated.
Do automatic systems damage solar panels?
Automatic systems can damage modules through abrasive grit, excessive brush pressure, high-pressure water, unsupported robot loads, poor drainage, or unauthorized frame attachments. Select equipment approved for the exact module and mounting system, then supervise commissioning before enabling unattended operation.
Do solar panels need to be turned off before cleaning?
Solar panels remain capable of producing DC electricity in daylight, even when the inverter is off. Do not touch connectors, exposed conductors, or junction boxes. Follow the equipment manufacturer’s shutdown procedure and use a qualified electrician where isolation is required.
Is a waterless solar panel cleaner effective?
Dry brushes can remove loose desert dust while using no water, but they are less effective against bird droppings, oily films, and hardened deposits. Dry cleaning is safest when the brush is clean, pressure is controlled, and abrasive grit is not dragged across the glass.
How can I tell whether cleaning increased solar output?
Compare inverter output with irradiance, temperature, time of day, and shading held as constant as possible. A before-and-after comparison on two similar clear days is more useful than comparing total daily kilowatt-hours across different weather conditions.
The Bottom Line
To clean solar panels on roof automatically, first measure the array, roof pitch, water chemistry, drainage, and soiling loss. Use fixed treated-water sprinklers for uniform residential dust, a compatible robot for larger continuous arrays, and dry brushing where water is scarce. Automate weather and fault lockouts, keep electrical boundaries intact, inspect the lower frame, and verify recovered output before expanding the cleaning schedule.