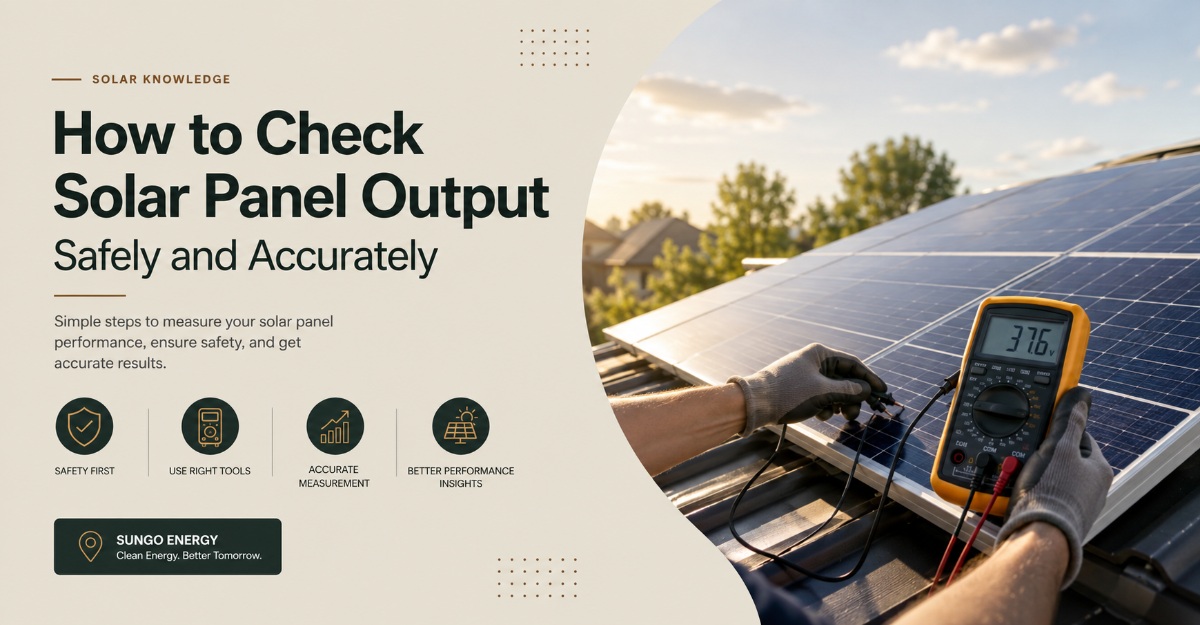
A solar panel can be checked in three layers: inspect the module and wiring, review inverter or charge-controller data, and measure electrical output under controlled sunlight. Start with monitoring and visual checks; use a multimeter only on an isolated, low-voltage setup unless you are qualified to work on live photovoltaic circuits.
Key facts at a glance
- A healthy solar panel should produce measurable DC voltage in daylight, but voltage alone does not prove that the panel can deliver its rated power.
- Compare measurements with the panel label, especially (V_{oc}), (V_{mp}), (I_{sc}), (I_{mp}), and (P_{max}).
- Solar-panel current changes strongly with sunlight and shading, while open-circuit voltage changes less dramatically.
- A rooftop system can show zero household output because of an inverter, battery, meter, grid, or shutdown fault, even when the panels are healthy.
- Never change a multimeter from voltage mode to current mode while connected to a live PV circuit.
- Do not walk on modules or open rooftop connectors; DC arcs can persist in sunlight and can cause fire or severe injury.
What exactly are you checking?
A solar panel is a photovoltaic module that converts sunlight into direct-current electricity. A complete solar-energy system also includes module cables, connectors, fuses, isolators, string wiring, an inverter or charge controller, batteries where fitted, and monitoring equipment.
The testing target must therefore be identified first. A portable 12-volt module, a series string on a roof, and an energized 1,000-volt commercial array require different instruments and procedures. A reading taken at the inverter does not prove that every panel produces equal power.
What do the panel ratings mean?
The specification label provides the reference values needed for a useful test. Under standard test conditions, commonly defined as 1,000 watts per square metre irradiance, 25°C cell temperature, and an AM1.5 reference spectrum, the module receives a laboratory comparison point rather than a promise of identical outdoor output.
| Label value | Meaning | Typical 12 V nominal panel | Diagnostic use |
|---|---|---|---|
| (V_{oc}) | Open-circuit voltage | 20-24 V | Checks polarity and gross electrical continuity |
| (V_{mp}) | Voltage at maximum power | 17-20 V | Better reference during loaded operation |
| (I_{sc}) | Short-circuit current | 5-7 A | Current ceiling under specified conditions |
| (I_{mp}) | Current at maximum power | 4.5-6.5 A | Current during rated power production |
| (P_{max}) | Maximum rated power | 100-200 W | Main nameplate output comparison |
| Voc temperature coefficient | Voltage change with temperature | About -0.25% to -0.35%/°C | Prevents overvoltage in cold weather |
The National Renewable Energy Laboratory explains that standard test conditions allow modules to be compared consistently, but real operating conditions differ because module temperature, irradiance, spectrum, angle, and wiring losses change outdoors. That distinction prevents a common error: treating a 400-watt module’s nameplate value as its expected output at every midday reading.
How should you check a solar panel first?
Check the system without touching live conductors. Record the weather, time, shade, inverter status, daily energy, and panel temperature before deciding that a module has failed. This first pass is safer and often more informative than a single multimeter reading because monitoring data reveals whether the problem affects one panel, one string, or the entire system.
Step 1: Inspect the panel and wiring
Use ground-level viewing or binoculars for a rooftop array. Do not climb onto a roof unless you have suitable fall protection, electrical training, and authorization to access the installation.
Look for:
- Cracked glass, frame separation, bent frames, or impact marks
- Brown or black hot-spot areas
- White haze or bubbles beneath the glass, which can indicate delamination
- “Snail trails,” which are thin dark lines associated with cell or metallization damage
- Discolored backsheets, melted insulation, loose conduit, and exposed copper
- Corroded connectors, damaged cable clips, standing water, bird nesting, leaves, soot, or heavy dust
- Uneven shading from trees, chimneys, antennas, or new construction
A clean-looking module can still contain microcracks, bypass-diode faults, or insulation damage. Conversely, a dirty module may be electrically sound but produce less energy until cleaned.
Visual Check Completion
Step 2: Check inverter or charge-controller data
Open the manufacturer’s monitoring application, inverter display, or charge-controller screen. Record present power in watts, daily energy in kilowatt-hours, DC voltage, DC current, error codes, isolation alarms, and string values where the equipment reports them.
Compare the result with:
- A nearby clear day with similar weather
- Neighboring strings or panels
- The expected solar window for the array’s orientation
- The system’s historical seasonal output
A fixed rooftop array should not be judged from one cloudy reading. Solar irradiance can fall sharply under cloud, while a brief shadow across one module can reduce the output of a series string. Monitoring systems with module-level electronics, such as microinverters or power optimizers, provide more precise localization than a central inverter.
Monitoring Check Completion
Can you test a solar panel with a multimeter?
You can test a small, isolated, low-voltage panel with a correctly rated digital multimeter, but a rooftop array should normally be tested by a qualified solar electrician. The safest sequence is to read the label, verify the meter and leads, measure open-circuit voltage, and use a manufacturer-approved current or load test rather than casually shorting a high-power module.
Before you start
| Requirement | Typical value or condition | Why it matters |
|---|---|---|
| Test time | 10:00-14:00 local solar time | Provides stronger, more stable irradiance |
| Weather | Clear or lightly cloudy sky | Makes comparison with the rating more useful |
| Panel condition | Clean, unshaded, facing the sun | Reduces false low readings |
| Multimeter category | CAT III or CAT IV as the circuit requires | Provides appropriate transient protection |
| DC voltage range | Above the panel or string maximum | Prevents meter damage |
| Current range and fuse | Above the label (I_{sc}), with intact fuse | Protects the meter during current testing |
| Safety equipment | Insulated leads, eye protection, dry footwear | Reduces shock and arc risk |
| Test location | Ground-level isolated module preferred | Avoids roof and high-voltage hazards |
A multimeter is not a substitute for a PV tester. Professional instruments can measure insulation resistance, I-V curves, irradiance, module temperature, polarity, and continuity under controlled conditions.
Step 3: Read and photograph the specification label
Reference Power from Datasheet
Locate the rear label or manufacturer datasheet. Record module model, Pmax, Voc, Vmp, Isc, Imp, maximum system voltage, maximum series fuse rating, and temperature coefficients.
Calculate a simple reference power:
For example, a module rated at 40.5 volts and 9.88 amps has a maximum-power rating of approximately 400 watts. The calculation is useful because it checks whether the label values are internally consistent.
Label & Meter Limits Check
Step 4: Measure open-circuit voltage
Disconnect the module from the battery, charge controller, inverter, or other equipment according to the equipment manufacturer’s shutdown procedure. Set the meter to DC volts before making contact, select a range above the expected voltage, and confirm that the leads are in the voltage and common ports.
Connect the red probe to positive and the black probe to negative. Read the voltage in direct sunlight, then compare it with the label (V_{oc}).
A practical field screen for a small module is a reading within roughly 5-10% of the label under strong, comparable conditions. That is a screening rule, not a universal pass standard. Low irradiance, high cell temperature, cold weather, module age, connector resistance, and measurement error all affect the result.
Open-circuit voltage often remains fairly high under weak light, while current falls much faster. A panel may therefore show normal voltage and still deliver very little useful energy.
Voltage Reading Check
Step 5: Measure current only with an approved method
Current testing is the highest-risk common DIY measurement. A meter in current mode has very low internal resistance, so connecting it directly across a high-current panel creates a short circuit and can blow the meter fuse, damage the meter, melt a lead, or produce a DC arc.
For a qualified person testing a suitable low-voltage module, the meter must have an intact fuse and a DC current range above the module’s (I_{sc}). The connection sequence must follow the meter and panel manufacturer’s instructions, and the meter must never be switched between voltage and current modes while connected.
A safer alternative is a DC clamp meter rated for the circuit, a dedicated PV I-V tracer, or a controlled load test. A clamp meter must be suitable for DC current because many inexpensive AC clamp meters cannot detect steady PV current.
The measured current should be compared with (I_{sc}) only when irradiance and orientation are similar to the rating conditions. Partial shade, haze, dirt, high temperature, poor angle, and cloud movement can reduce current substantially.
Current Test Safety Check
Step 6: Check loaded power
Measuring Useful Power
Useful power is measured while the panel operates at a load, not while it is open-circuit or short-circuited. Measure DC voltage and current at the same operating point with a suitable PV analyzer, charge controller display, power station display, or approved DC meter.
Then calculate:
A module producing 38 volts and 8 amps is delivering about 304 watts at that moment. Compare the value with Pmax, but adjust expectations for real conditions. A module rated at 400 watts may produce less because its cell temperature is above 25 °C, irradiance is below 1,000 W/m², the sun angle is poor, or the system has conversion and cable losses.
Do not calculate expected maximum power as Voc × Isc. That product describes neither the rated operating point nor actual maximum-power output.
Which solar panel measurements matter most?
(V_{oc}) identifies gross voltage and polarity problems, while (I_{sc}), (I_{mp}), and loaded power reveal whether sunlight is being converted into useful current. The most reliable diagnosis compares multiple measurements with the module label and with neighboring modules under the same irradiance.
| Symptom | Likely location | Confirming check | Safe next action |
|---|---|---|---|
| Zero voltage in bright sun | Disconnected cable, failed junction box, blown fuse, open circuit | Qualified polarity and continuity test | Isolate circuit and inspect connectors |
| Normal (V_{oc}), very low current | Shade, dirt, cell damage, poor irradiance, controller issue | Compare loaded current and neighboring modules | Remove shade or arrange PV testing |
| Low voltage and low current | Bad connector, damaged cable, bypass diode, severe shading | String voltage and thermal inspection | Stop if heating or arcing appears |
| Normal panel output, zero household power | Inverter, AC isolator, grid, battery, or meter issue | Inverter code and AC-side inspection | Contact installer or electrician |
| One string below neighboring strings | String fuse, connector, panel fault, mismatch | String comparison under equal sunlight | Qualified string diagnosis |
| Inverter trips repeatedly | Ground fault, insulation fault, grid condition, overvoltage | Manufacturer error code and insulation test | Do not repeatedly reset the system |
| Output falls after rain | Water ingress, connector failure, insulation fault | Professional insulation and thermal tests | Isolate and arrange urgent service |
| One panel runs unusually hot | Hot spot, bypass diode, resistance or cell fault | Infrared survey under load | Keep people away and request repair |
Why can a panel show voltage but produce little power?
A solar panel can show normal open-circuit voltage while delivering little power because voltage is present without a useful current path. Common causes include heavy shade, a failed bypass diode, cracked cells, a poor connector, a blown string fuse, a charge-controller limit, or measuring the module without a load.
This is why (V_{oc}) is a screening measurement rather than a complete health test. A professional I-V curve test shows whether the panel has reduced short-circuit current, reduced operating voltage, abnormal series resistance, or a distorted curve caused by mismatch or cell faults.
How do panel types affect testing?
Panel technology changes efficiency, physical dimensions, temperature behavior, and nameplate values, but panel type alone does not diagnose a fault. Compare each module with its own datasheet and with similarly oriented modules, rather than applying one voltage or wattage expectation to every panel.
| Panel type | Typical efficiency | Common module application | Testing consideration |
|---|---|---|---|
| Monocrystalline silicon | 20-23% | Residential roofs and limited roof area | Higher wattage modules often have operating currents near 10-14 A |
| Polycrystalline silicon | 15-17% | Older systems and larger ground arrays | Older labels may show lower power and different voltage ranges |
| Thin-film | 10-13% | Lightweight roofs, vehicles, specialized surfaces | Temperature coefficient, substrate, and module construction vary widely |
| Flexible crystalline | 15-22% | Boats, vans, portable systems | Heat buildup and flex damage can reduce output without visible cracks |
The panel’s test method should follow the electrical design. A series string adds voltage while current remains close to the string current. Parallel strings add current while voltage remains similar. Never connect a meter to a rooftop string until its maximum possible voltage, connector arrangement, and isolation procedure are known.
What should you do in common situations?
Different system designs require different checks. A portable panel can often be tested at ground level, while a residential rooftop system should usually be diagnosed from monitoring data and installer documentation.
Portable panel or power station
Check the panel’s (V_{oc}), inspect the cable and connector, and review the power station’s solar-input limits. A power station may reject a panel because its voltage is too high, its current is too low for startup, or the input is already at its charge limit.
Test in full sun with the panel oriented toward the sun and no shadow from the stand or cable. Portable modules often run hotter than roof-mounted modules because air cannot circulate beneath them, which reduces operating power.
Battery and charge-controller system
Check battery state of charge, controller status, PV voltage, PV current, charging stage, and any low-temperature or overvoltage protection. A healthy panel can produce zero battery current when the battery is full and the controller has moved to float or stopped charging.
For an MPPT controller, PV voltage normally remains above battery voltage while the controller converts the operating point. For a PWM controller, panel voltage may be pulled closer to battery voltage, so comparing it with (V_{mp}) requires care.
Grid-connected rooftop array
Read the inverter portal before touching anything. Confirm that the AC isolator, DC isolator, residual-current protection, and grid supply have not been switched off, but do not open covers or remove connectors.
An inverter replacement is commonly needed before a panel replacement in older systems because inverter service life is often around 10-15 years, while modules commonly carry 25-year performance warranties. That age difference makes inverter diagnosis an important part of any low-output investigation.
How much do solar-panel checks cost and take?
A basic ground-level inspection usually takes 15-30 minutes and costs nothing if the owner uses the monitoring application. A professional residential diagnostic visit typically takes 1-3 hours; typical service pricing ranges from approximately $150-$500, while advanced I-V curve, insulation, thermal, or commercial testing can cost $500-$2,000 or more depending on access and array size.
| Task | Typical time | Typical cost | Suitable operator |
|---|---|---|---|
| Monitoring and visual review | 15-30 minutes | $0 | Owner |
| Portable low-voltage label and voltage check | 30-60 minutes | $20-$100 for a suitable meter | Experienced DIY user |
| Residential electrical diagnostic visit | 1-3 hours | $150-$500 | Solar electrician |
| Thermal and I-V testing | 2-8 hours | $500-$2,000+ | PV testing contractor |
| Commercial array commissioning test | 1-3 days | $1,000-$10,000+ | Specialist testing firm |
These are typical planning ranges, not universal tariffs. Roof access, travel, local licensing, array voltage, documentation, and whether repairs are included can change the final price substantially.
What are the most dangerous testing mistakes?
The most dangerous mistakes are creating a short circuit with a current meter, working on an energized rooftop string, misreading system-level data, and repeatedly resetting an inverter with an unresolved fault. PV modules produce electricity whenever light reaches them, so switching off household power does not automatically de-energize the DC conductors.
Avoid these errors:
- Changing meter modes while connected. Disconnect the probes, select the new function, verify lead placement, and reconnect only after checking the range.
- Using an AC-only clamp meter. Steady DC current may read zero or produce an invalid result.
- Ignoring cold-weather voltage. Open-circuit voltage rises as cell temperature falls; series strings must remain below the equipment’s maximum DC voltage.
- Walking on modules. Mechanical loading can create microcracks that later appear as hot spots or reduced current.
- Cleaning with abrasive tools or a pressure washer. Abrasion damages coatings, while pressure can force water into frames and connectors.
- Resetting an isolation fault repeatedly. A ground fault or wet connector can create shock and fire risk.
A useful practitioner rule is simple: if the test requires opening an inverter, entering a roof array, disconnecting MC4 connectors under load, or measuring above the meter’s clearly known rating, stop and call a qualified professional.
Frequently asked questions
Can I check a solar panel without a multimeter?
Yes. Review inverter or charge-controller data, compare output with historical records, inspect for shade and physical damage, and compare neighboring panels or strings. A portable power station may display input watts, while microinverter software can identify individual module performance. These methods cannot confirm insulation resistance or internal cell faults.
What voltage should a 12-volt solar panel show?
A typical nominal 12-volt crystalline panel shows approximately 20-24 volts open circuit in strong sunlight, not 12 volts. The exact value comes from the label. A connected charge controller may display a lower operating voltage because the panel is under load, so do not compare that reading directly with (V_{oc}).
Why is my solar panel producing power in shade?
A shaded panel can still produce voltage and a small amount of current because diffuse light reaches the cells. Output usually falls sharply, especially when shade covers one or more cells in a series-connected module. A narrow shadow from a cable, branch, or railing can cause a disproportionate reduction.
How often should solar panels be checked?
Review system monitoring monthly and inspect the array from ground level at least twice yearly, plus after hail, strong winds, nearby construction, or unusual output changes. Professional electrical testing is appropriate during commissioning, after a fault, before a warranty claim, and at intervals set by the system owner or insurer.
Should I replace a panel that is below its rated wattage?
Not automatically. The rated wattage applies under standard test conditions, while real modules lose output from heat, low irradiance, angle, dirt, wiring loss, and inverter clipping. Replace or claim a module only after controlled comparison or an I-V test shows abnormal performance after those conditions are accounted for.
When should I call a solar electrician?
Call a qualified solar electrician for rooftop access, high-voltage strings, damaged or hot connectors, exposed conductors, repeated inverter faults, ground-fault alarms, burning smells, water ingress, or any test involving live DC wiring. Professional testing is also the correct route when a warranty claim requires documented electrical results.
The bottom line
To check a solar panel, begin with a visual inspection and monitoring data, then compare label specifications with safe electrical measurements under strong, documented sunlight. Open-circuit voltage can reveal major wiring or polarity problems, but loaded current and power are needed to judge performance. The correct how to check solar panel procedure depends on whether the equipment is a low-voltage portable module or an energized rooftop array, and rooftop or high-voltage testing belongs with a qualified technician.