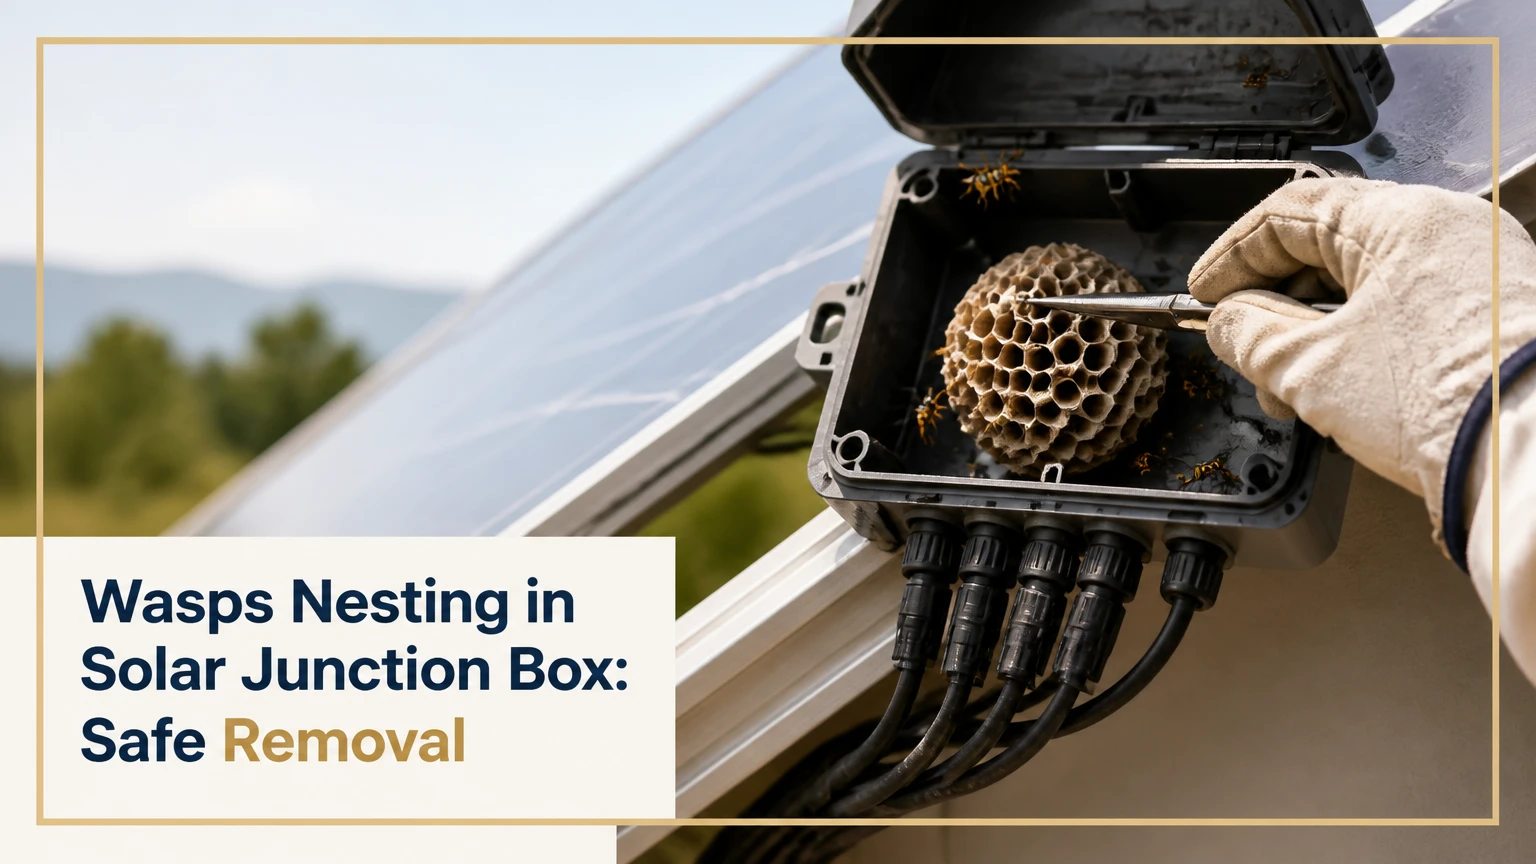
Wasps nesting in a solar junction box create a stinging and electrical-maintenance hazard, but the nest does not automatically mean the panel is ruined. De-energize the photovoltaic system using its documented isolation procedure, have a qualified person verify the circuit, arrange licensed pest treatment when the nest is active, then inspect and repair the enclosure before exclusion.
Key Facts at a Glance
- A photovoltaic junction box protects a panel’s bypass diodes and output connections on the module’s rear surface.
- A rapid shutdown command reduces array voltage in designated conductors, but exposed module wiring can remain energized in sunlight.
- Never inject liquid insecticide, water, foam, or compressed air into an electrical enclosure.
- Factory drainage and pressure-equalization openings must remain functional unless the module manufacturer specifies an approved guard.
- Typical professional costs range from $300-$1,200, with roof access and damaged components determining the final price.
- A recurring nest usually indicates an unsealed cable route, failed gasket, damaged cover, or a void around the array perimeter.
What Is a Solar Junction Box?
A solar junction box is the molded enclosure attached to the back of a photovoltaic module. It connects the module’s internal bus ribbons to external cable leads and commonly contains bypass diodes that reduce the effect of shaded or faulty cell sections.
The junction box is different from a rooftop combiner box. A junction box belongs to one panel, while a combiner box combines multiple string circuits and may contain fuses, terminals, and disconnect hardware. Confusing the two leads to the wrong shutdown procedure and the wrong repair technician.
| Equipment | Typical location | Main contents | Primary risk from a nest |
|---|---|---|---|
| Module junction box | Rear of one solar panel | Bypass diodes, bus connections, cable leads | Corrosion, connector stress, blocked drainage |
| String combiner box | Roof, wall, or equipment area | Fuses, terminals, multiple circuits | Arc fault, overheating, inaccessible live parts |
| Inverter enclosure | Wall or ground equipment pad | DC input, MPPT electronics, AC output | Shock, fire, fault damage |
| Cable management channel | Under or beside panel rows | PV wire and clips | Damaged insulation, abrasion, recurring access |
Most panel junction boxes are weather-resistant rather than user-serviceable. Their ingress-protection rating, gasket design, drainage path, and approved repair method come from the module documentation, not from a general caulking rule.
Why Do Wasps Choose Solar Equipment?
Wasps often select solar equipment because the underside provides shade, shelter from rain, elevation, and protected cavities. A small gap beside a cable, a loose cover, or an opening in nearby roof hardware can offer a better nesting site than an exposed wall.
Paper wasps build open combs, while yellowjackets and some hornets may occupy concealed cavities. Species identification matters because colony size, defensive behavior, and legal pesticide requirements vary by location. A single wasp entering a gap does not prove that the junction box itself contains the nest.
Where Wasps Usually Enter
Inspect the entire underside of the array rather than assuming the visible insect is entering the module box. Common routes include:
- A cracked or displaced junction-box cover.
- A failed cable gland or loose connector.
- A gap at a roof penetration or flashing detail.
- An unprotected space between the panel frame and roof.
- Hollow conduit or poorly capped wire-management hardware.
A practical inspection screen is a gap around 4 mm, but that figure is not a universal species limit. Never enlarge an opening, remove a connector, or pull a cable to confirm access.
How Dangerous Is a Wasp Nest in a Junction Box?
A wasp nest near a solar junction box is dangerous mainly because it combines defensive insects with energized direct-current equipment. Paper debris can retain moisture and obstruct inspection, while corrosion or disturbed conductors can produce insulation faults, connector heating, or an arc hazard.
The nest itself does not normally cause “thermal runaway” in a photovoltaic module. Thermal runaway is not a standard diagnosis for ordinary nest debris in a junction box. The credible risks are moisture contamination, poor electrical contact, blocked drainage, damaged insulation, and unsafe human access.
OSHA’s electrical-work rule states that “deenergized parts that have not been locked out and tagged in accordance with this section shall be treated as energized” (29 CFR 1910.333). That principle applies even when an inverter display is blank or a rapid shutdown indicator appears active.
| Observation | Likely implication | Immediate response | Escalate to |
|---|---|---|---|
| Wasps entering a rear box | Active cavity or route nearby | Keep people away and photograph from ground | Pest professional and solar technician |
| Brown discoloration or melted plastic | Heat damage or poor connection | Do not operate the suspect circuit | Qualified PV electrician |
| Inverter ground-fault alert | Possible insulation or moisture fault | Follow manufacturer shutdown instructions | Solar electrician |
| Cracked gasket or cover | Water and insect entry path | Do not seal over contamination | Module installer or manufacturer |
| Burn odor, smoke, or arcing | Active electrical emergency | Move away and call emergency services | Fire service and utility if required |
Before You Start
Treat active nests and rooftop electrical work as separate hazards. A pest professional can control insects, but only a qualified solar electrician should open, test, disconnect, or replace photovoltaic electrical components.
| Planning item | Ground-mount typical | Low one-story roof | Steep or multi-story roof |
|---|---|---|---|
| Initial inspection time | 15-30 minutes | 30-60 minutes | 45-90 minutes |
| Professional project time | 1-3 hours | 2-4 hours | 3-6 hours |
| DIY material range | $20-$75 | $20-$75 | Not a suitable DIY basis |
| Access requirement | Stable ground and exclusion zone | Roof ladder and fall protection | Trained roof worker and fall protection |
| Main limiting factor | Correct identification | Electrical isolation | Fall risk and rescue planning |
Before scheduling treatment, collect the module make and model, inverter model, array location, photographs taken from a safe distance, recent fault codes, and warranty information. Do not remove the panel label or disconnect a PV connector for diagnosis.
Step 1: Isolate the Solar System
Follow the inverter and rapid-shutdown manufacturer sequence, then prevent accidental re-energization. A typical system may require the rapid shutdown initiator, inverter AC disconnect, solar DC disconnect, and utility-side isolation in a specified order, so the equipment manual and local electrical rules control the sequence.
A shutdown command does not make every panel conductor harmless. Sunlight can continue producing voltage at module leads, and some systems retain stored energy in capacitors. Verification requires appropriate test equipment, trained personnel, and a defined test point.
Safe Isolation Checklist
- Keep occupants, children, pets, and unprotected workers away from the array.
- Do not work during rain, condensation, high wind, or poor visibility.
- Tell the pest professional that photovoltaic equipment is present.
- Use lockout and tagout where the work arrangement requires it.
- Have a qualified person verify absence of voltage before opening electrical parts.
- Stop immediately if smoke, heat damage, exposed conductor, or arcing appears.
Success checkpoint: The responsible electrician has documented the isolation state and test result for the exact equipment being opened. Common mistake: treating a dark inverter screen as proof that the rear module box is de-energized.
Step 2: Control the Active Wasp Nest
Use a licensed pest professional when wasps are entering an enclosure, when the colony is large, or when the array is on a roof. Night or early morning can reduce flight activity, but darkness does not remove sting risk or electrical risk.
Do not spray aerosol insecticide, water, expanding foam, or any wet pesticide into a junction box. Liquid can bridge contacts, attack plastics or seals, contaminate connectors, and create a concealed fault after the enclosure is closed.
A pest professional may select an insecticidal dust or another labeled treatment based on the species and entry route. Deltamethrin and pyrethrin products are not automatically safe for PV electronics, and product labels, local regulations, runoff restrictions, and pollinator precautions govern use. The treatment must target the nest entrance without saturating electrical parts.
Success checkpoint: No active wasp traffic remains after the interval specified by the pest professional and product label. A 24-48 hour wait is typical for some dust treatments, not a guaranteed universal period. Common mistake: sealing the entry while live insects remain inside.
Step 3: Remove Debris and Inspect the Enclosure
After pest control confirms the nest is inactive, the electrician should open the enclosure only under the verified isolation procedure. Remove loose paper material with a dry, nonconductive tool and avoid levering against diode housings, bus connections, cable glands, or brittle plastic.
Do not scrape aggressively if nest material has bonded to a gasket, terminal, or cable entry. Contaminated or corroded parts may require replacement rather than cosmetic cleaning. Electronics cleaner is appropriate only when the product is approved for the material and the component manufacturer permits its use.
| Inspection point | Acceptable finding | Repair indicator | Typical action |
|---|---|---|---|
| Cover and latch | Flat, intact, secure | Crack or distorted latch | Replace approved cover or box |
| Gasket | Continuous and elastic | Flattened, split, missing | Replace specified gasket |
| Bypass diode area | Clean, dry, undamaged | Corrosion or heat marks | Electrical diagnosis and part replacement |
| Cable entry | Tight, supported | Loose gland or abrasion | Replace gland or cable section |
| Drainage path | Open and manufacturer-approved | Blocked by nest or sealant | Restore approved drainage |
| Module backsheet | Intact, no puncture | Cut, burn, delamination | Manufacturer or installer assessment |
Success checkpoint: The box closes evenly, the gasket seats continuously, no debris remains on conductive surfaces, and the electrician records photographs before reassembly. Common mistake: using a metal screwdriver to chip hardened material beside a live-looking cable.
Step 4: Exclude Wasps Without Blocking Drainage
Repair the actual entry route with manufacturer-approved parts. Outdoor silicone may suit a gap around a non-electrical mounting detail, but sealant should not cover a factory weep hole, pressure vent, cable gland, or drainage channel unless the module manufacturer expressly permits that repair.
A stainless-steel mesh screen can help at an array perimeter or around a separate guard structure. It is not automatically appropriate over a module junction-box opening, because the opening may be part of the enclosure’s drainage or pressure-management design. A solar installer should approve any modification that touches the module box.
| Exclusion method | Best location | Typical material cost | Main limitation |
|---|---|---|---|
| Replace gasket or cover | Damaged module junction box | $10-$80 per part | Exact model compatibility required |
| Approved cable gland | Loose cable entry | $5-$25 per gland | Requires correct cable diameter |
| Exterior silicone repair | Noncritical mounting gap | $8-$20 per tube | Can trap water or void warranty |
| Perimeter critter guard | Array edge and roof gap | $3-$12 per linear foot | Roof labor and drainage details |
| Conduit cap or screen | Open wire-management route | $5-$30 per fitting | Must not pinch PV cable |
Success checkpoint: The repair keeps water-shedding, cable bend radius, ventilation, and drainage functions intact. Common mistake: applying solid sealant across every opening because the gap looks like an insect route.
Which Treatment Method Is Best?
Licensed pest treatment is the safest first response for an active colony, while mechanical repair is the durable response for recurrence. Insecticidal dust can reach a concealed nest, but it does not repair corrosion or make a damaged junction box weather-tight.
| Method | Active-nest use | Electronics risk | Typical cost | Durability |
|---|---|---|---|---|
| Licensed dust treatment | Suitable after route assessment | Low when kept out of components | $100-$300 | Days to months |
| Liquid aerosol spray | Poor choice inside box | High moisture and contamination risk | $10-$25 | Temporary |
| Gasket or box replacement | Not a nest killer | Low when professionally fitted | $10-$150 per part | Several years if correct |
| Array perimeter guard | Preventive after treatment | Low if drainage is preserved | $300-$1,200 installed | Several years |
| Ultrasonic repeller | Limited preventive experiment | Low electrical risk | $20-$100 | Unreliable |
Ultrasonic devices are not a dependable primary treatment for an enclosed wasp colony. Decoy nests may discourage some territorial paper wasps in limited situations, but they cannot block a cavity that already offers shelter and do not address damaged electrical hardware.
What Does Professional Removal Cost?
Typical total costs range from $300-$1,200 when pest treatment, electrical inspection, and array guarding are combined. A simple ground-mounted nest may cost less, while a steep roof, a large array, replacement connectors, module removal, or emergency access can raise the invoice substantially.
| Work scope | Typical price range | Typical duration | Cost driver |
|---|---|---|---|
| Pest-only treatment | $100-$300 | 30-90 minutes | Species, colony size, access |
| PV inspection and testing | $150-$400 | 1-2 hours | Fault diagnosis and roof access |
| Junction-box or connector repair | $100-$500 | 1-4 hours | Parts and panel accessibility |
| Perimeter critter guard | $300-$1,200 | 2-5 hours | Array size, roof pitch, linear footage |
| Module replacement | $250-$900 per module | 2-6 hours | Panel model, labor, availability |
DIY material costs of $20-$75 can cover a hand duster, approved sealant, replacement screen for a non-electrical gap, and basic exclusion supplies. That budget does not include fall protection, electrical test equipment, professional treatment, or a replacement module.
Can Wasps Damage Solar Panels?
Wasps can contribute to panel damage when nest material retains moisture against electrical connections or when removal disturbs seals and cables. The most common repair concern is localized contamination or corrosion, not immediate destruction of the entire photovoltaic module.
A junction box that has stayed dry and intact may need only cleaning and an inspection. A box with green or white corrosion, heat discoloration, loose leads, melted plastic, cracked backsheet, or repeated insulation faults requires electrical testing and possibly replacement.
The International Electrotechnical Commission’s IEC 61215 and IEC 61730 standards address photovoltaic module design, qualification, and safety, but they do not authorize field modifications to every junction box. The module maker’s installation and service instructions remain the controlling source for repair compatibility.
Why Does the Inverter Show a Ground-Fault Error?
A ground-fault or insulation-resistance alarm may result from moisture, damaged cable insulation, a failed connector, a contaminated junction box, or another unrelated string fault. Removing the visible nest does not prove that the electrical fault has cleared.
Record the exact inverter code, affected string, time, weather conditions, and recent production change. Do not repeatedly reset the inverter to force operation. A qualified PV electrician can isolate strings, inspect connectors, and perform the manufacturer-specified insulation-resistance tests with equipment rated for the circuit.
| Symptom after treatment | Possible cause | Do not do | Correct next action |
|---|---|---|---|
| Fault returns after drying | Insulation damage or corrosion | Keep resetting inverter | Request string-level testing |
| Production drops on one string | Bypass diode or connector issue | Unplug modules casually | Compare string voltage safely |
| Junction box will not close | Debris or damaged gasket | Force the latch | Replace seal or approved box |
| Wasps return within days | Alternate entry route | Add more pesticide | Trace route and repair it |
| Heat mark appears | High-resistance connection | Continue normal operation | Isolate and inspect urgently |
How Can Commercial Operators Prevent Recurrence?
Commercial array managers should combine seasonal pest inspection with electrical preventive maintenance rather than rely on repellents. A documented program can record nest locations, module serial numbers, enclosure condition, inverter alarms, and approved repairs for each affected row.
A practical schedule is a spring inspection before peak wasp activity, a late-season inspection, and event-driven checks after storms or inverter faults. Thermal imaging can help identify abnormal module or connector heating, but a thermal image cannot prove that a wasp nest is present. Follow-up physical inspection and electrical testing are still required.
Maintenance Records to Keep
- Module and inverter make, model, and serial number.
- Nest location, species assessment, treatment date, and product label.
- Photographs before cleaning and after reassembly.
- Junction-box gasket, cover, connector, and cable findings.
- Insulation test results and inverter fault history.
- Warranty approvals and the technician’s repair recommendation.
Common Mistakes and How to Fix Them
- Spraying liquid into the enclosure: Stop operation, keep the box closed, and have a qualified electrician assess contamination and insulation.
- Working only at night: Use darkness for pest activity management, not as proof of electrical safety. Apply the documented isolation and verification procedure.
- Sealing a live colony inside: Arrange another treatment cycle before exclusion, because trapped insects may find a second route or create a contaminated cavity.
- Blocking factory drainage: Remove unauthorized sealant only under the manufacturer’s repair guidance, then restore the approved drainage design.
- Assuming the nest caused every fault: Diagnose the complete string, since connector failure, rodent damage, moisture ingress, and inverter problems can produce similar alarms.
- Ignoring roof access: Use a licensed roof worker when fall protection, rescue equipment, or panel access exceeds household capability.
Which Response Fits Your Situation?
A ground-mounted array with a visible nest near, but not inside, the module box may need pest control followed by a visual solar inspection. A steep roof with active insects, a ground-fault alarm, or heat damage should receive professional treatment and electrical isolation rather than a DIY attempt.
| Situation | Best first call | DIY suitability | Follow-up |
|---|---|---|---|
| Active nest on ground mount | Pest professional | Limited to ground exclusion | PV inspection after treatment |
| Dead nest, no fault, accessible array | Solar technician | Cleaning only if authorized | Verify seal and drainage |
| Active nest on steep roof | Pest and solar professionals | Not suitable | Coordinated access plan |
| Ground-fault alarm after nest | PV electrician | None | Insulation and connector testing |
| Repeated nests across array | Solar installer | Perimeter work only if safe | Approved guarding design |
FAQ
Can I leave a dead wasp nest under a solar panel?
A dead nest should not remain against a junction box, cable connector, or drainage route. Paper debris can retain moisture and conceal corrosion, while loose material may obstruct a cover gasket. Have the area cleaned and inspected, especially if the inverter has logged a fault or production has changed.
Do solar panels attract wasps more than roofs?
Solar panels can offer shelter that an exposed roof surface lacks, but they do not universally attract more wasps than roofs. The deciding factors are species, shade, cavities, nearby food and water, roof condition, and access through cable-management or flashing gaps.
Can I use expanding foam to block the entry hole?
Expanding foam is unsuitable inside or against a photovoltaic junction box unless the equipment manufacturer specifically approves it. Foam can obstruct drainage, press against cables, absorb moisture, complicate future service, and conceal corrosion. Use an approved replacement part or an exterior repair method selected for that location.
How long should I wait before turning the system back on?
Wait until the pest professional confirms treatment completion and the solar technician has inspected the enclosure. A 24-48 hour period is typical for some dust treatments, but the product label, colony activity, weather, and electrical repair condition determine the actual restart time.
Will panel insurance cover wasp damage?
Coverage depends on the policy, the cause of damage, maintenance exclusions, and whether the panel or electrical system suffered a covered event. Photograph the nest and damage before removal, retain treatment and repair invoices, and ask the insurer whether an adjuster must inspect the equipment.
Should I replace the entire solar panel?
A whole panel is not automatically necessary. Replacement becomes more likely when the backsheet is punctured, the junction box is molded into a damaged module, bypass-diode connections are burned, or the manufacturer does not approve a field repair. A solar technician should document the failure before replacement.
The Bottom Line
Wasps nesting in solar junction box equipment requires coordinated pest and electrical safety decisions, not a liquid spray or blanket application of sealant. Keep people away, follow the system’s isolation procedure, have active insects treated safely, and obtain a qualified inspection before cleaning or restarting the circuit. Preserve factory drainage, repair the real entry route, and use array guarding only where its design does not compromise module serviceability.